Ankibutton
- Table of contents
- Glamour shots
- Introduction
- The problem
- False starts
- True starts
- The fourth button
- Conclusion
- Download
- Appendix: Installing Seeeduino Xiao into the Arduino IDE
Glamour shots (§)

Introduction (§)
One of the most effective ways to procrastinate on a task is to spend time working on something else that will supposedly help you do the original task more efficiently, but in actuality will never recoup the invested time. You can make a new tool, or design a new process, or rearrange your work environment, just as long as you spend more time on it than it could ever possibly pay you back. Whatever you do, never consult this chart. This technique will ensure that you come out behind on your goals while giving you the defense of having worked hard the entire time.
In this article, I'll show you a new tool I made.
The problem (§)
Over the past three years, I've done almost 100% of my Anki studying on my smartphone, simply because I don't enjoy the ergonomics of using Anki on the computer. I don't like having to sit with my hands on the keyboard for a long time, pressing the spacebar. I'd rather be able to lean back or sit farther away.
At the same time, the ergonomics of the smartphone are not ideal either. The hands are most comfortable at the lap but this is bad for the neck. Researching words and copy-pasting unicode is slow and cumbersome on mobile.
I thought it might be nice to have a handheld controller that I can use with my computer from a distance. I already have an Xbox controller and joytokey, but if I used those things then I'd be done procrastinating already.
So there I was, with no choice but to make my own.
False starts (§)
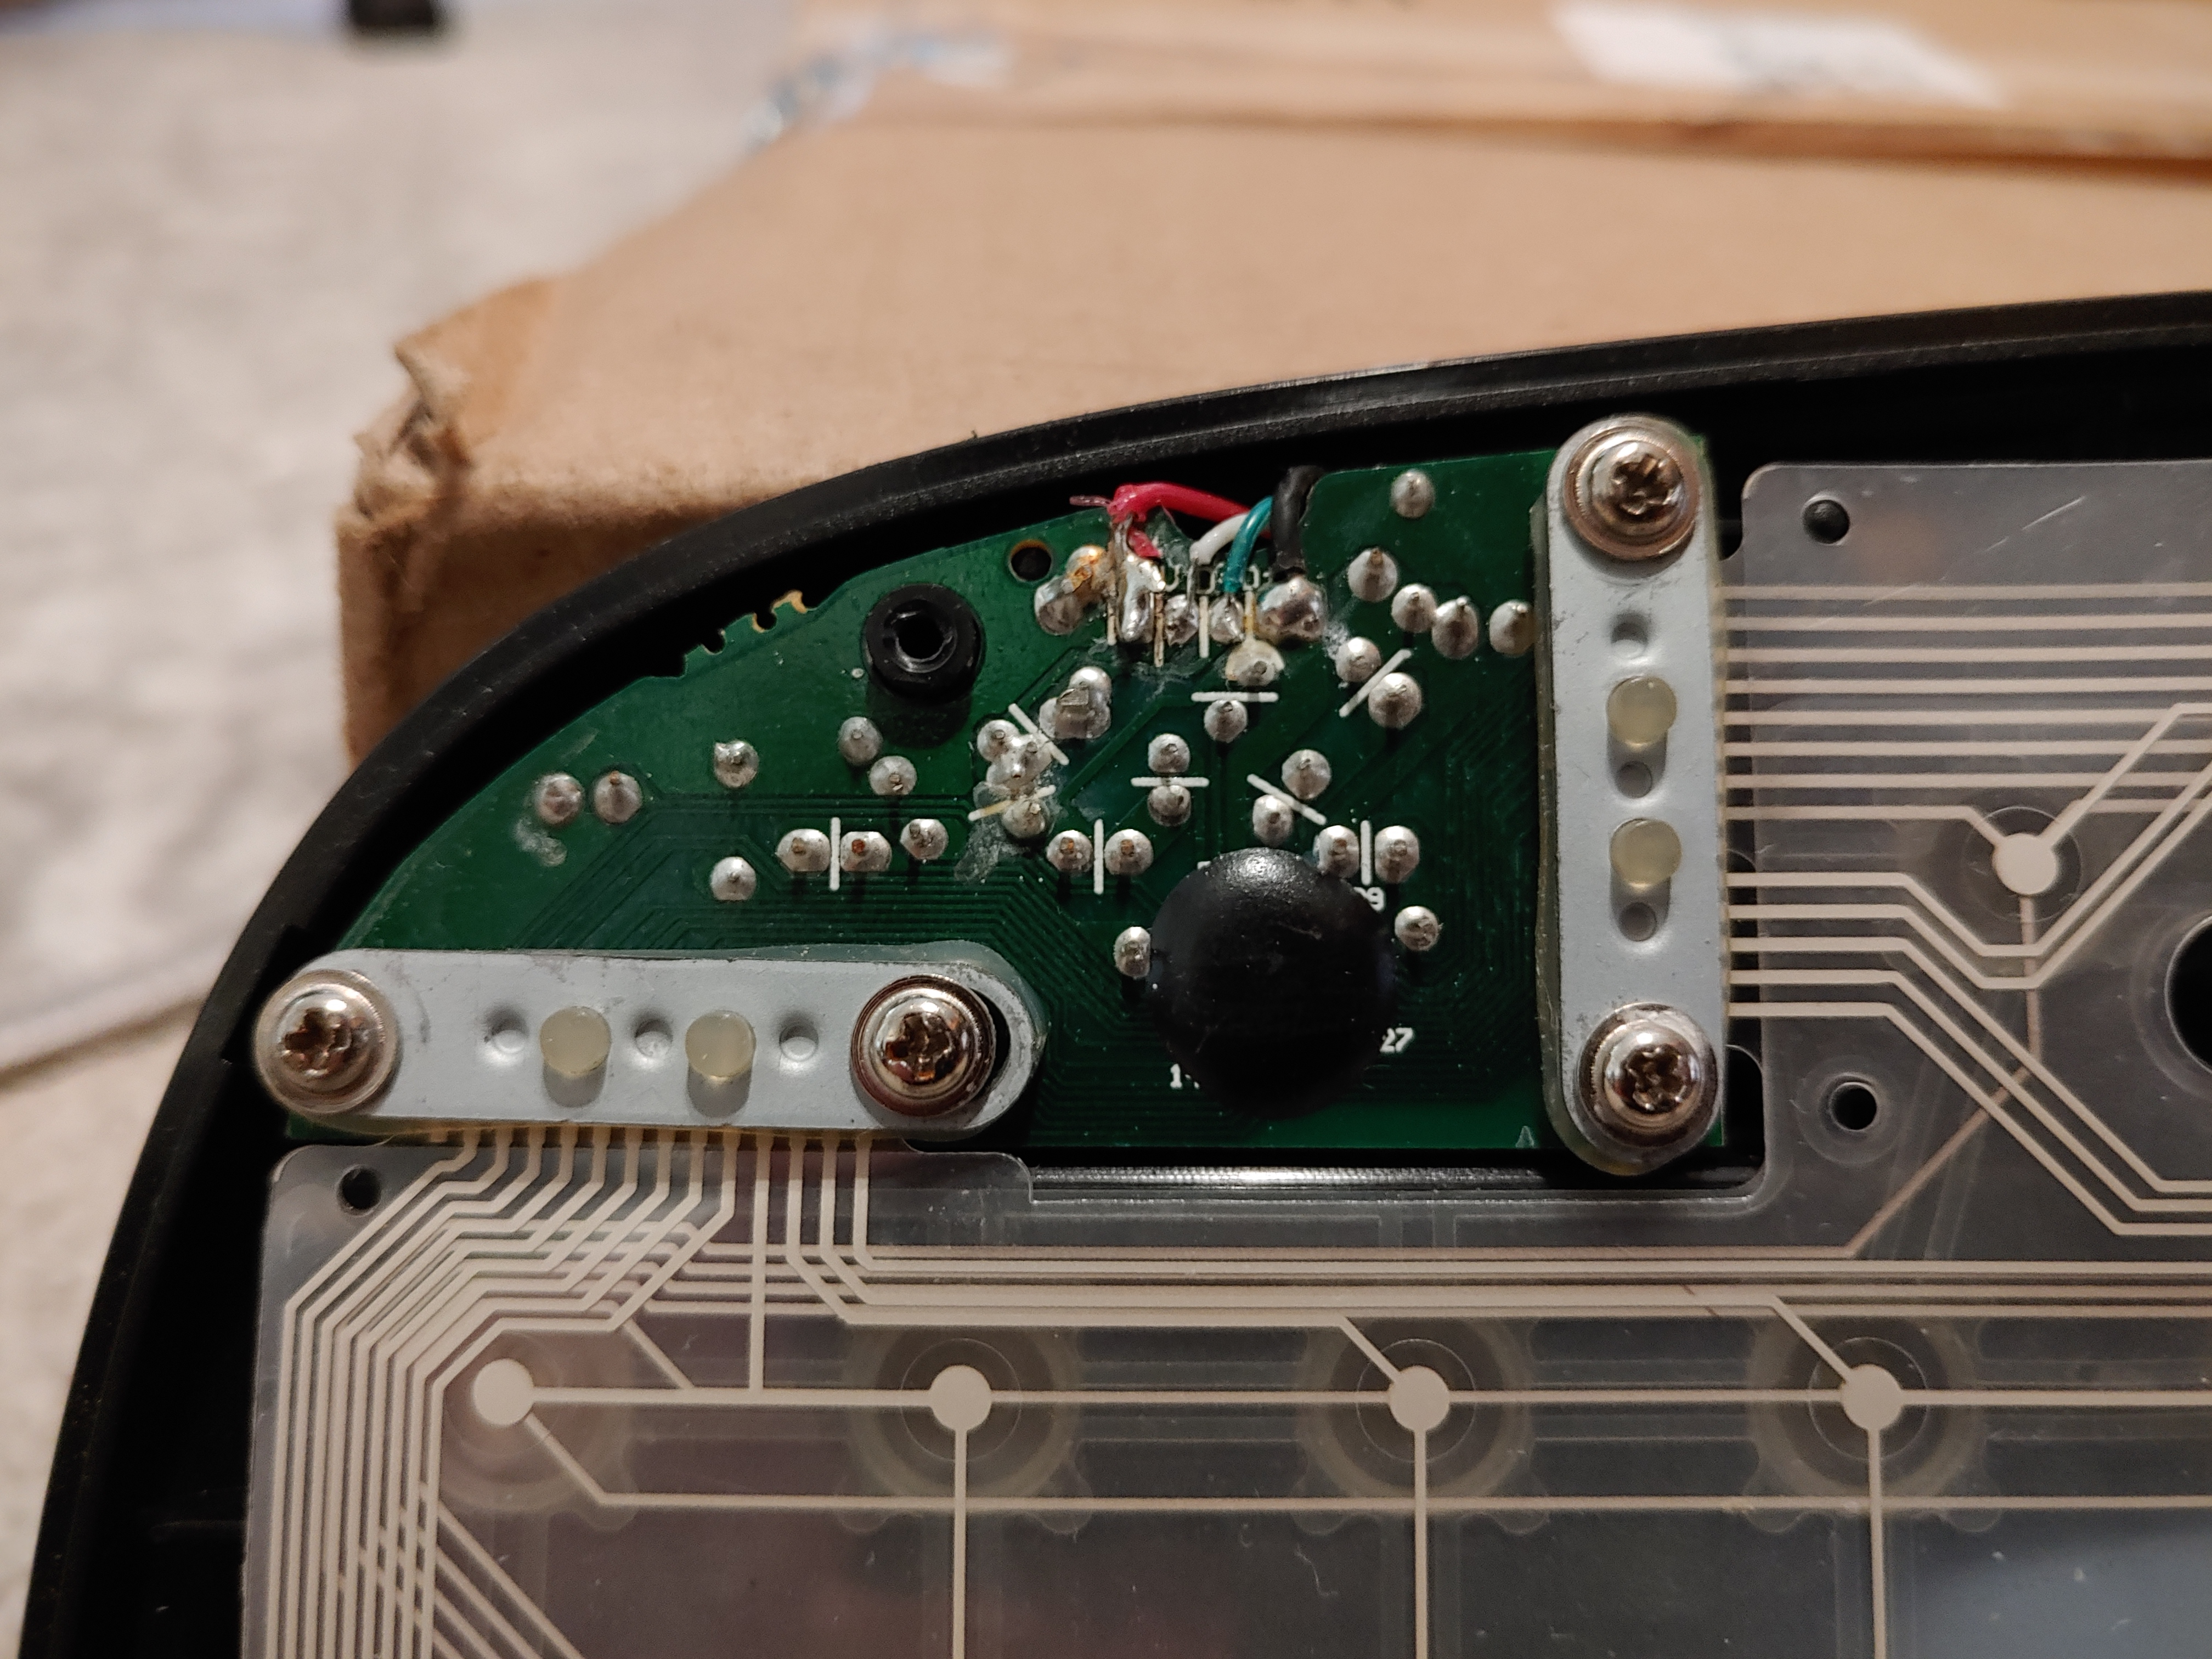
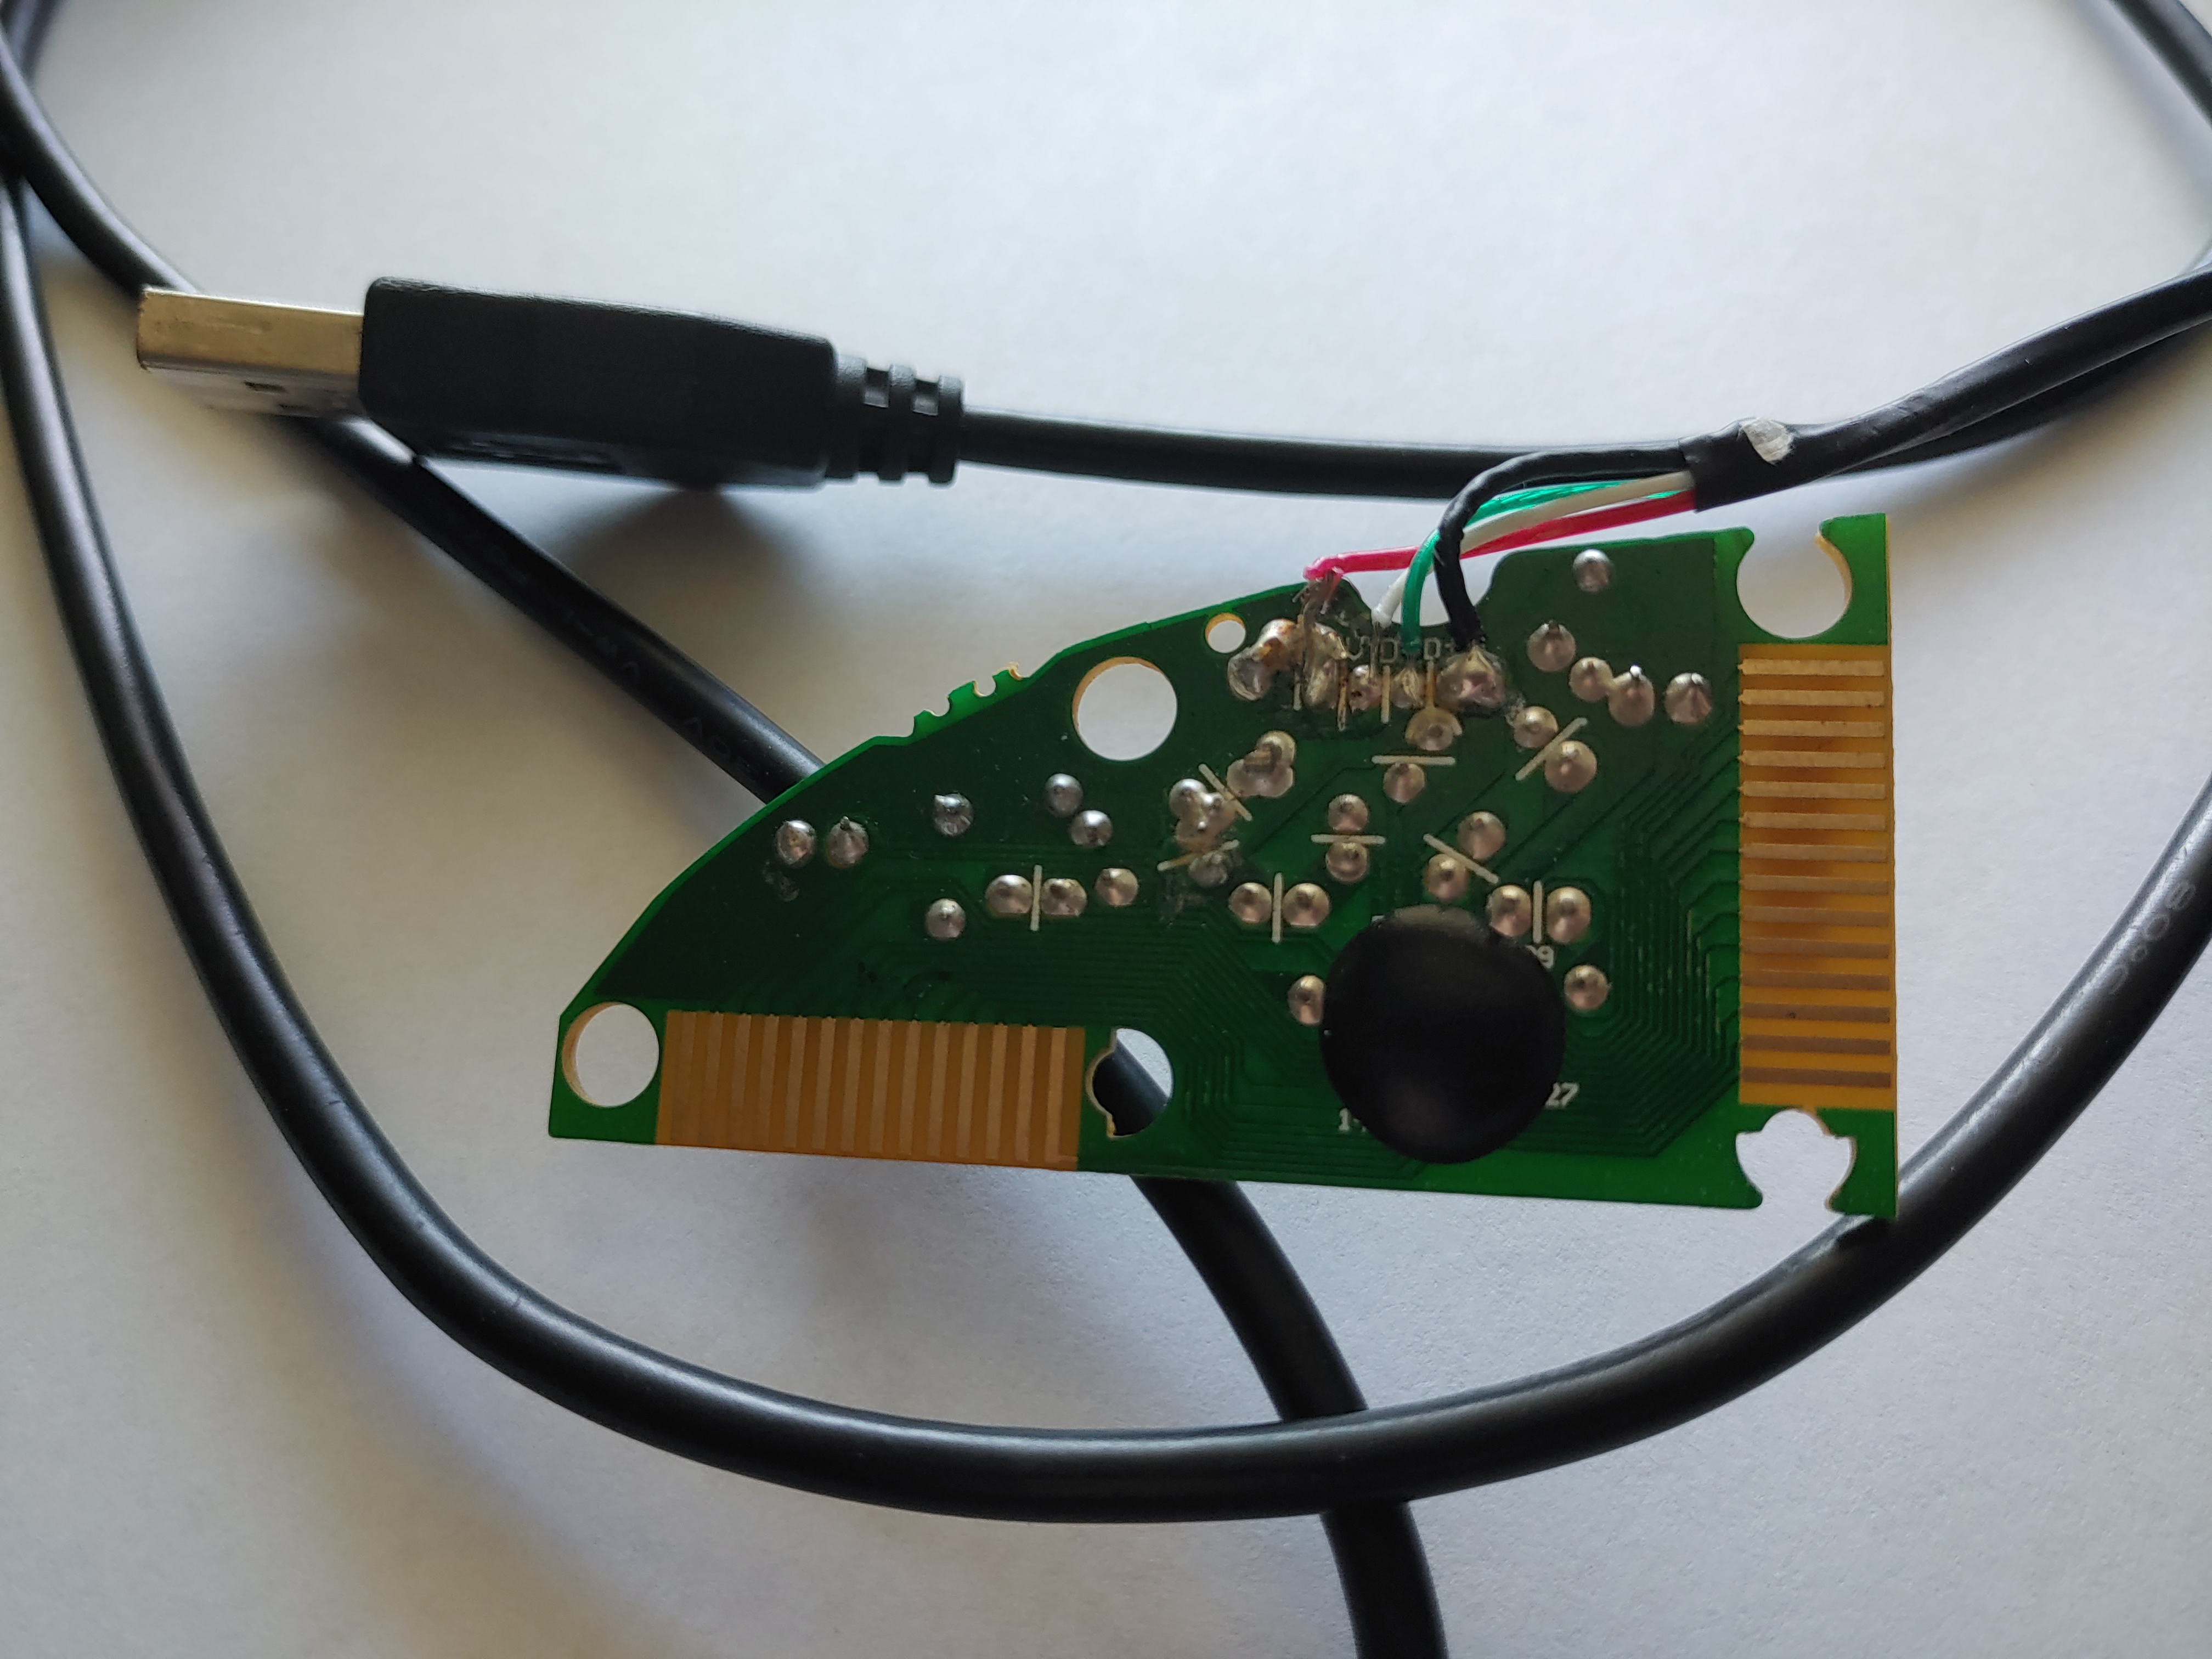
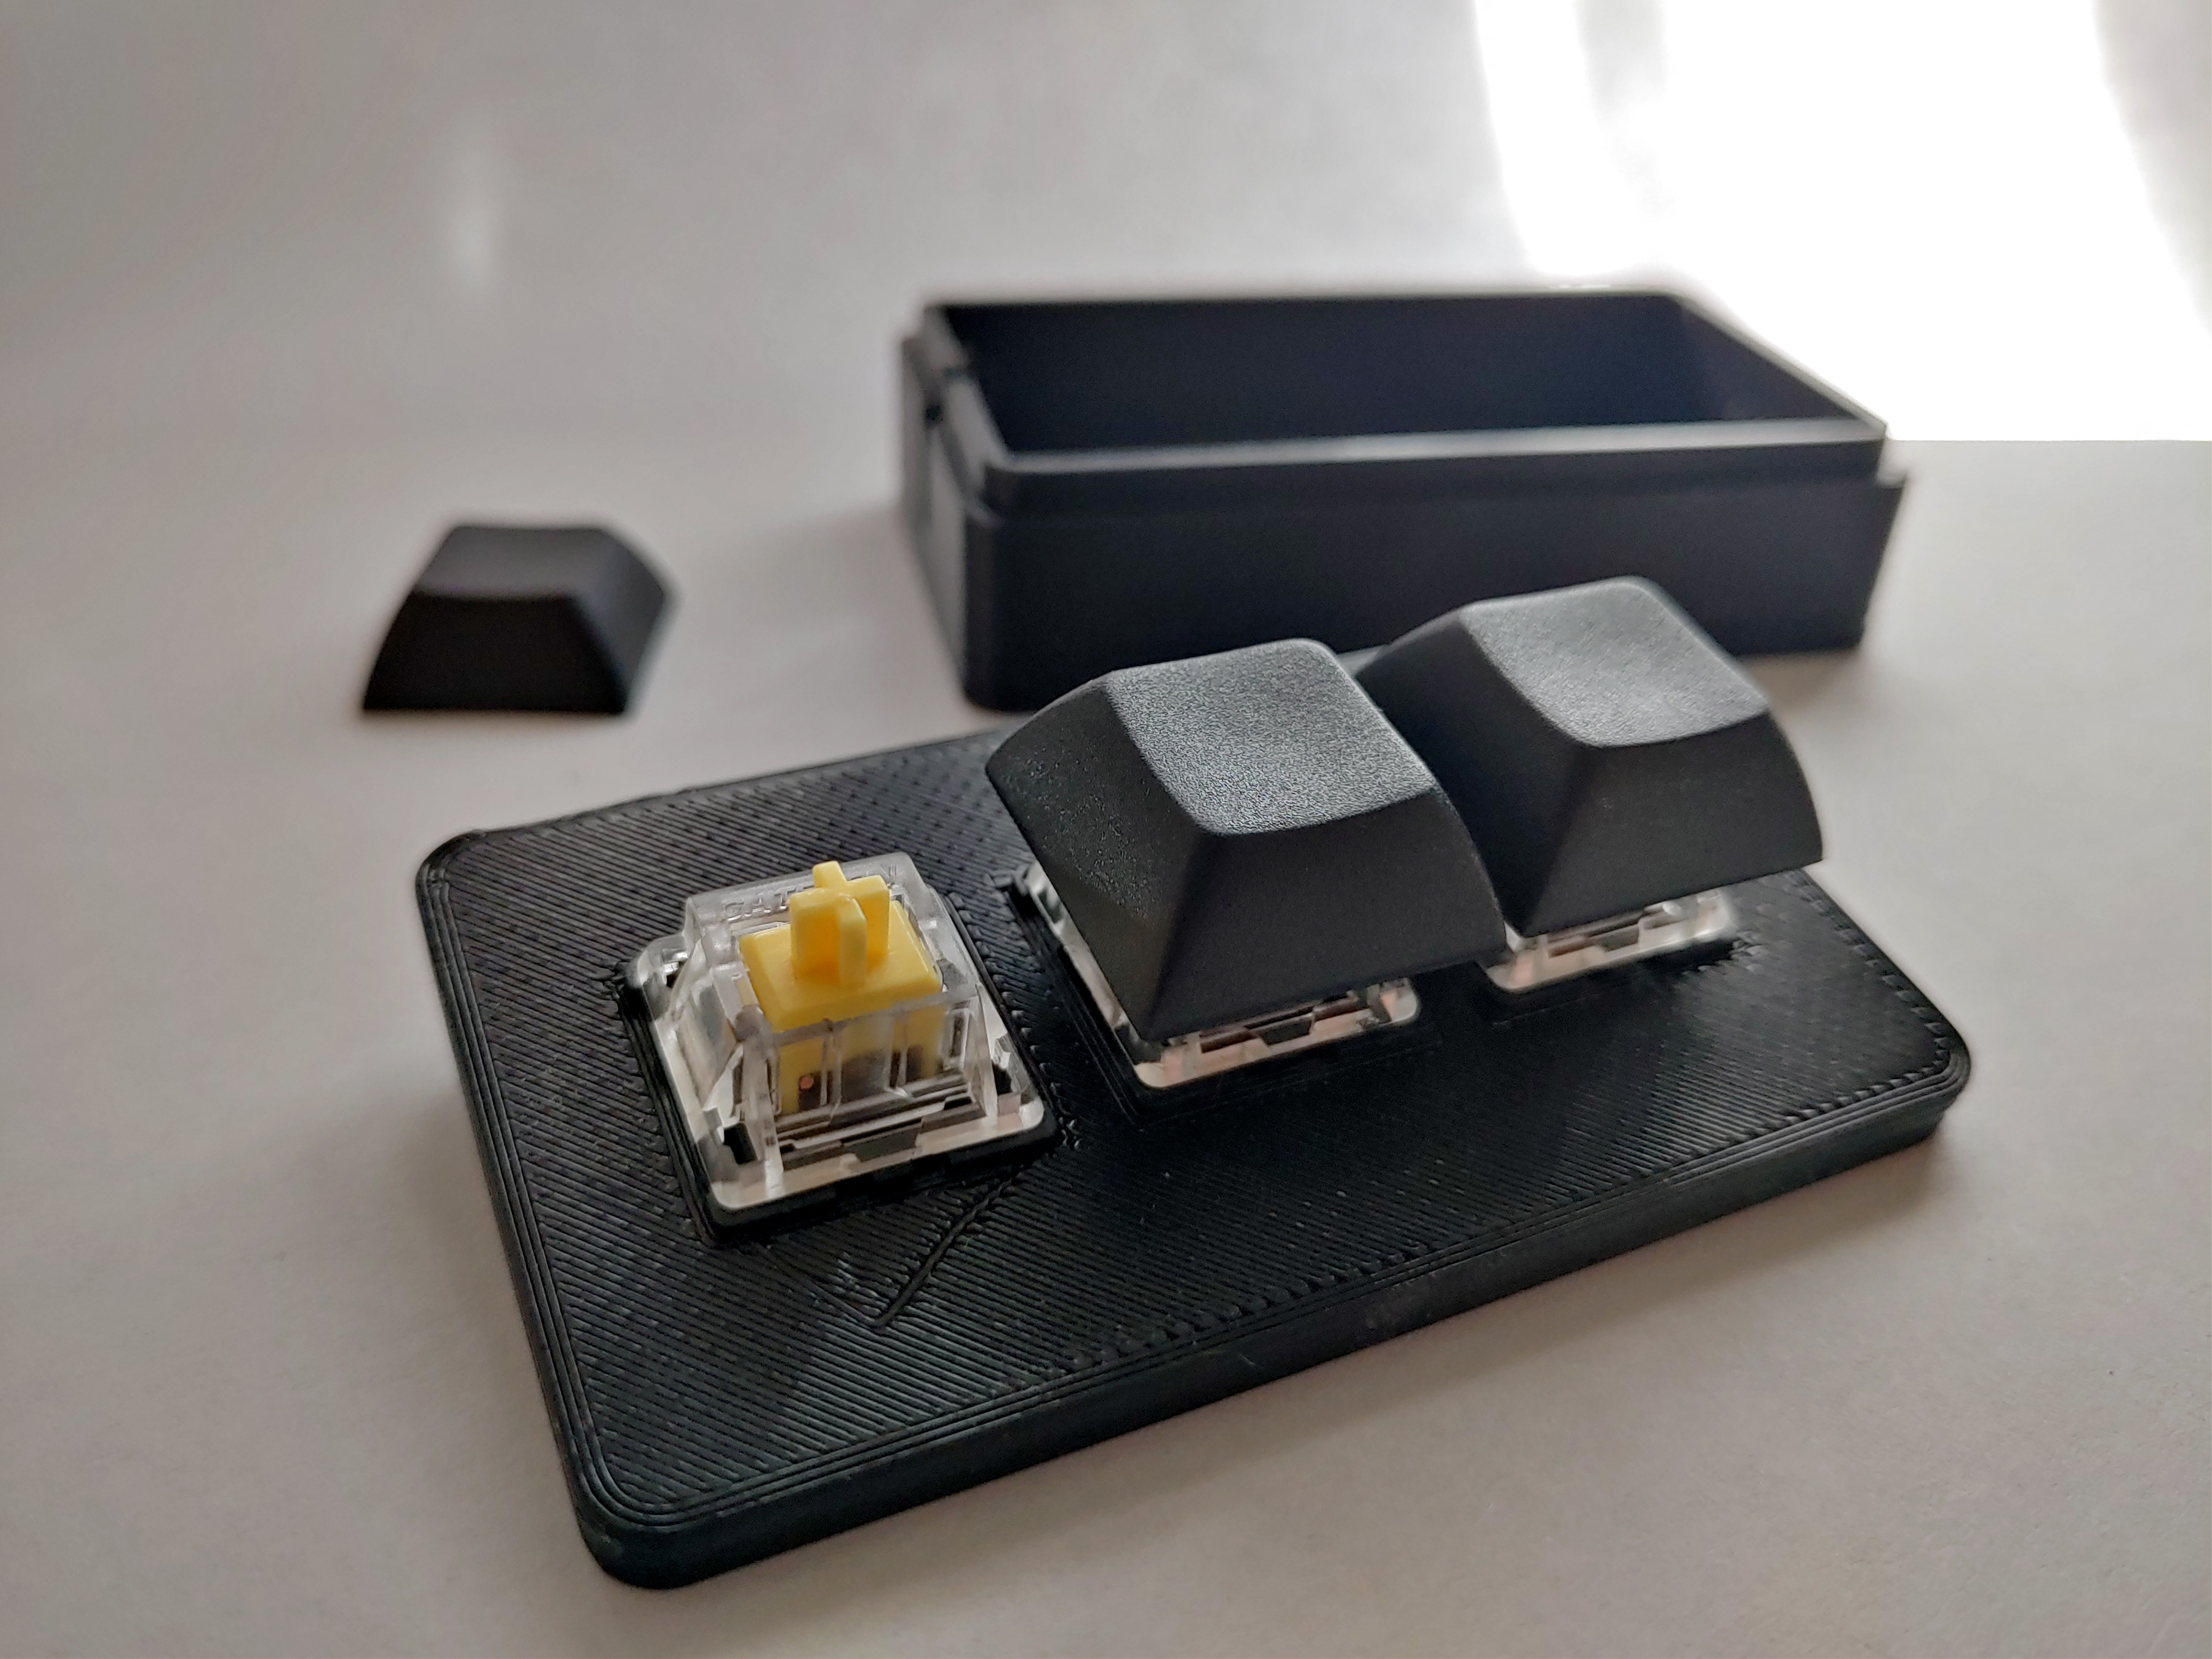
When I assembled my keyboard I used a microcontroller that cost $18 plus $5 shipping, which is more than I wanted to spend on a silly thing like the ankibutton. I happened to have an old rubber-dome style keyboard that was broken and useless, so I thought I'd take the controller out of that and wire up some of my leftover keyboard switches onto it. By following the sheets of electrical contacts you can learn which pins you'd need to solder switches to to make a keypress. I never did solder anything, but I used a piece of wire to connect some pins and figure out where the keys I want are.

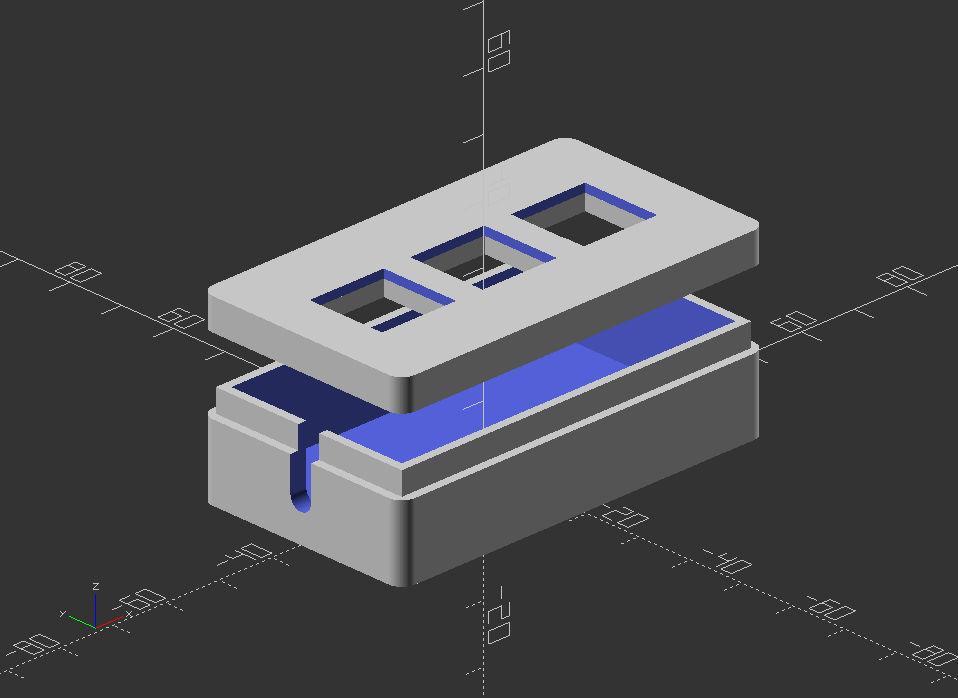
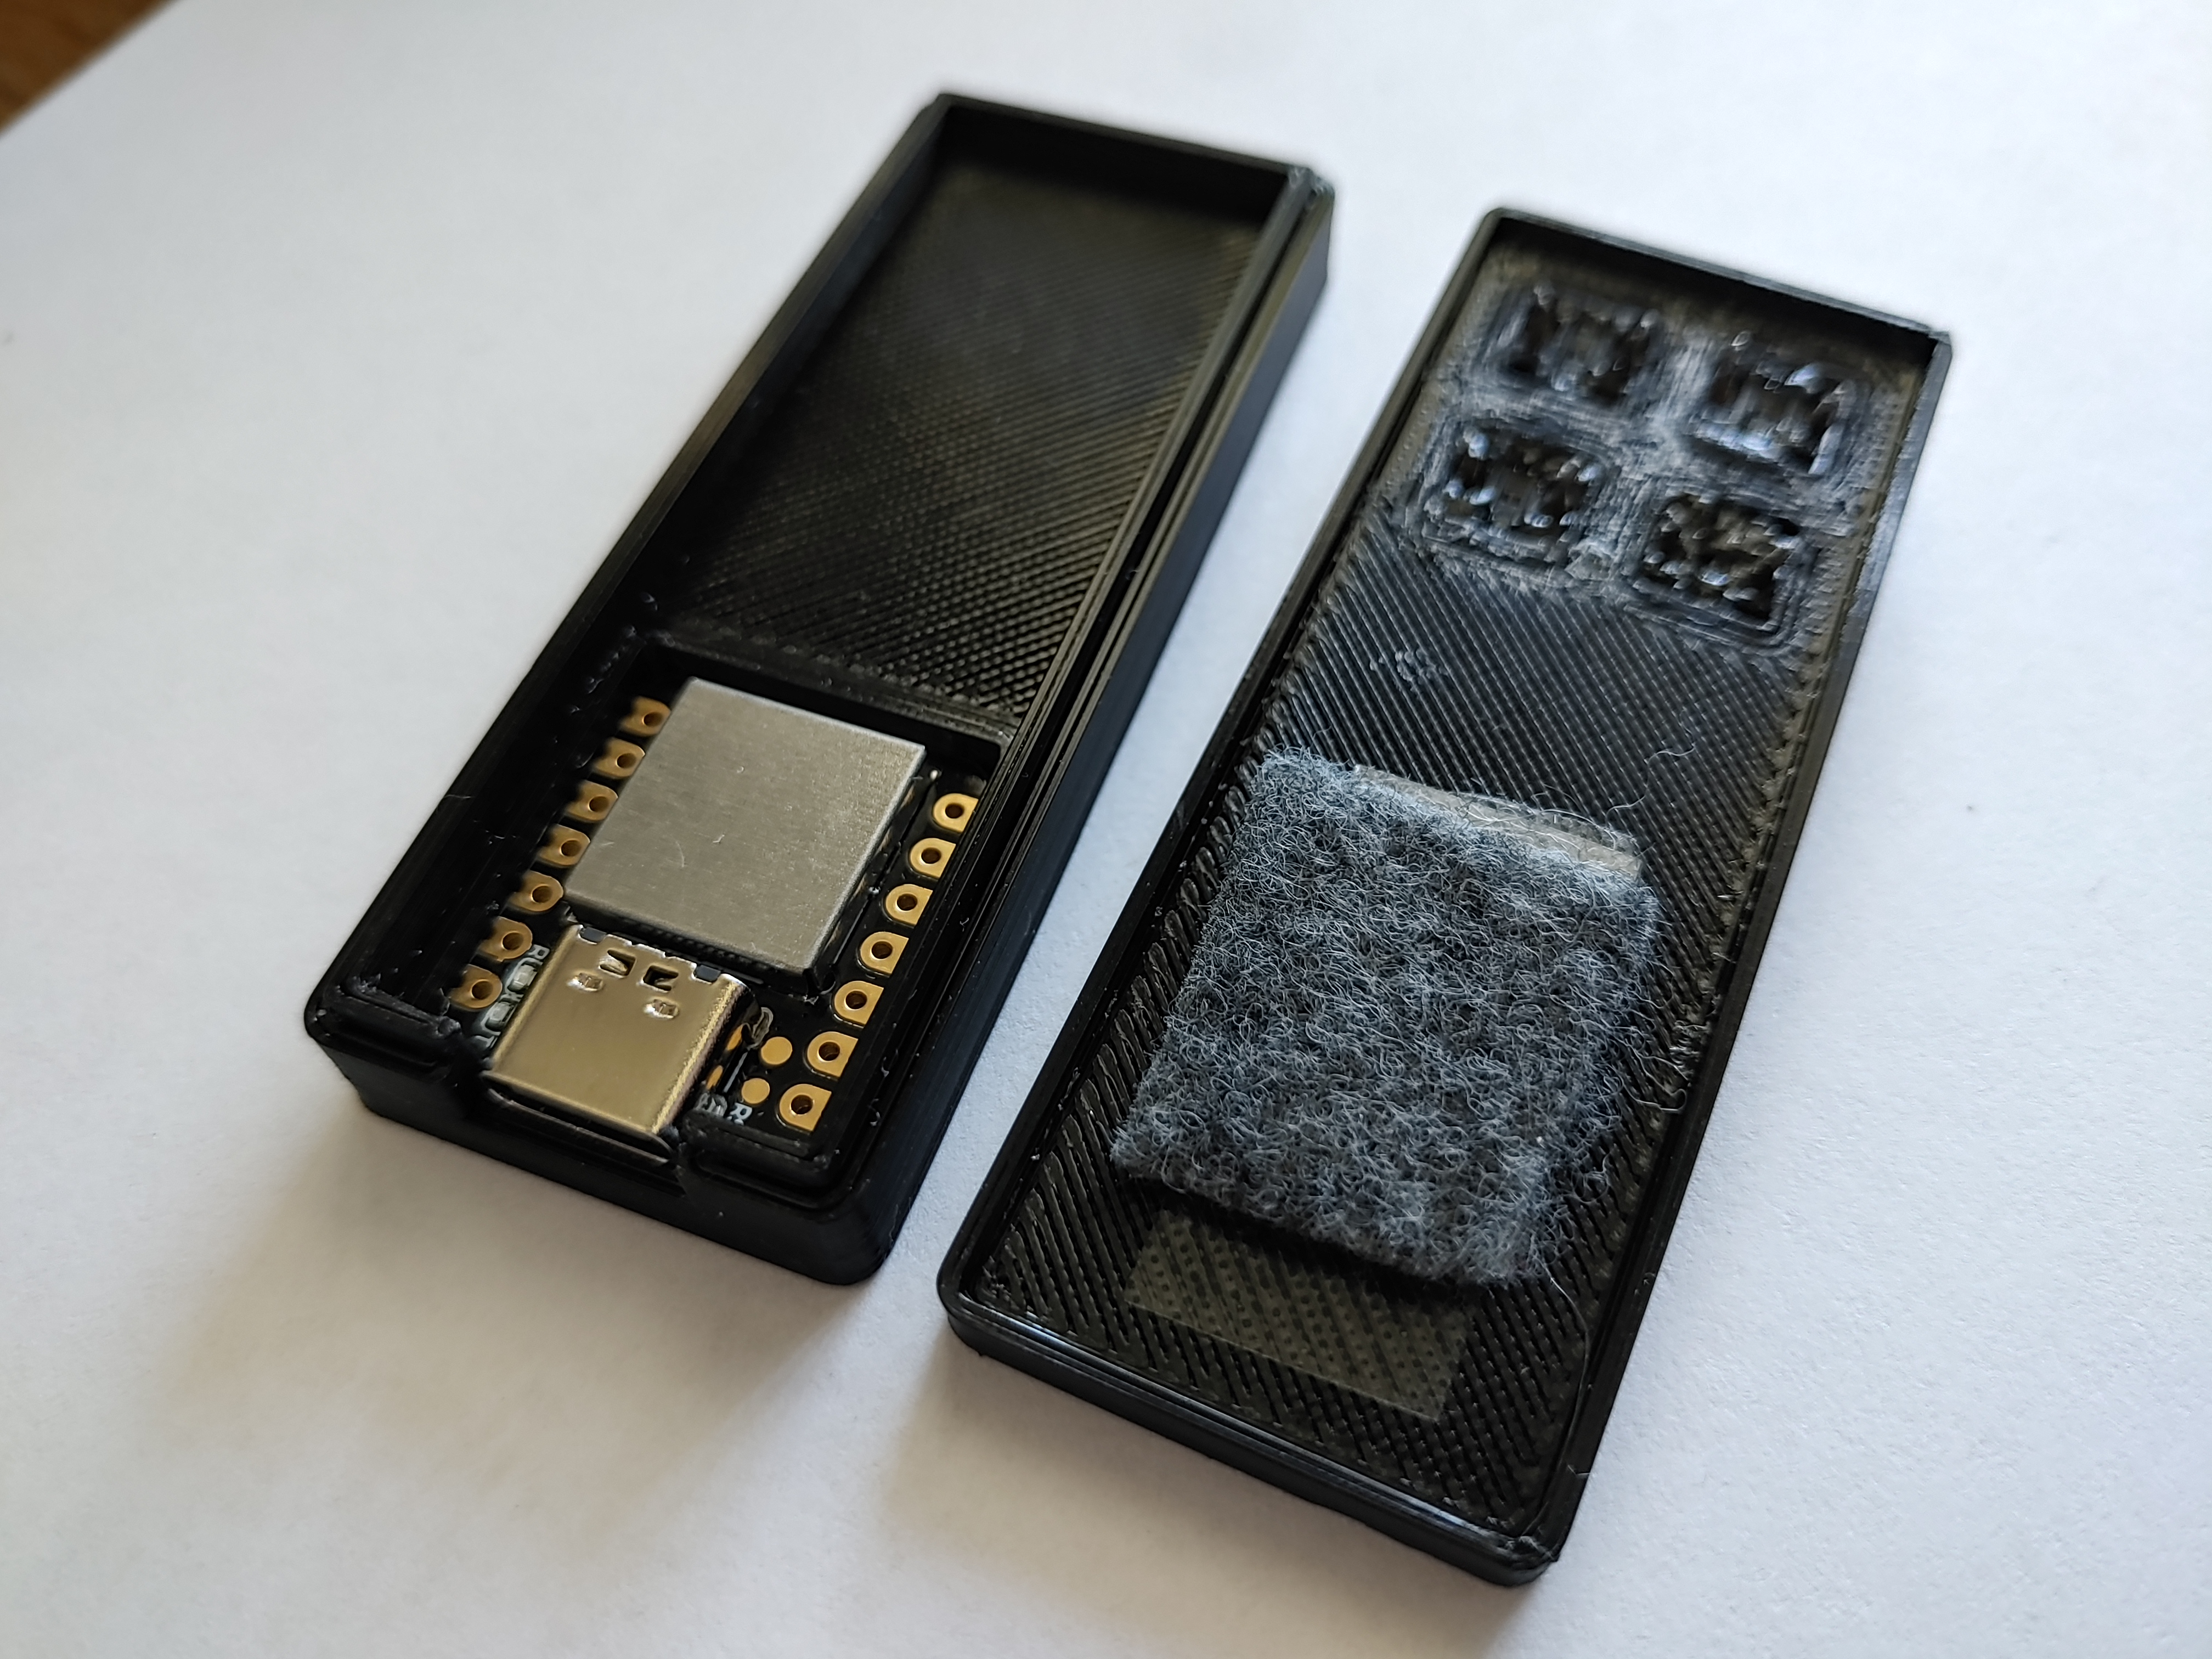
I designed a case for this controller and three cherry switches.
I decided not to use that controller for two reasons. Mainly because it's not possible to reprogram the firmware on it, so if I ever got tired of using it as an ankibutton I'd be unable to change any of the keys without unsoldering and resoldering it in a new configuration. Secondly because I want to include a Ctrl+Z button on the ankibutton, and I don't think soldering a single switch onto the pads for both Ctrl and Z would work properly.
True starts (§)
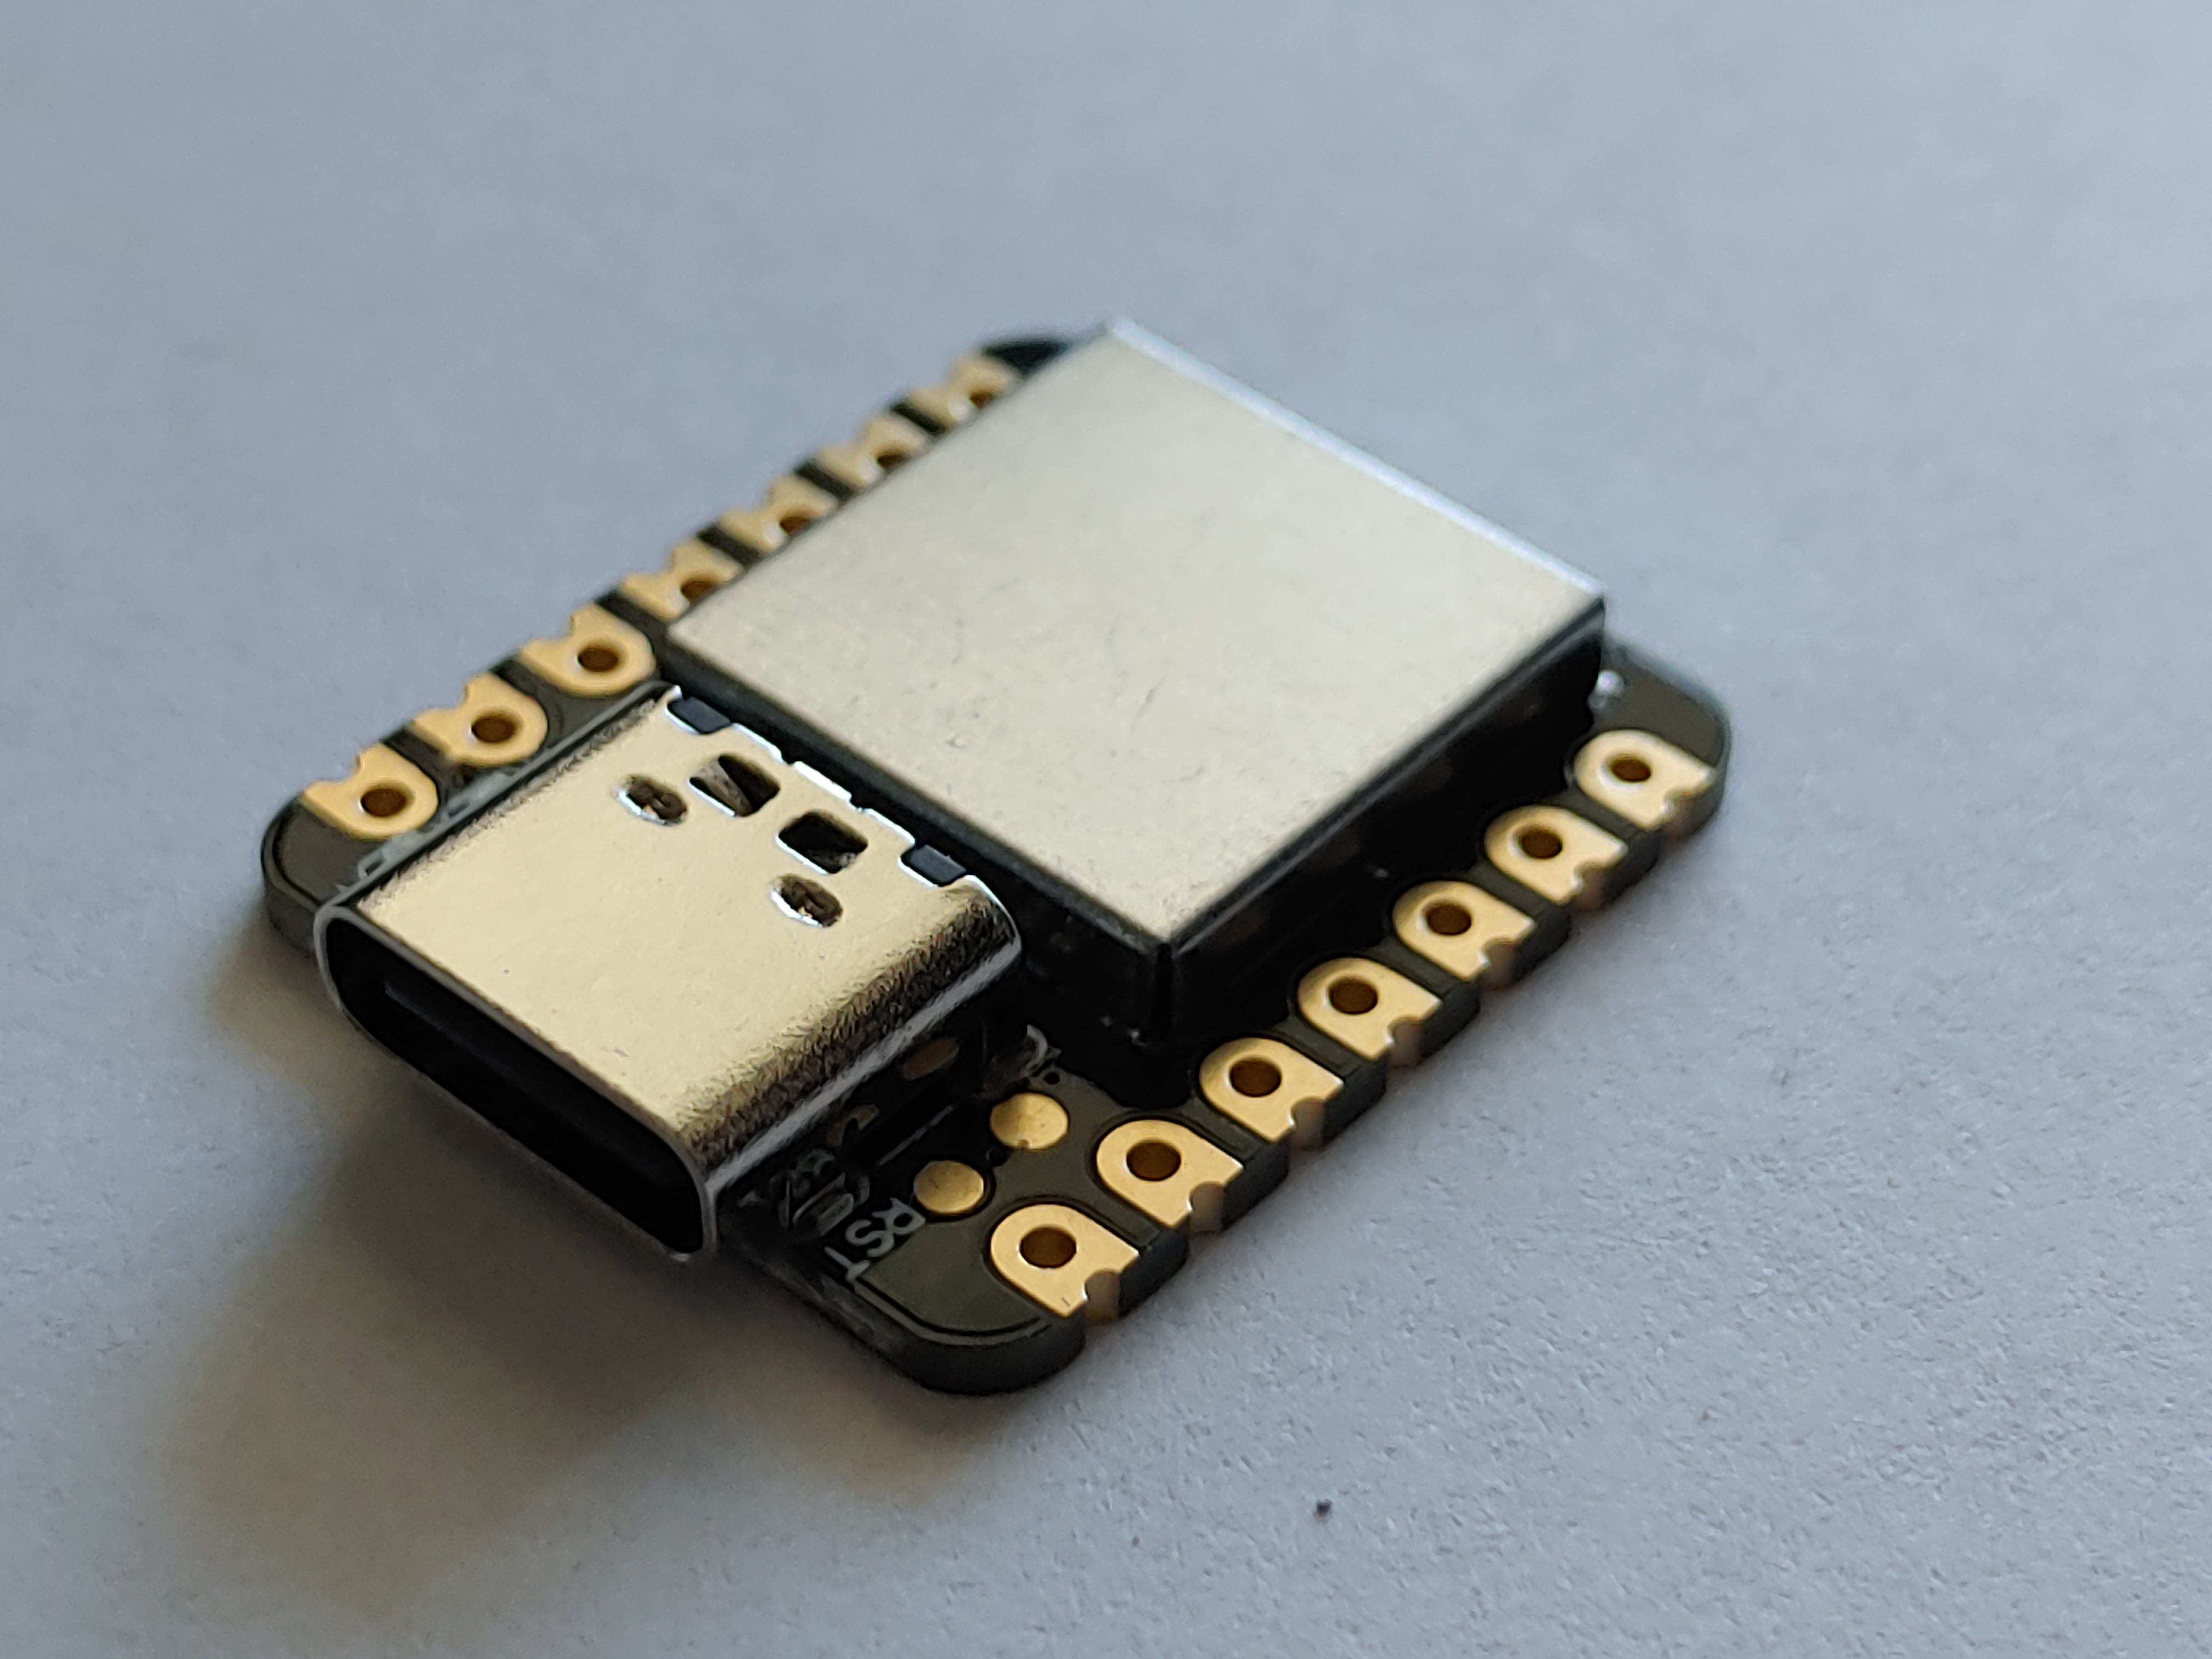
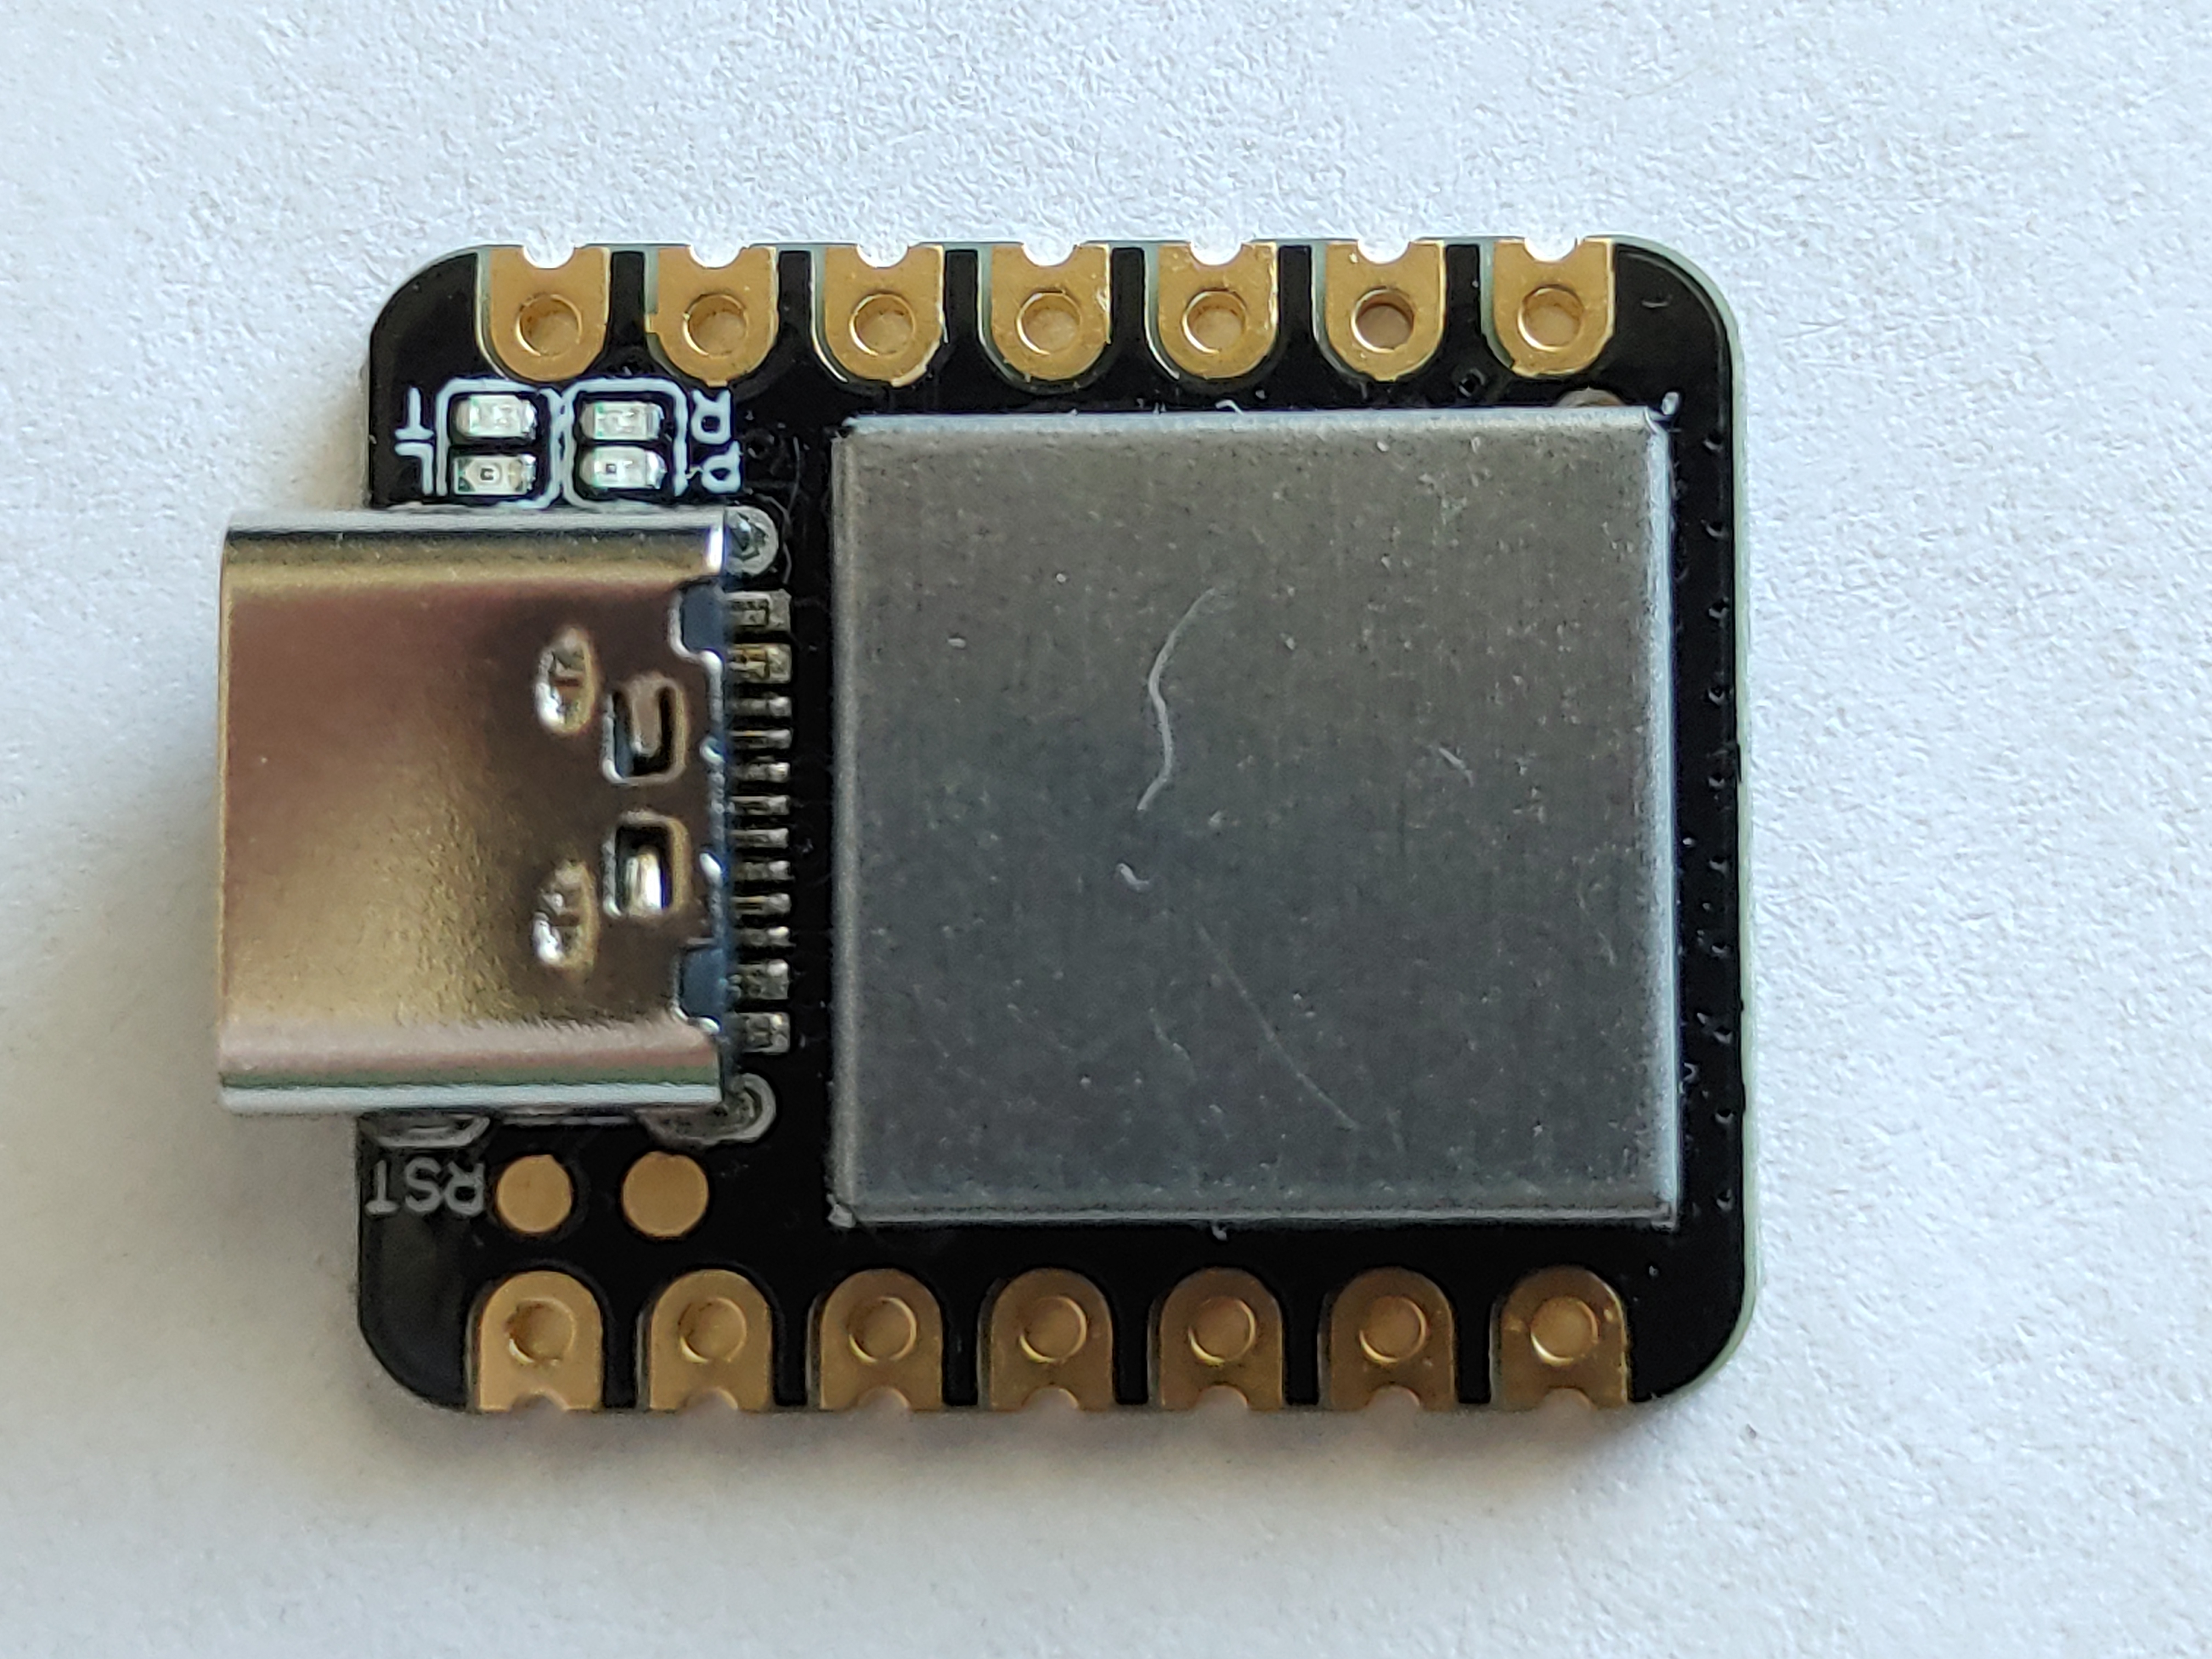
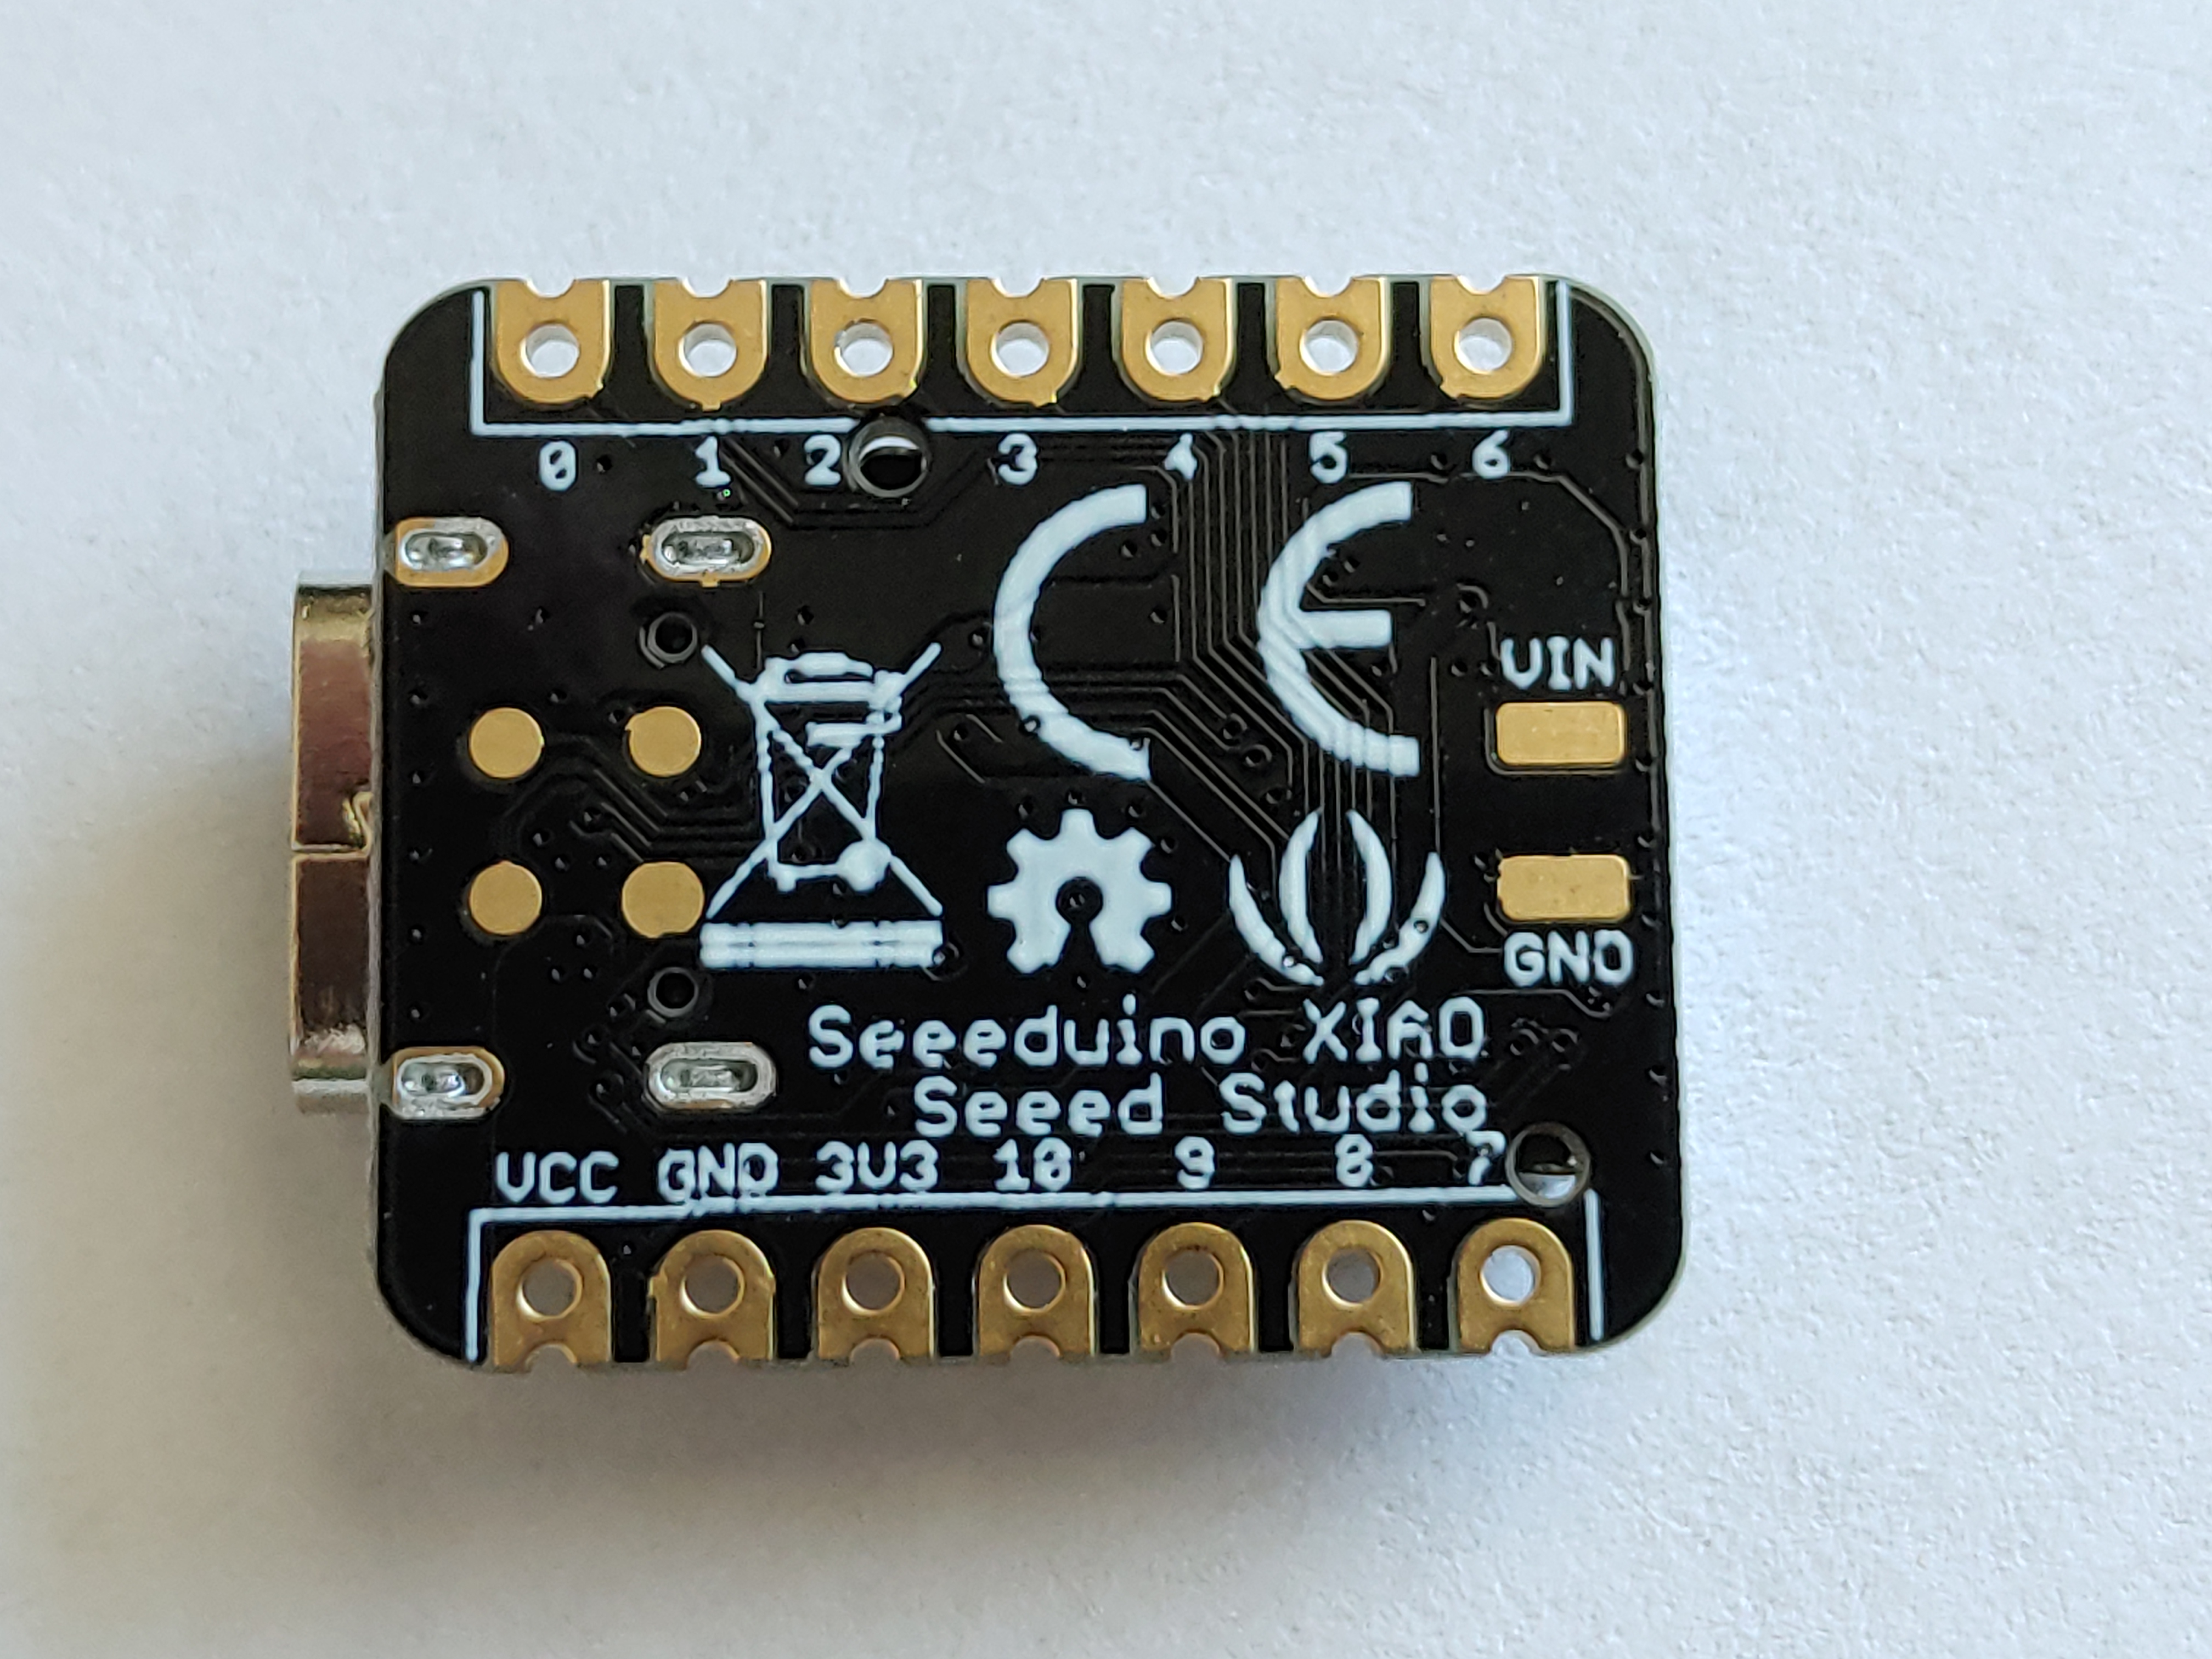
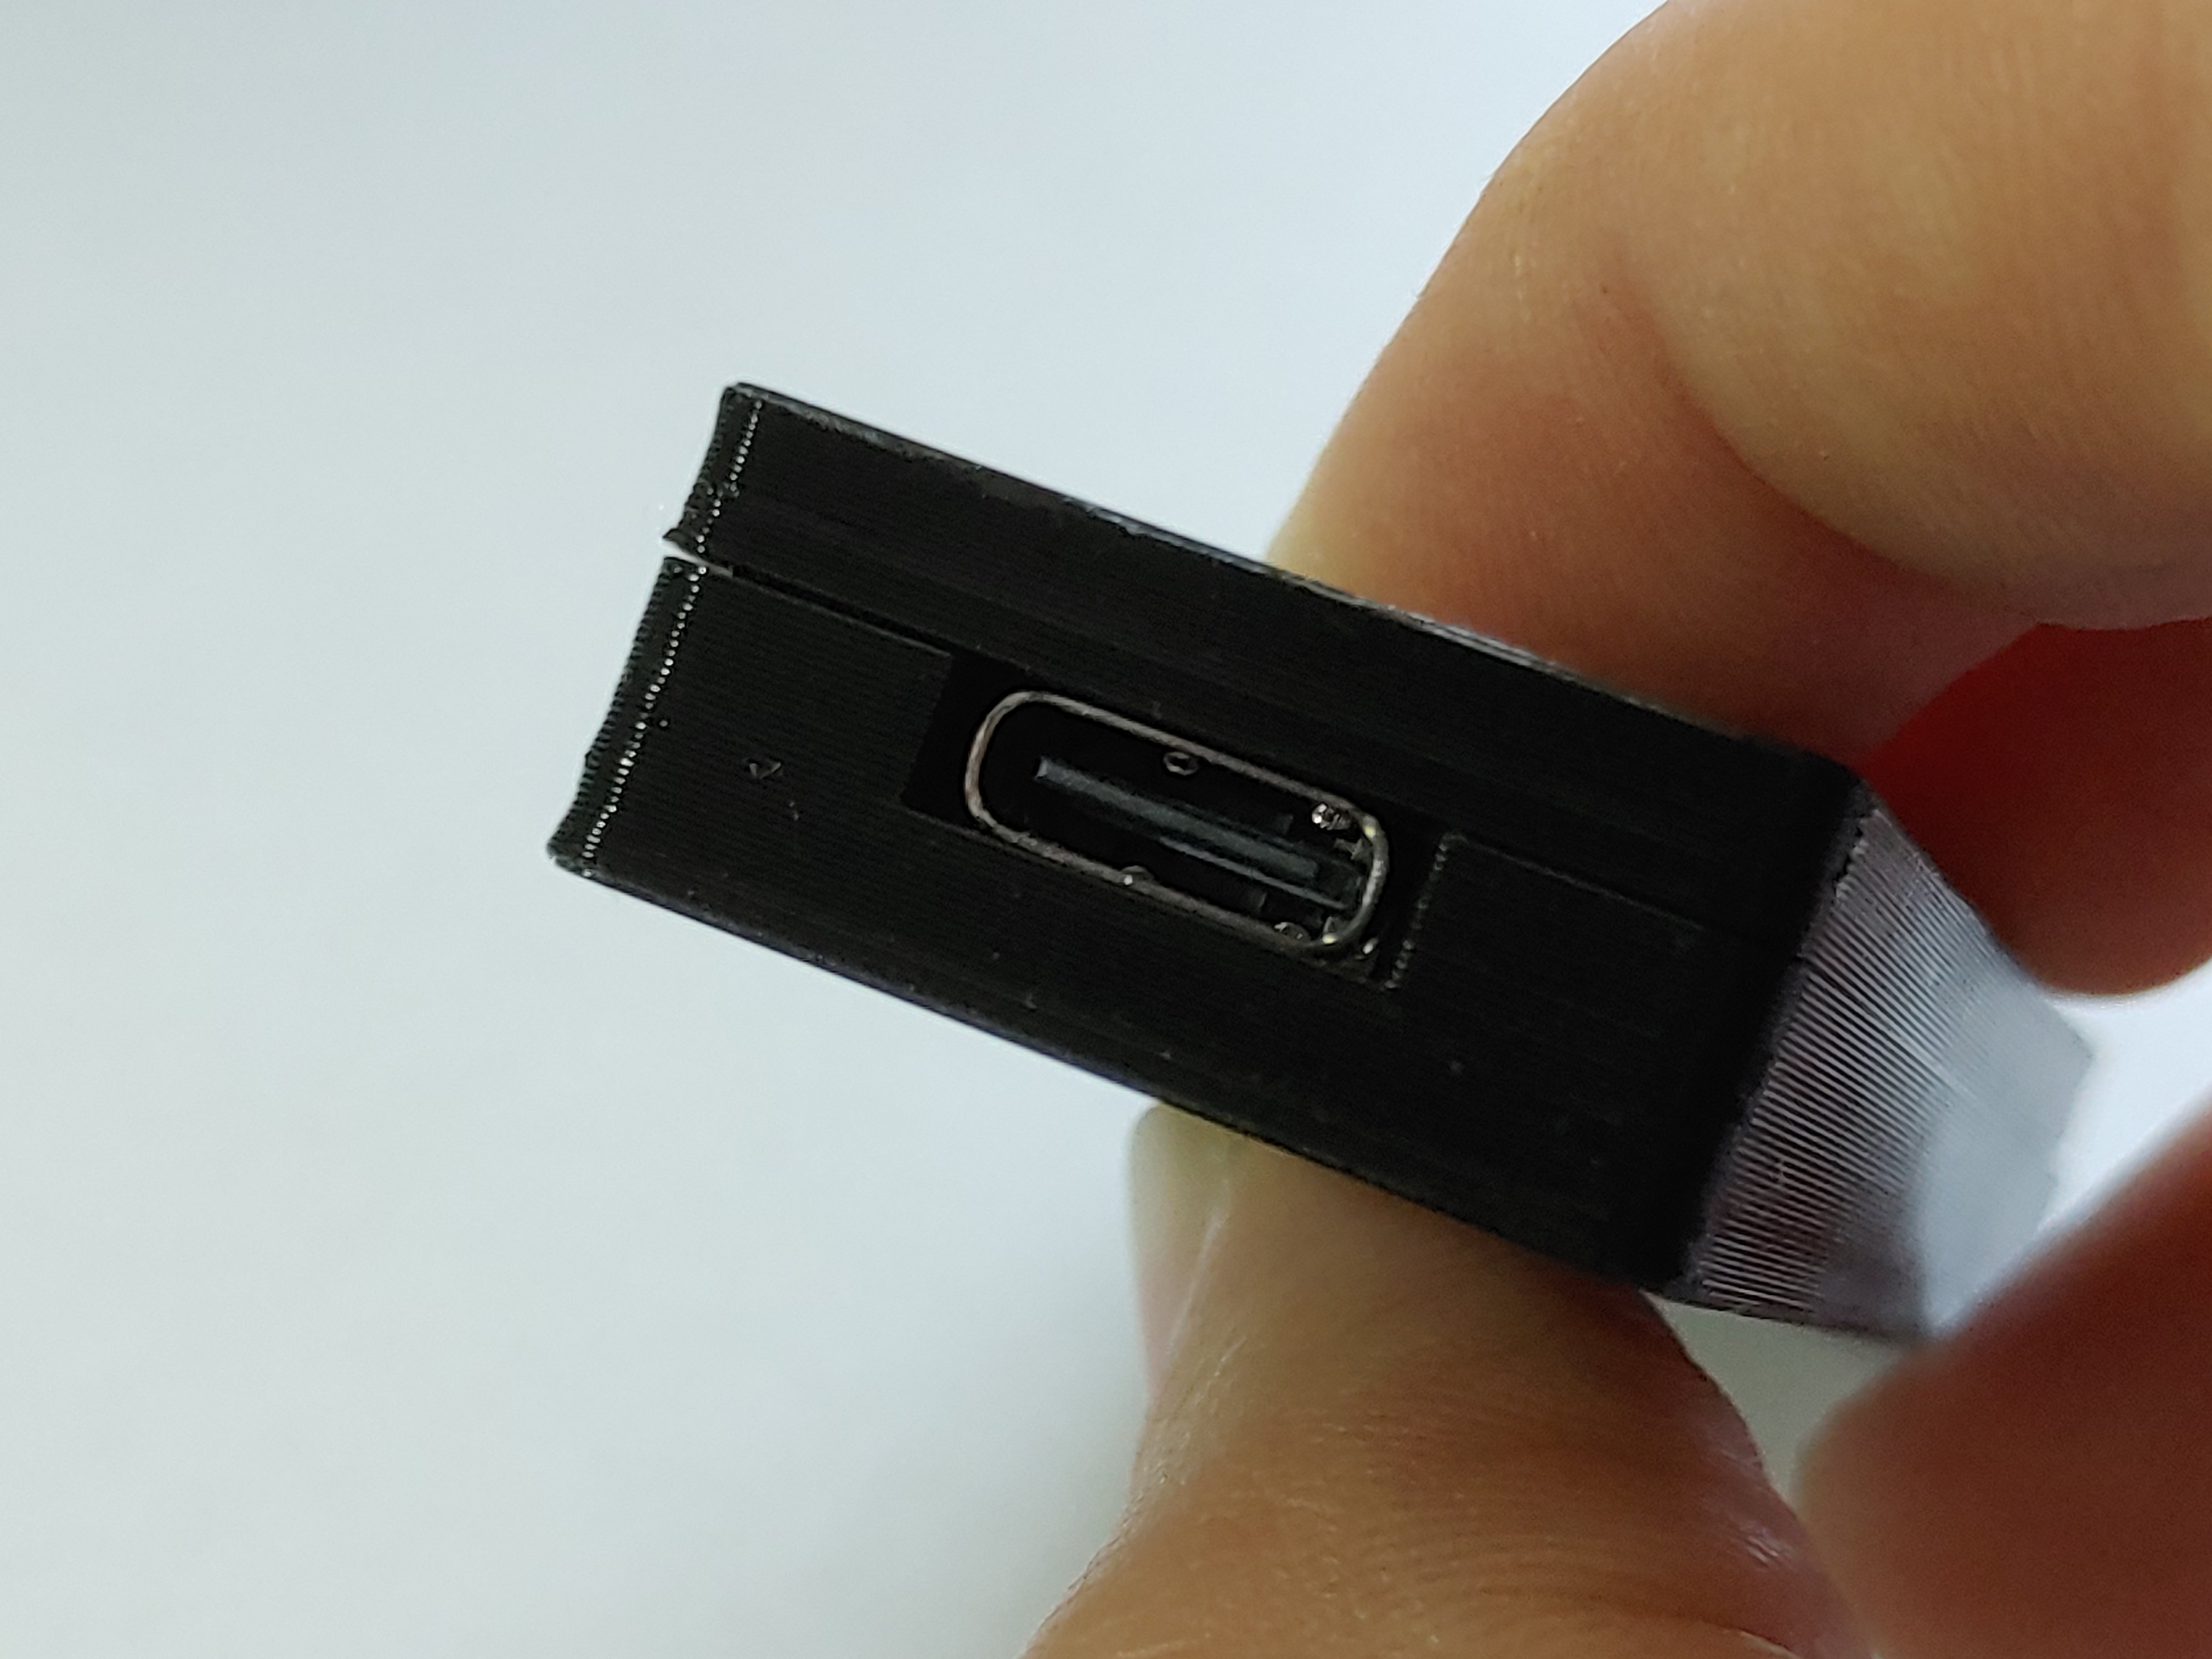
I set this idea aside for a few months until one day I got an idea for a different project and started researching for other microcontrollers. I discovered the Seeeduino Xiao, and was able to get a two-pack for $14. Seven dollars for an arduino-compatible board with USB-C is a pretty good price.
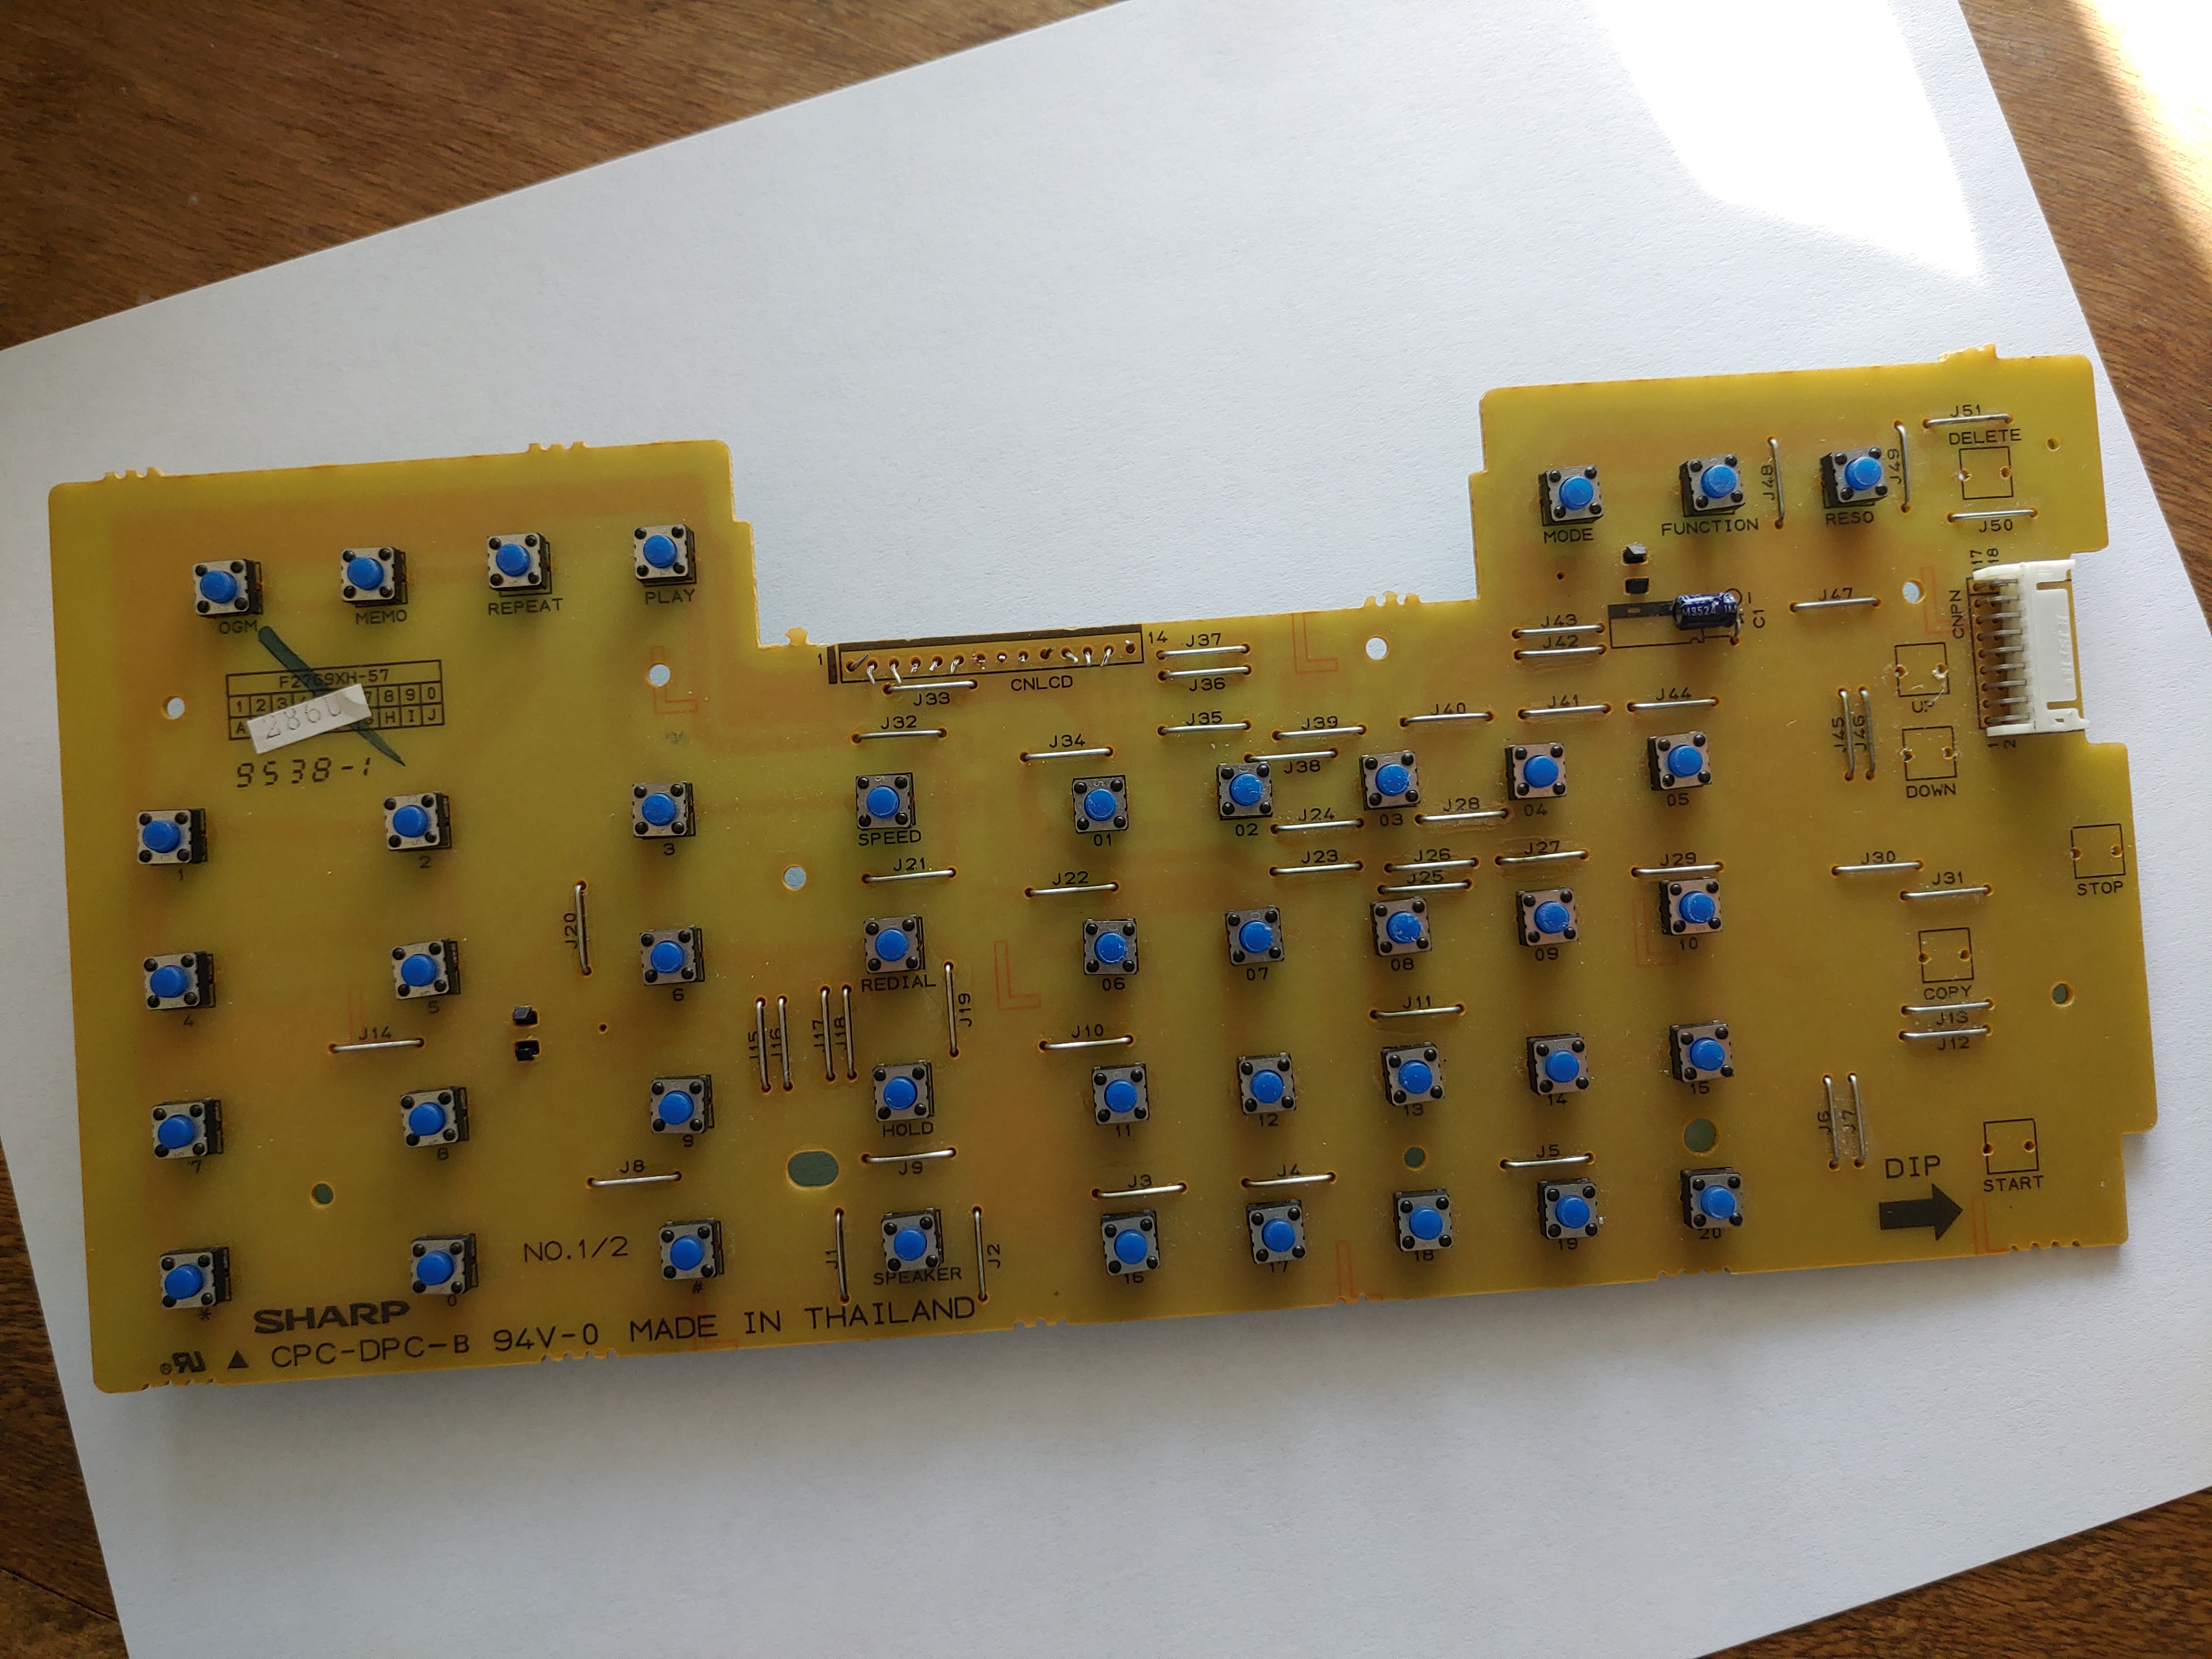
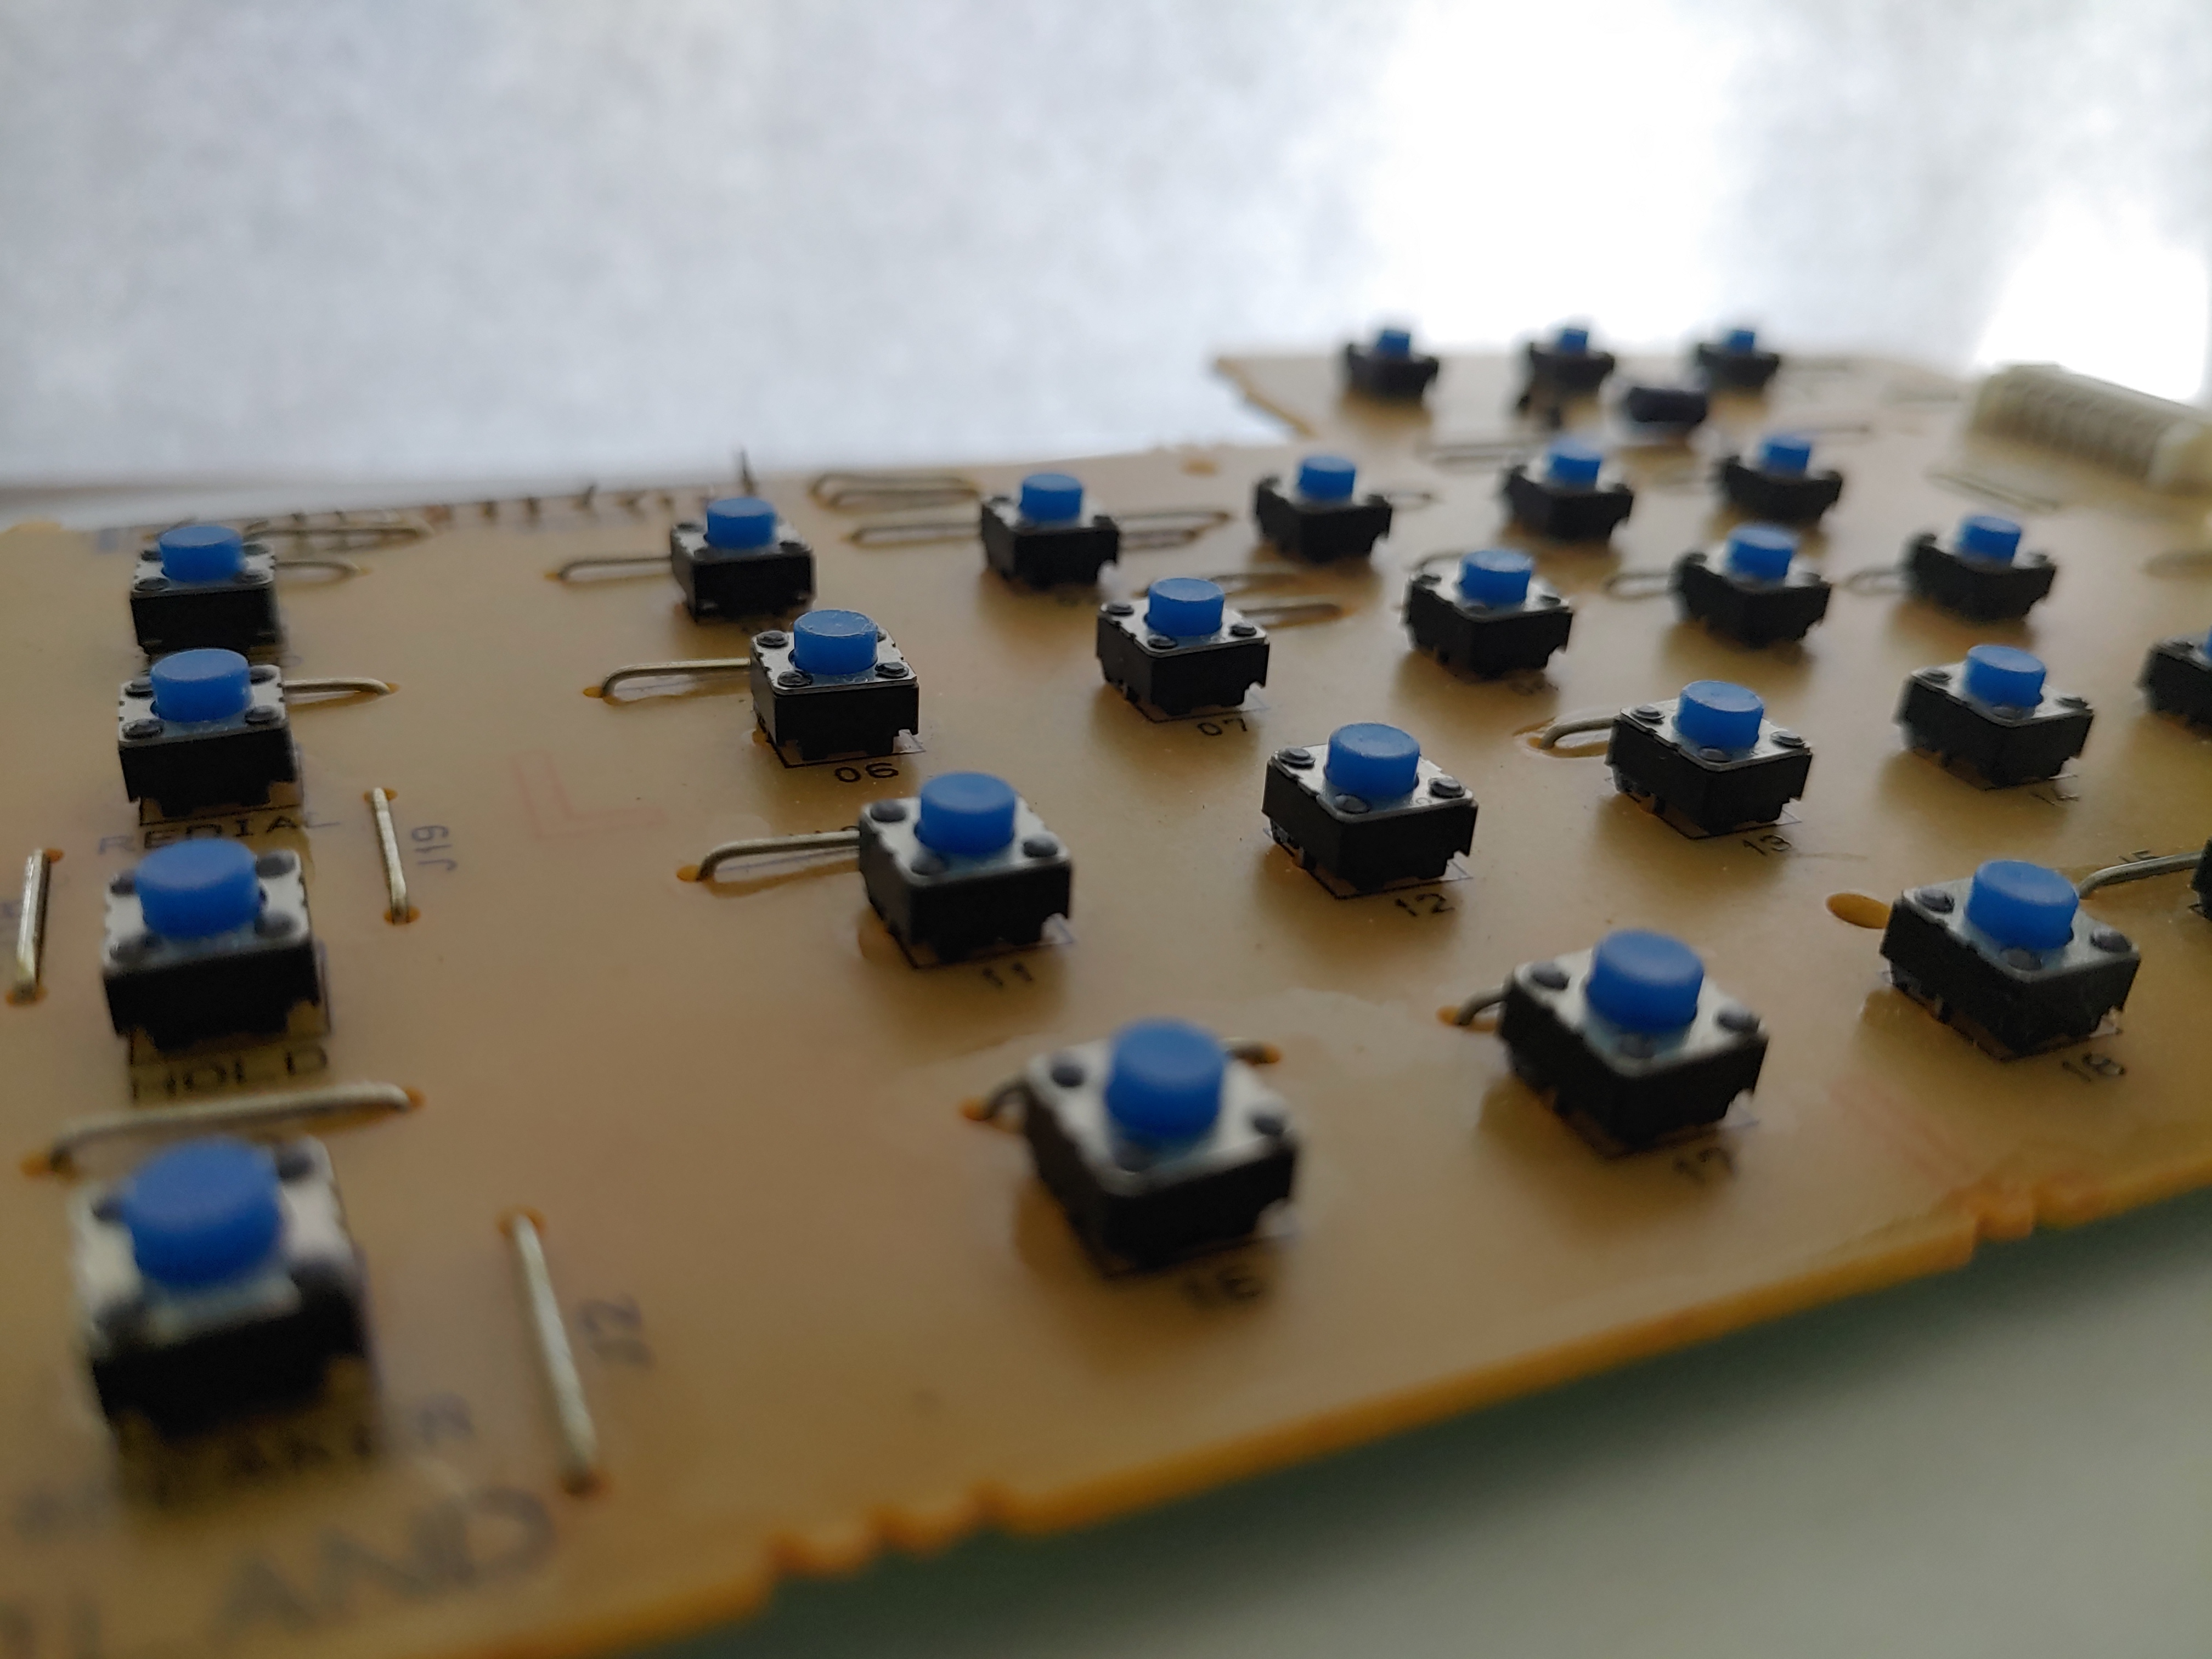
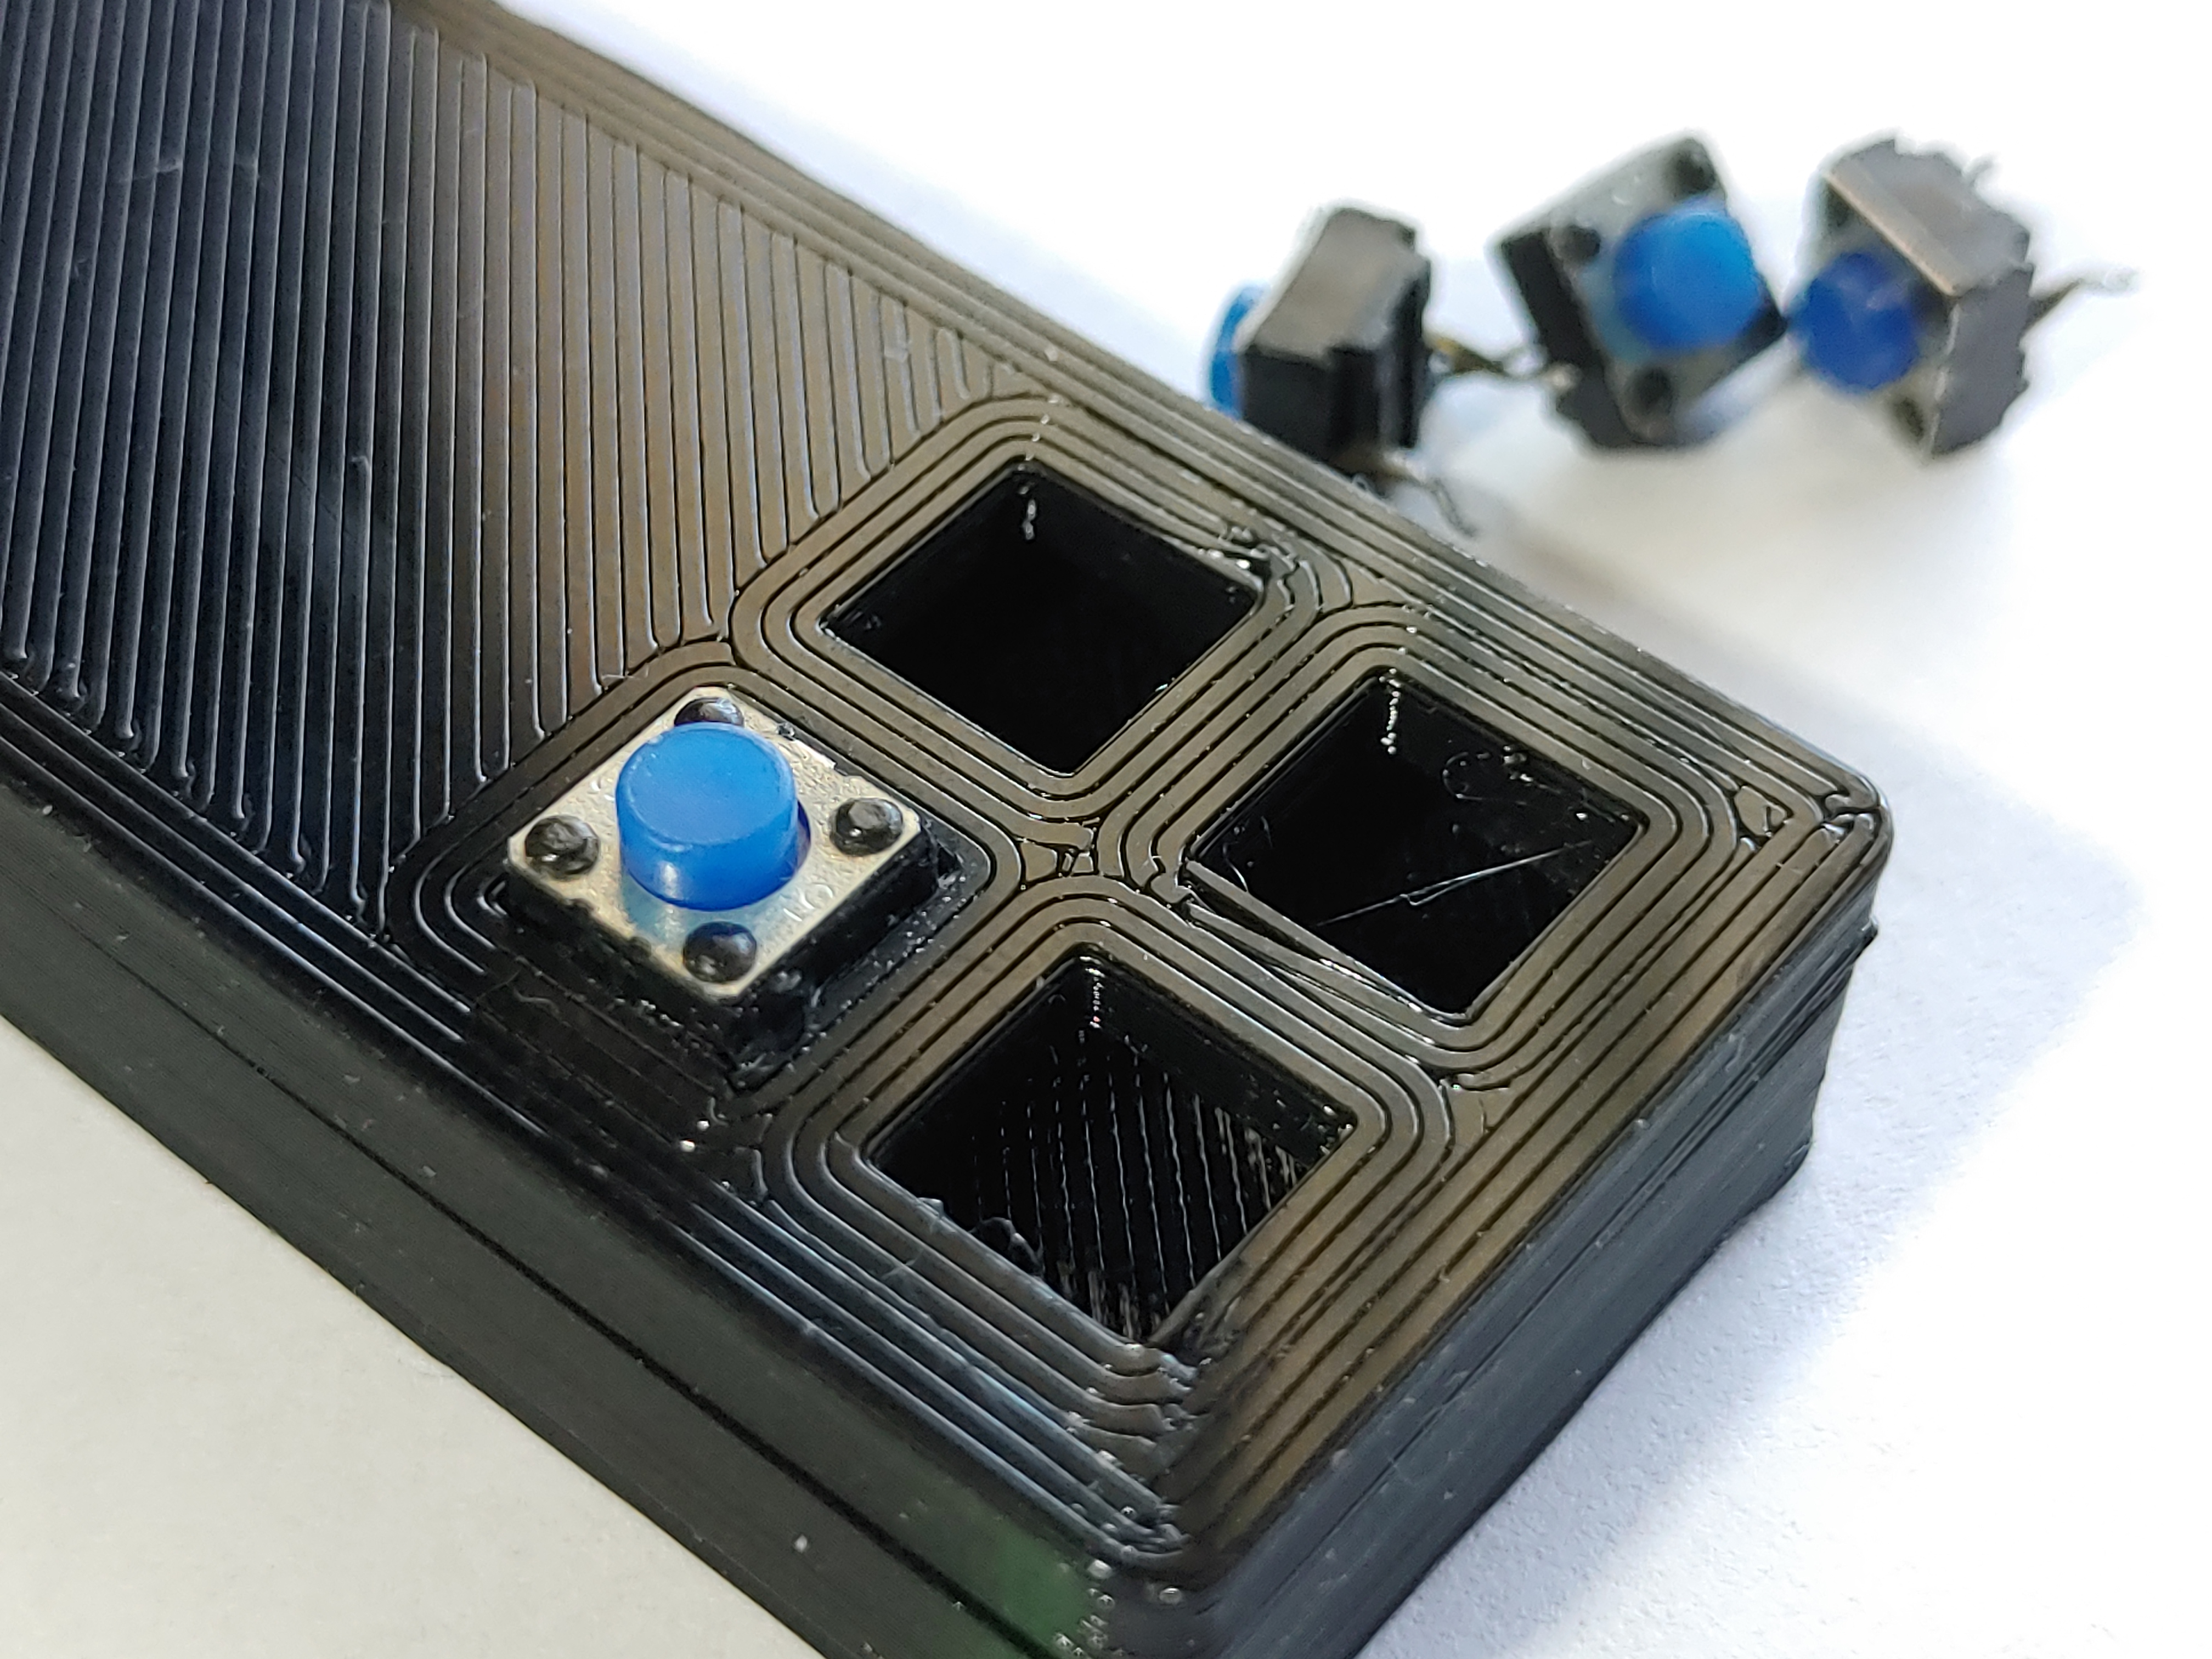
I also decided not to use the gateron keyboard switches, because for a handheld device these switches were just too big and would require lots of thumb movement during normal use. Instead, I harvested some small pushbuttons from a plate that had come out of a fax machine.
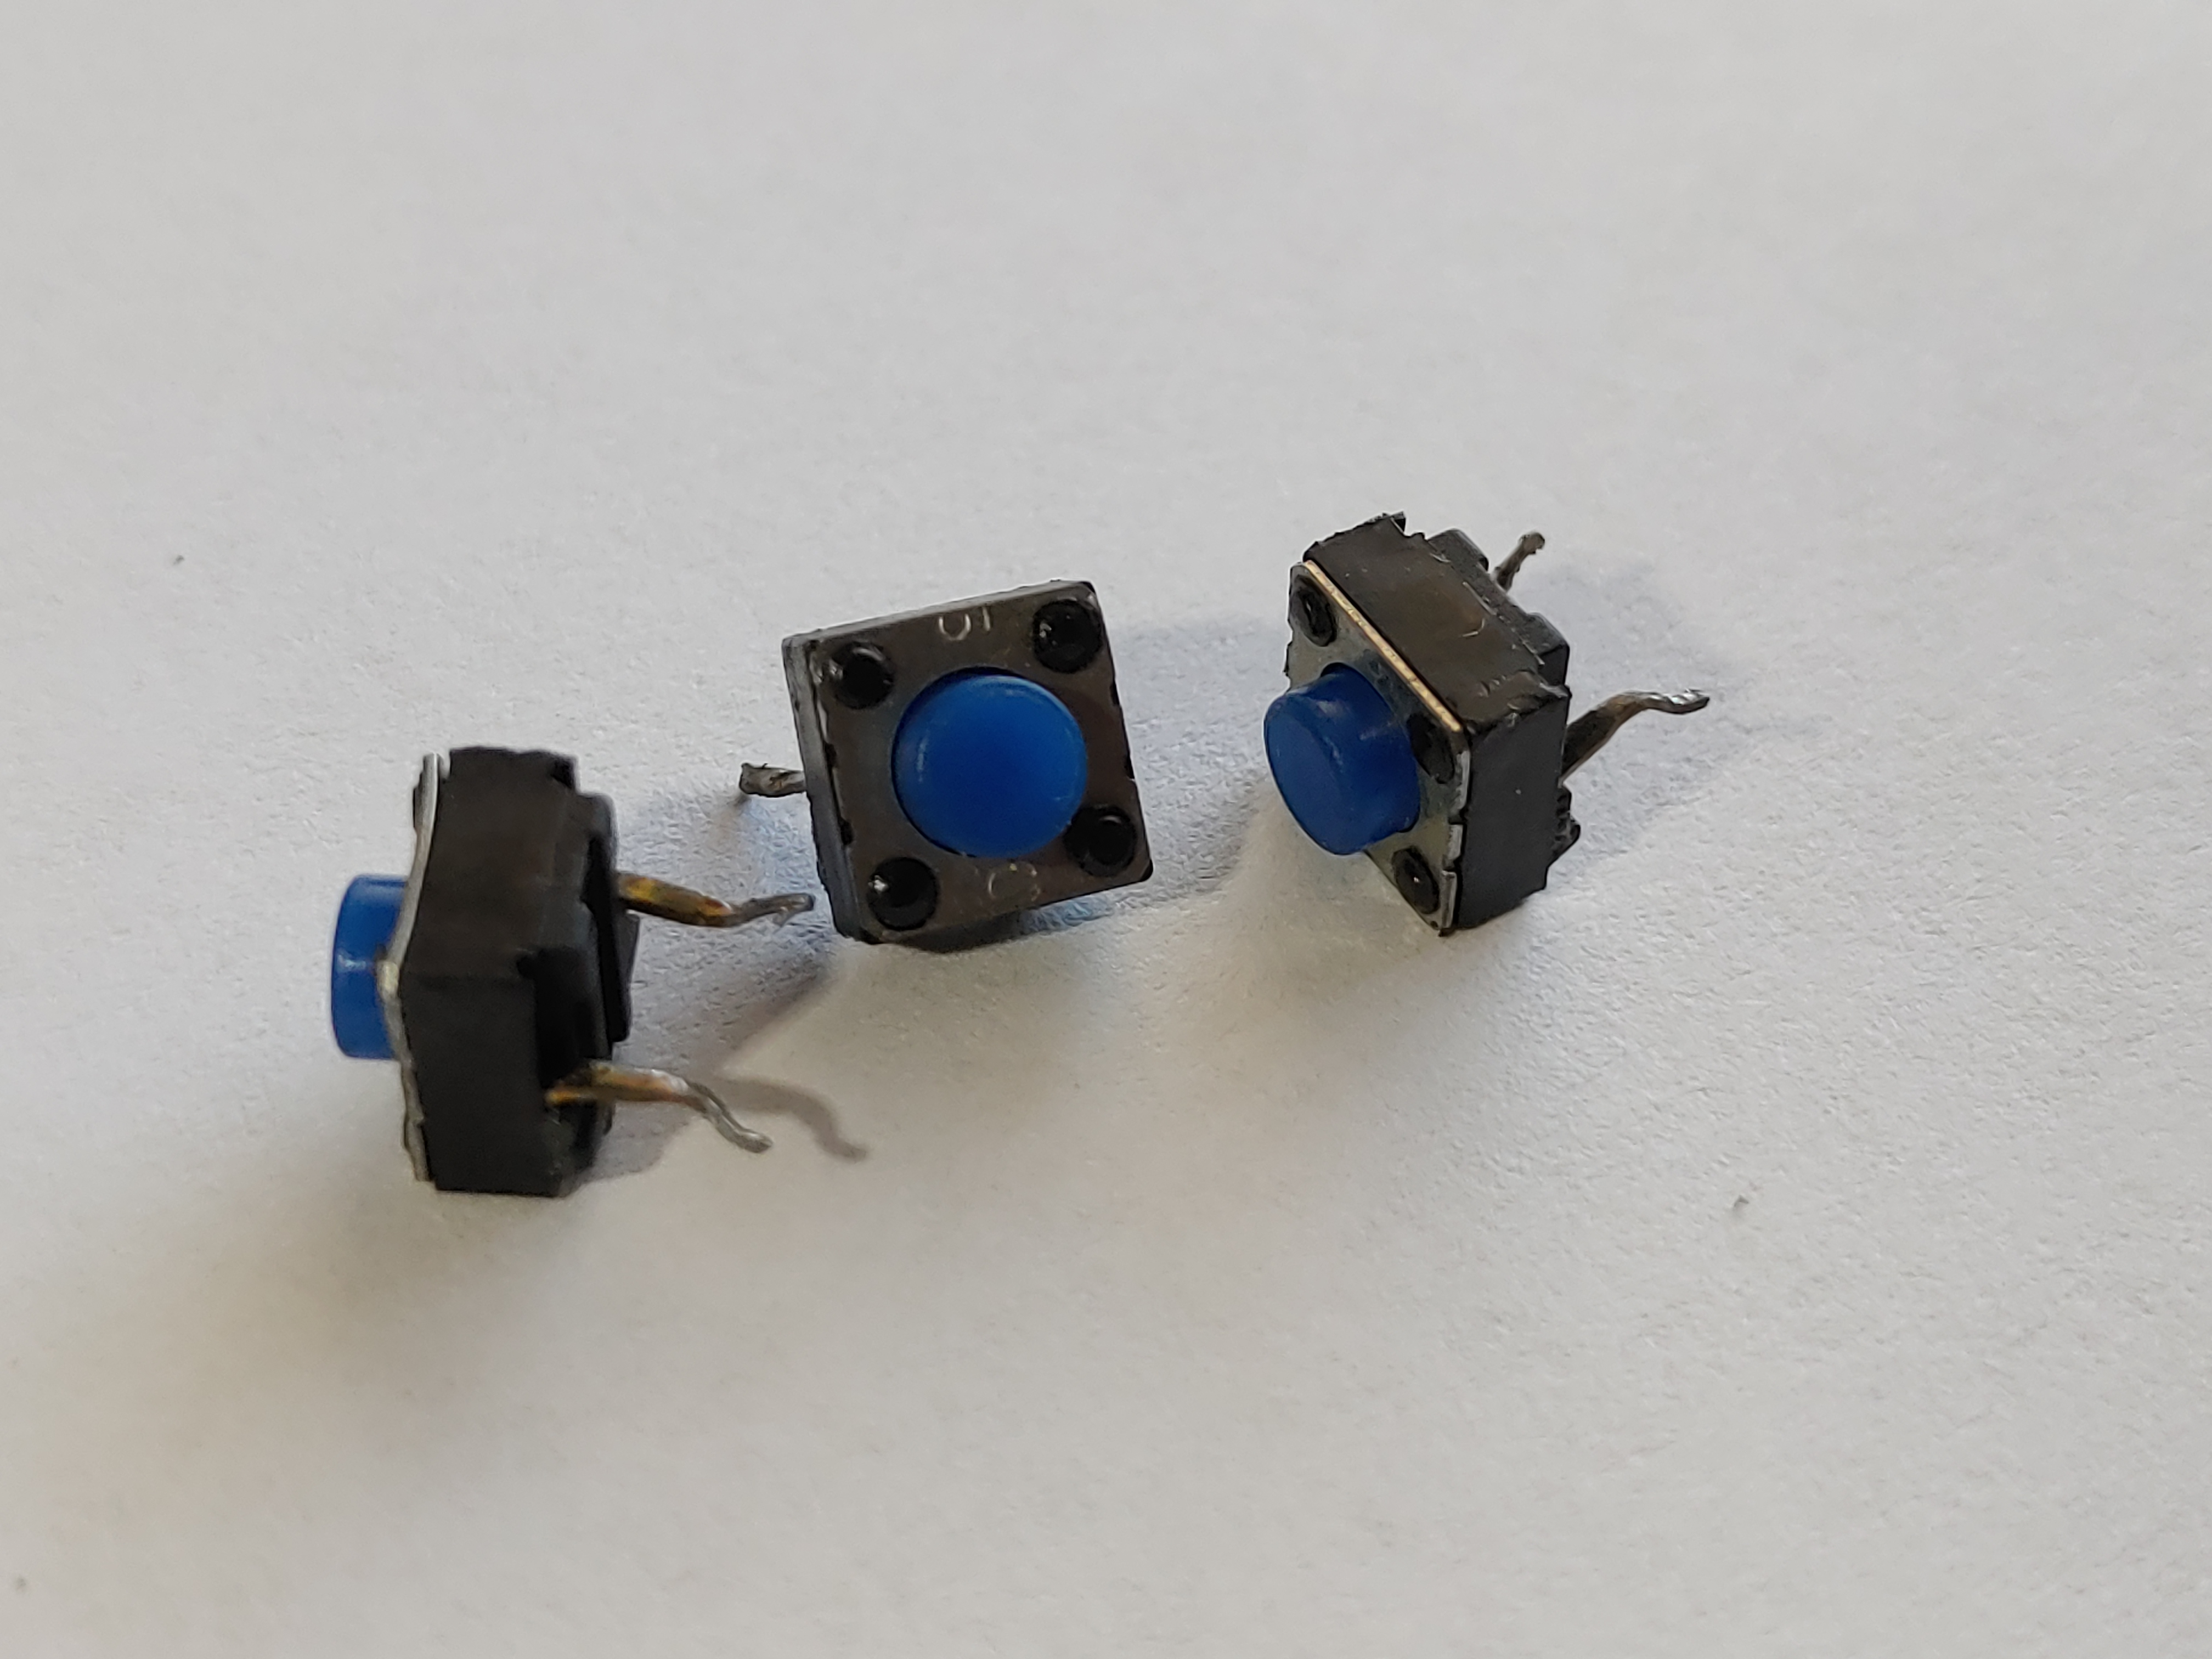
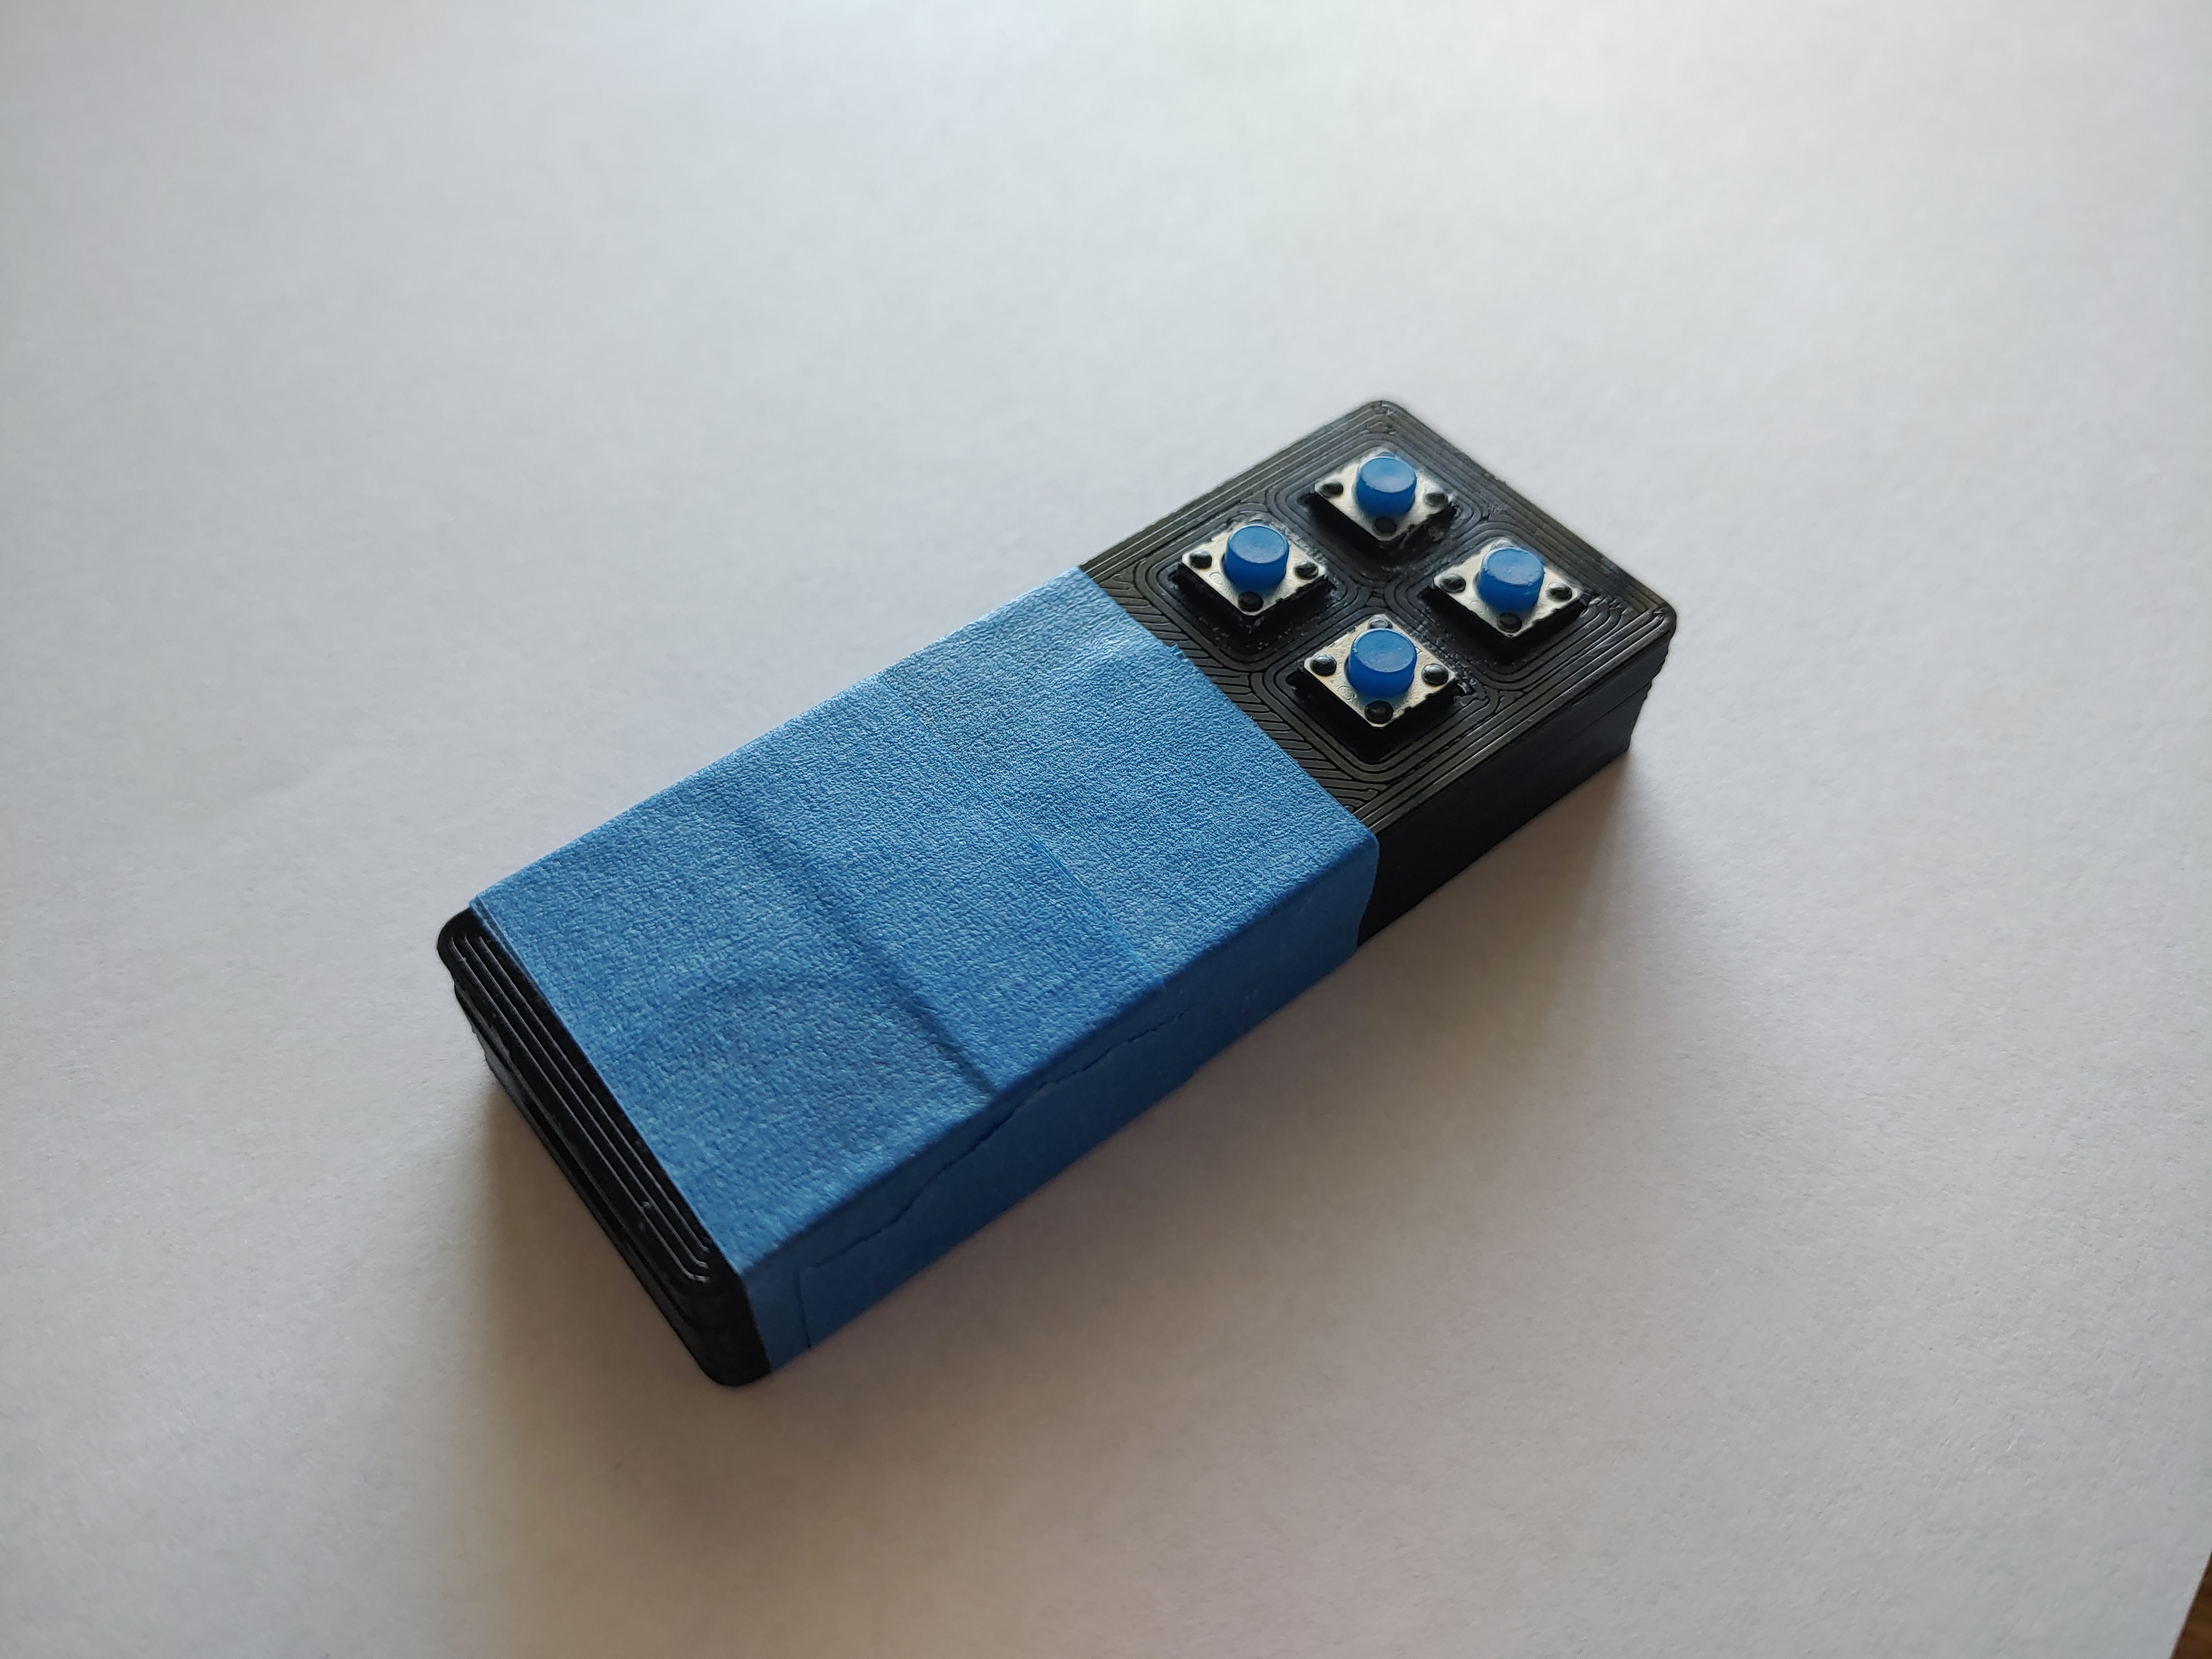
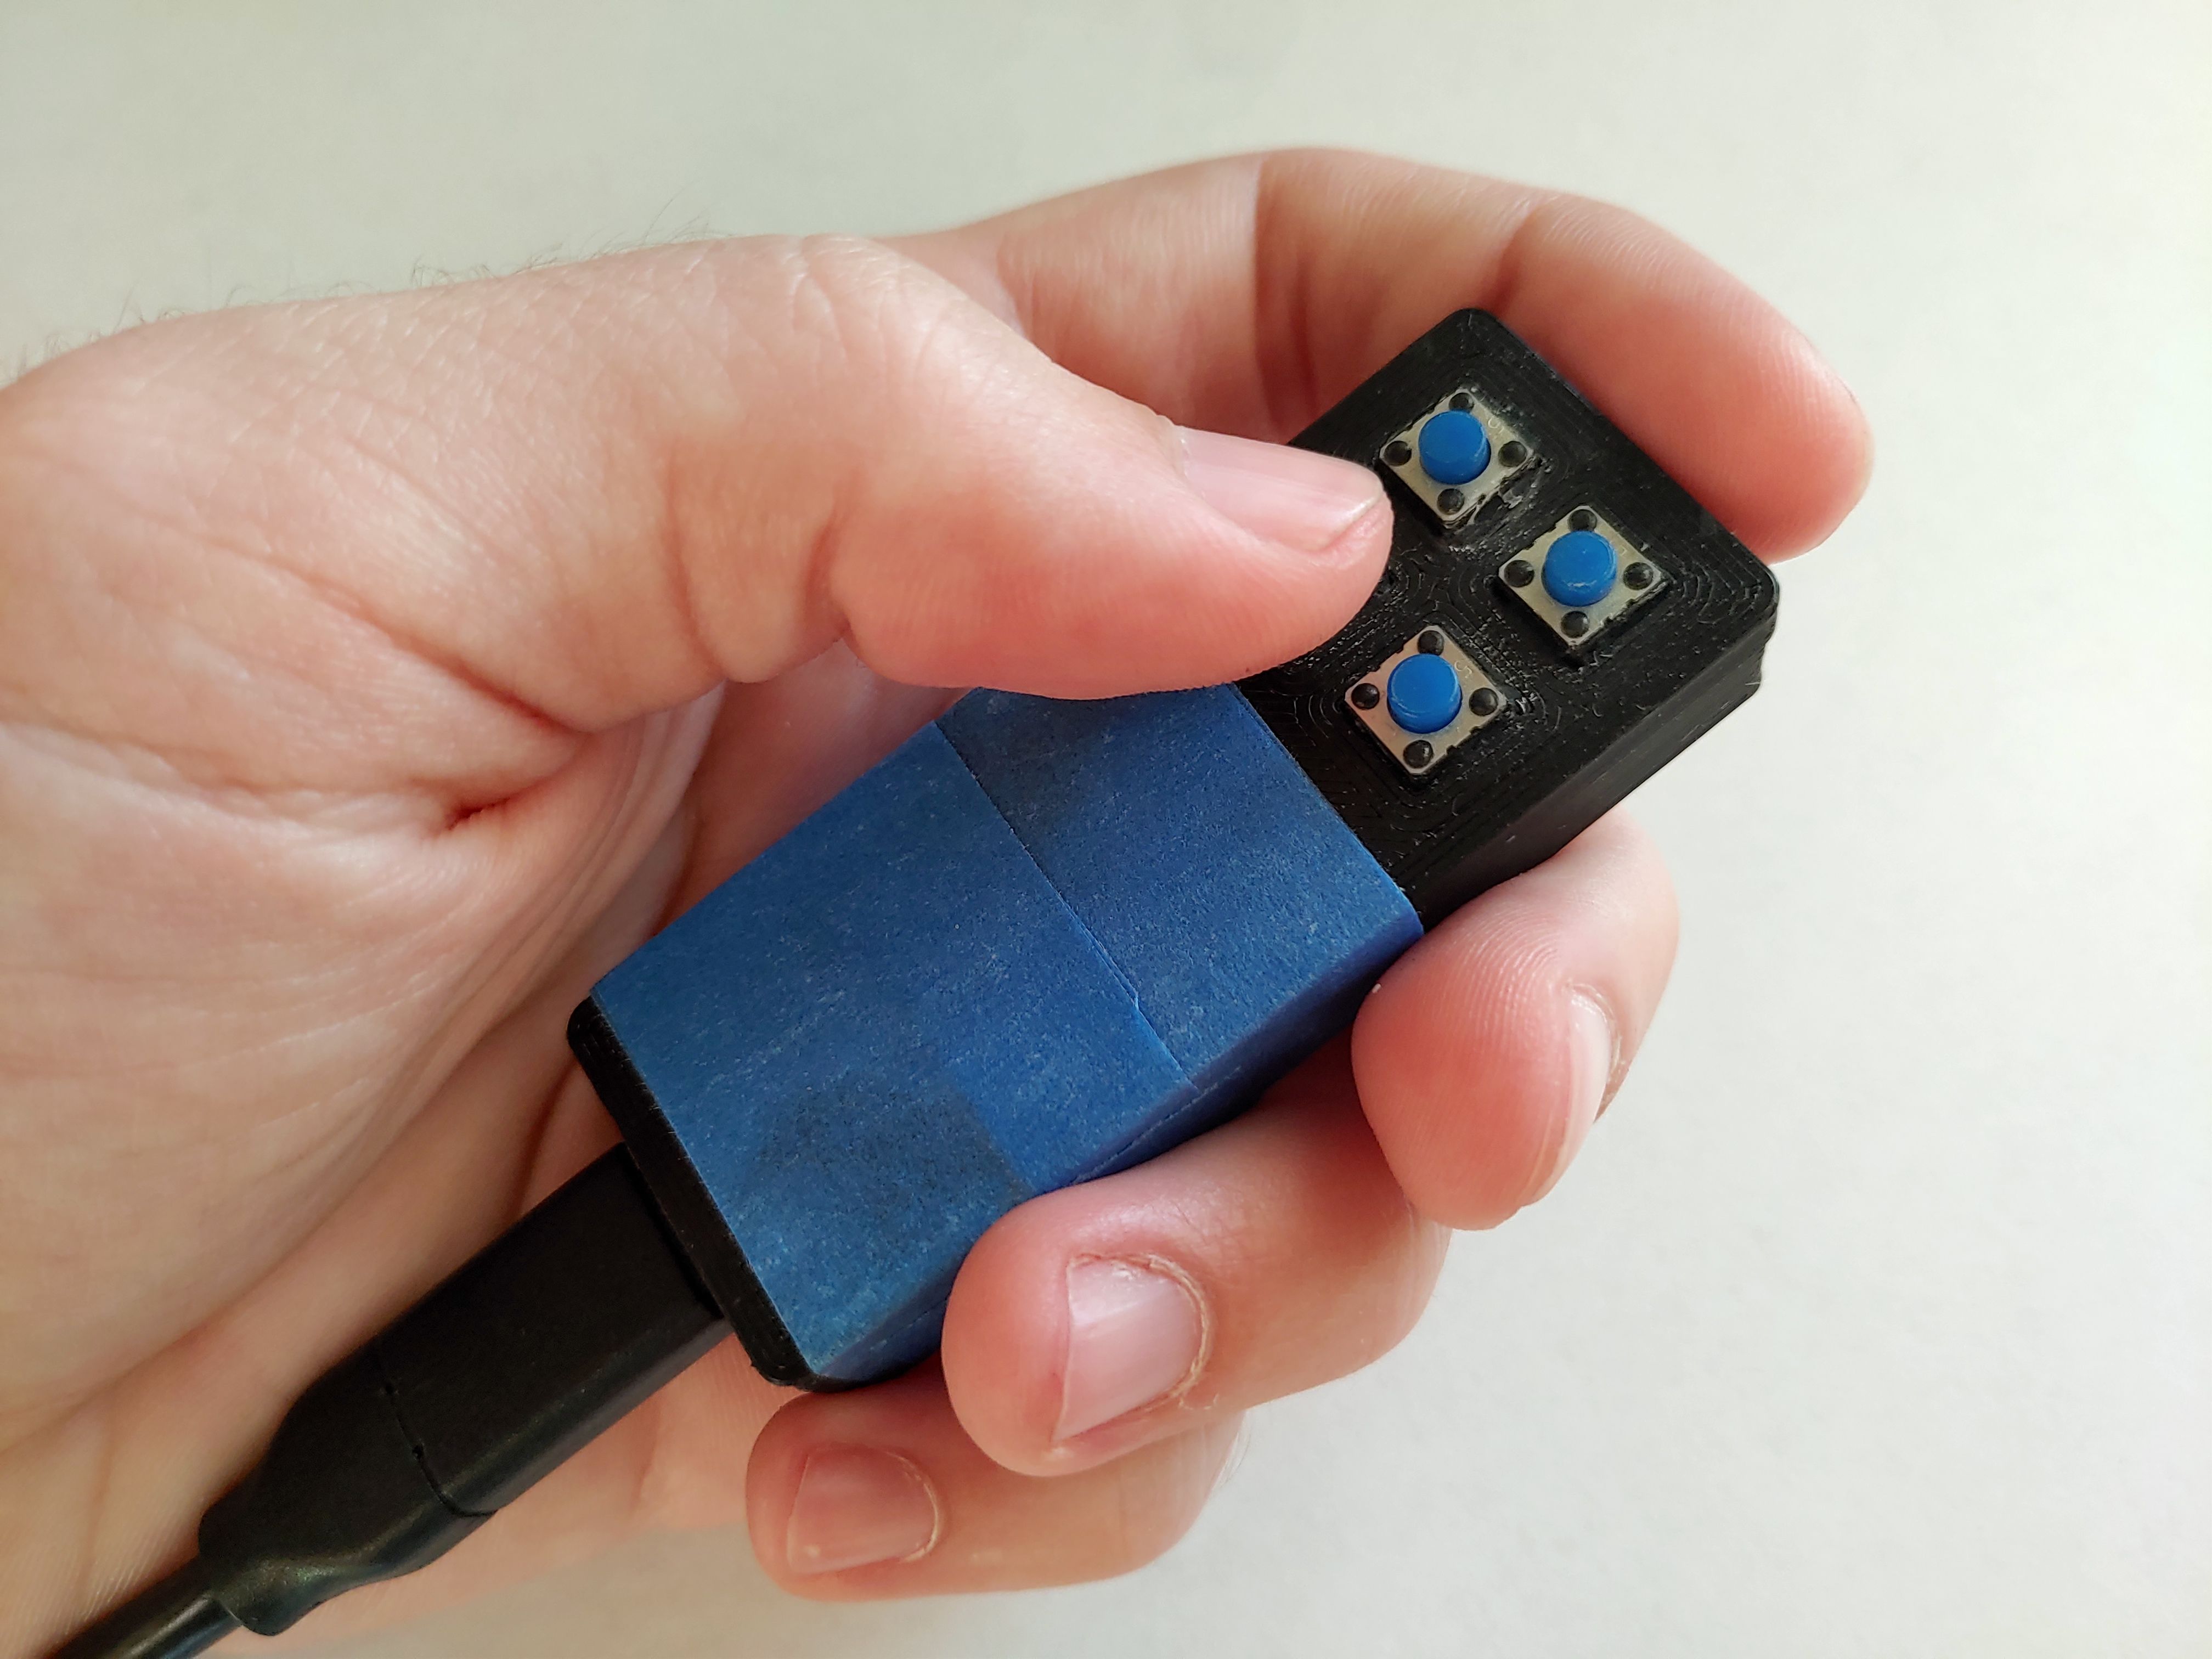
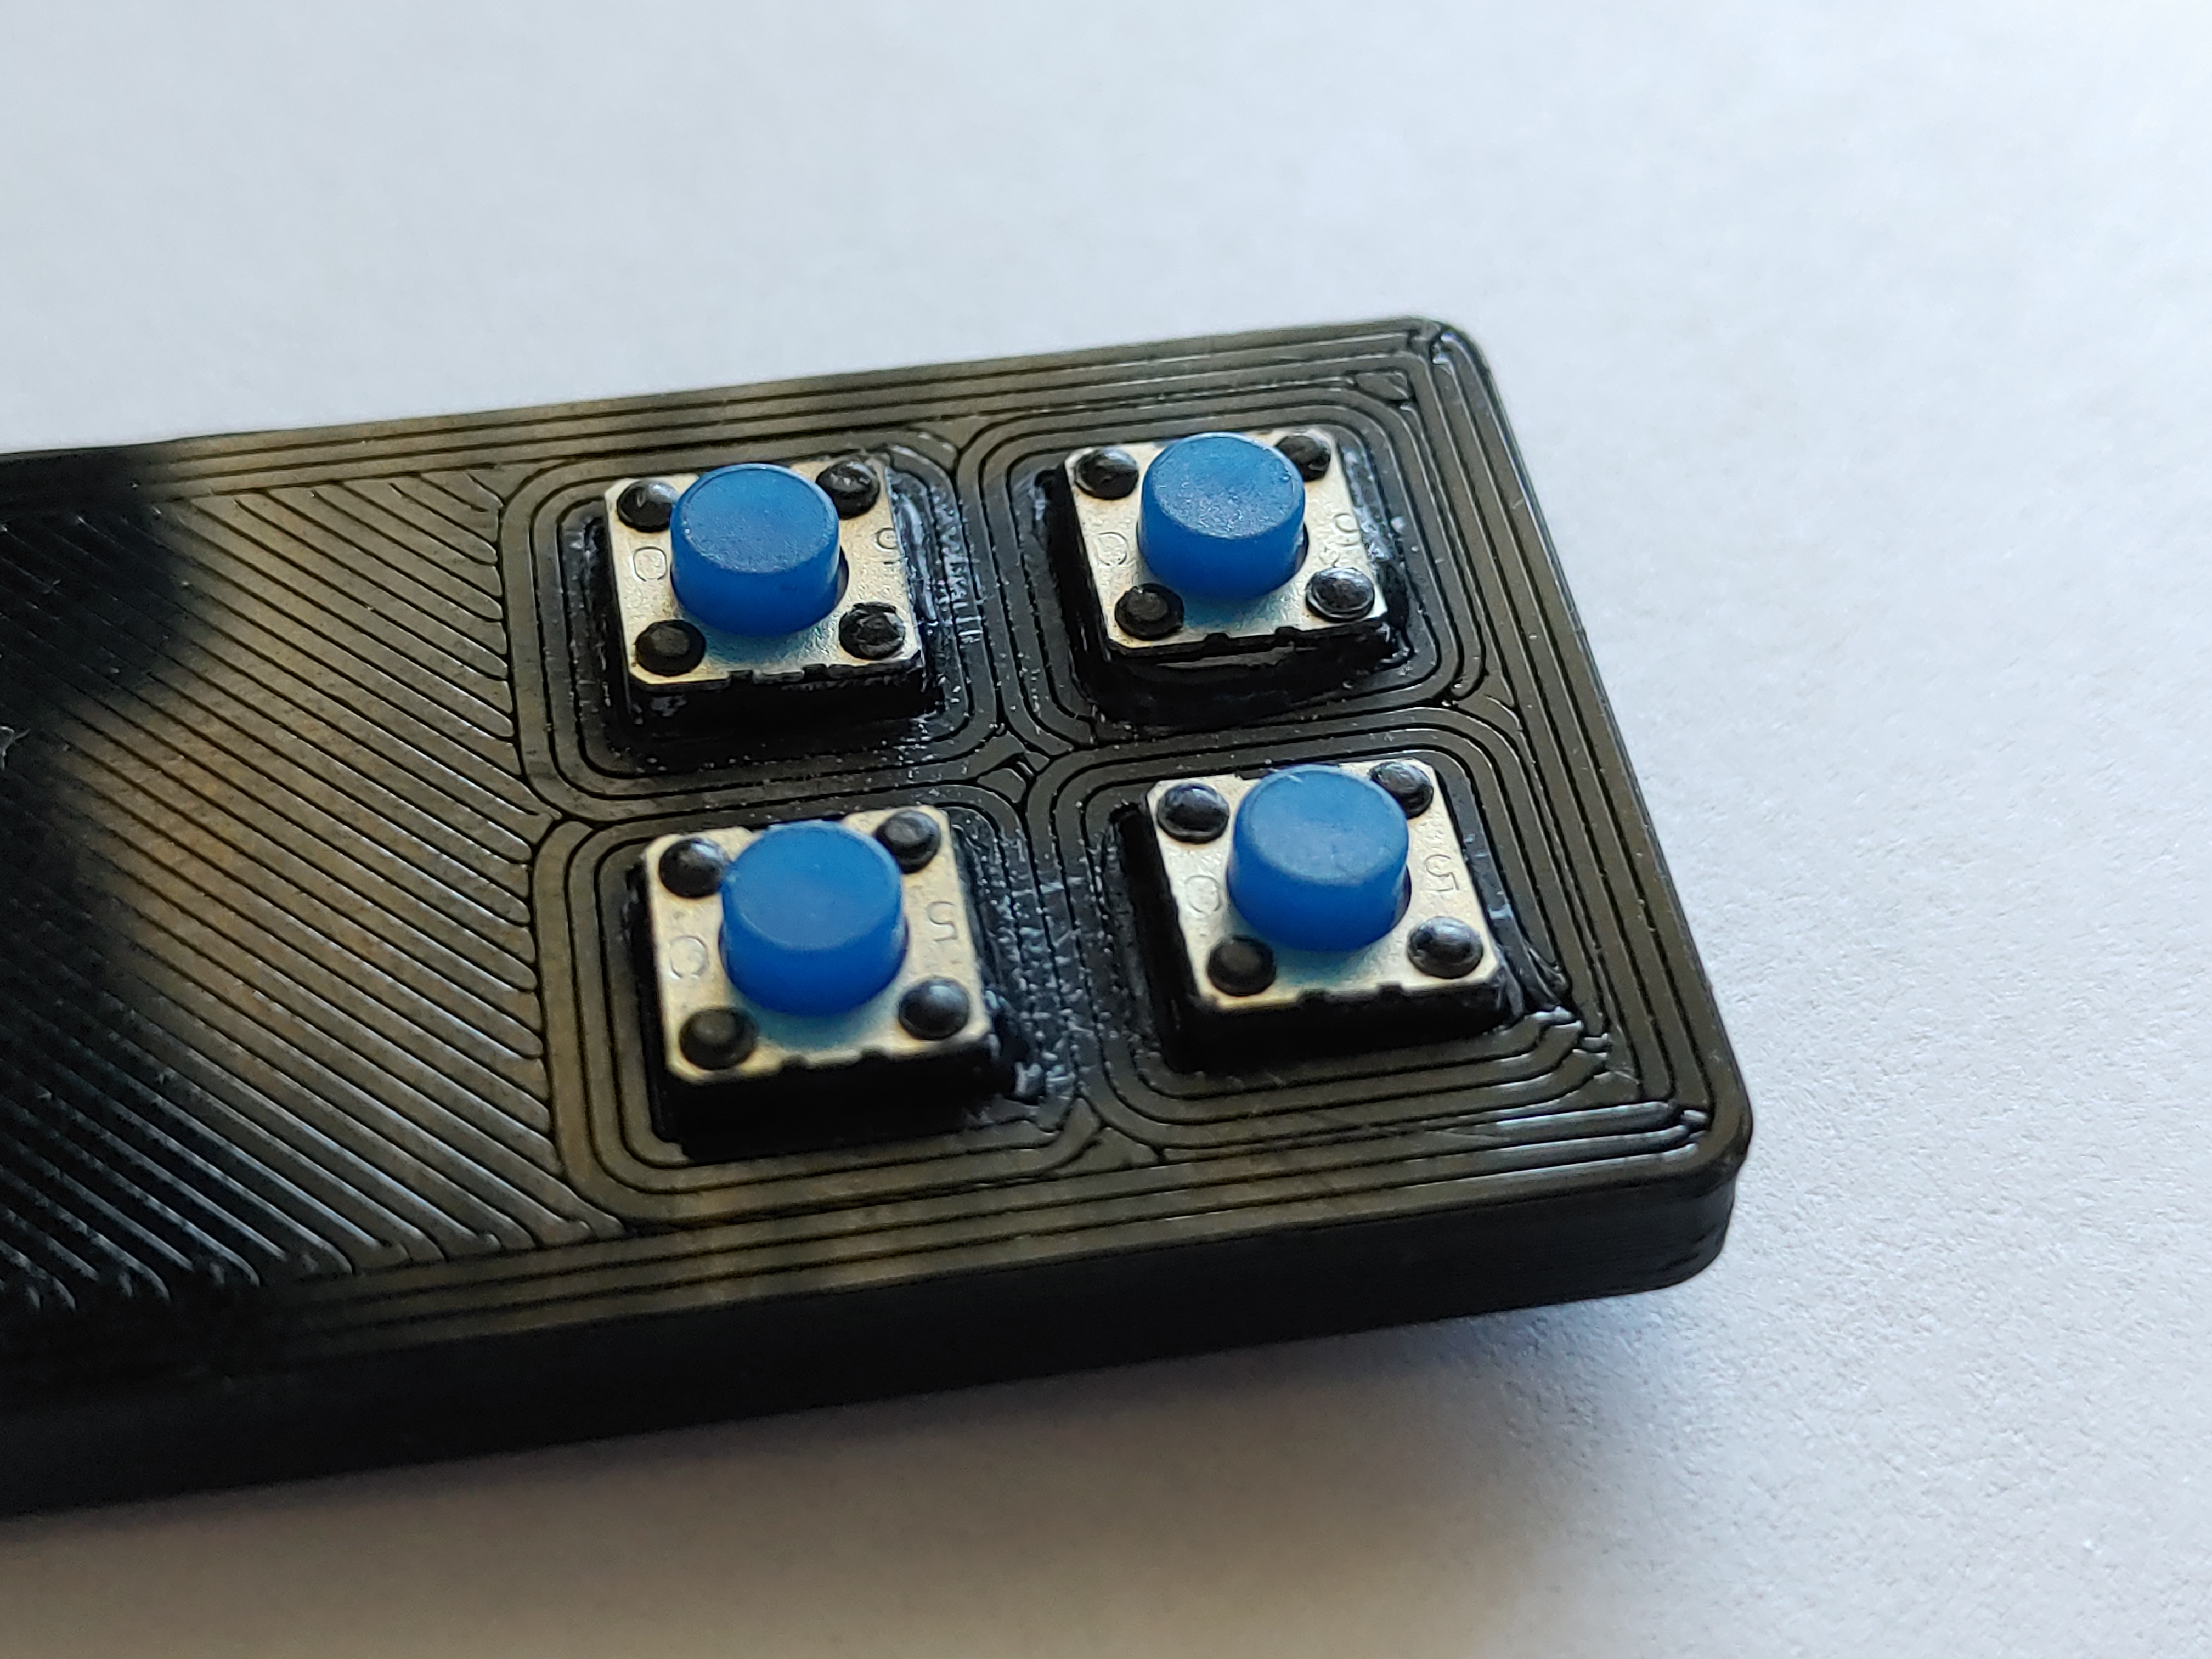
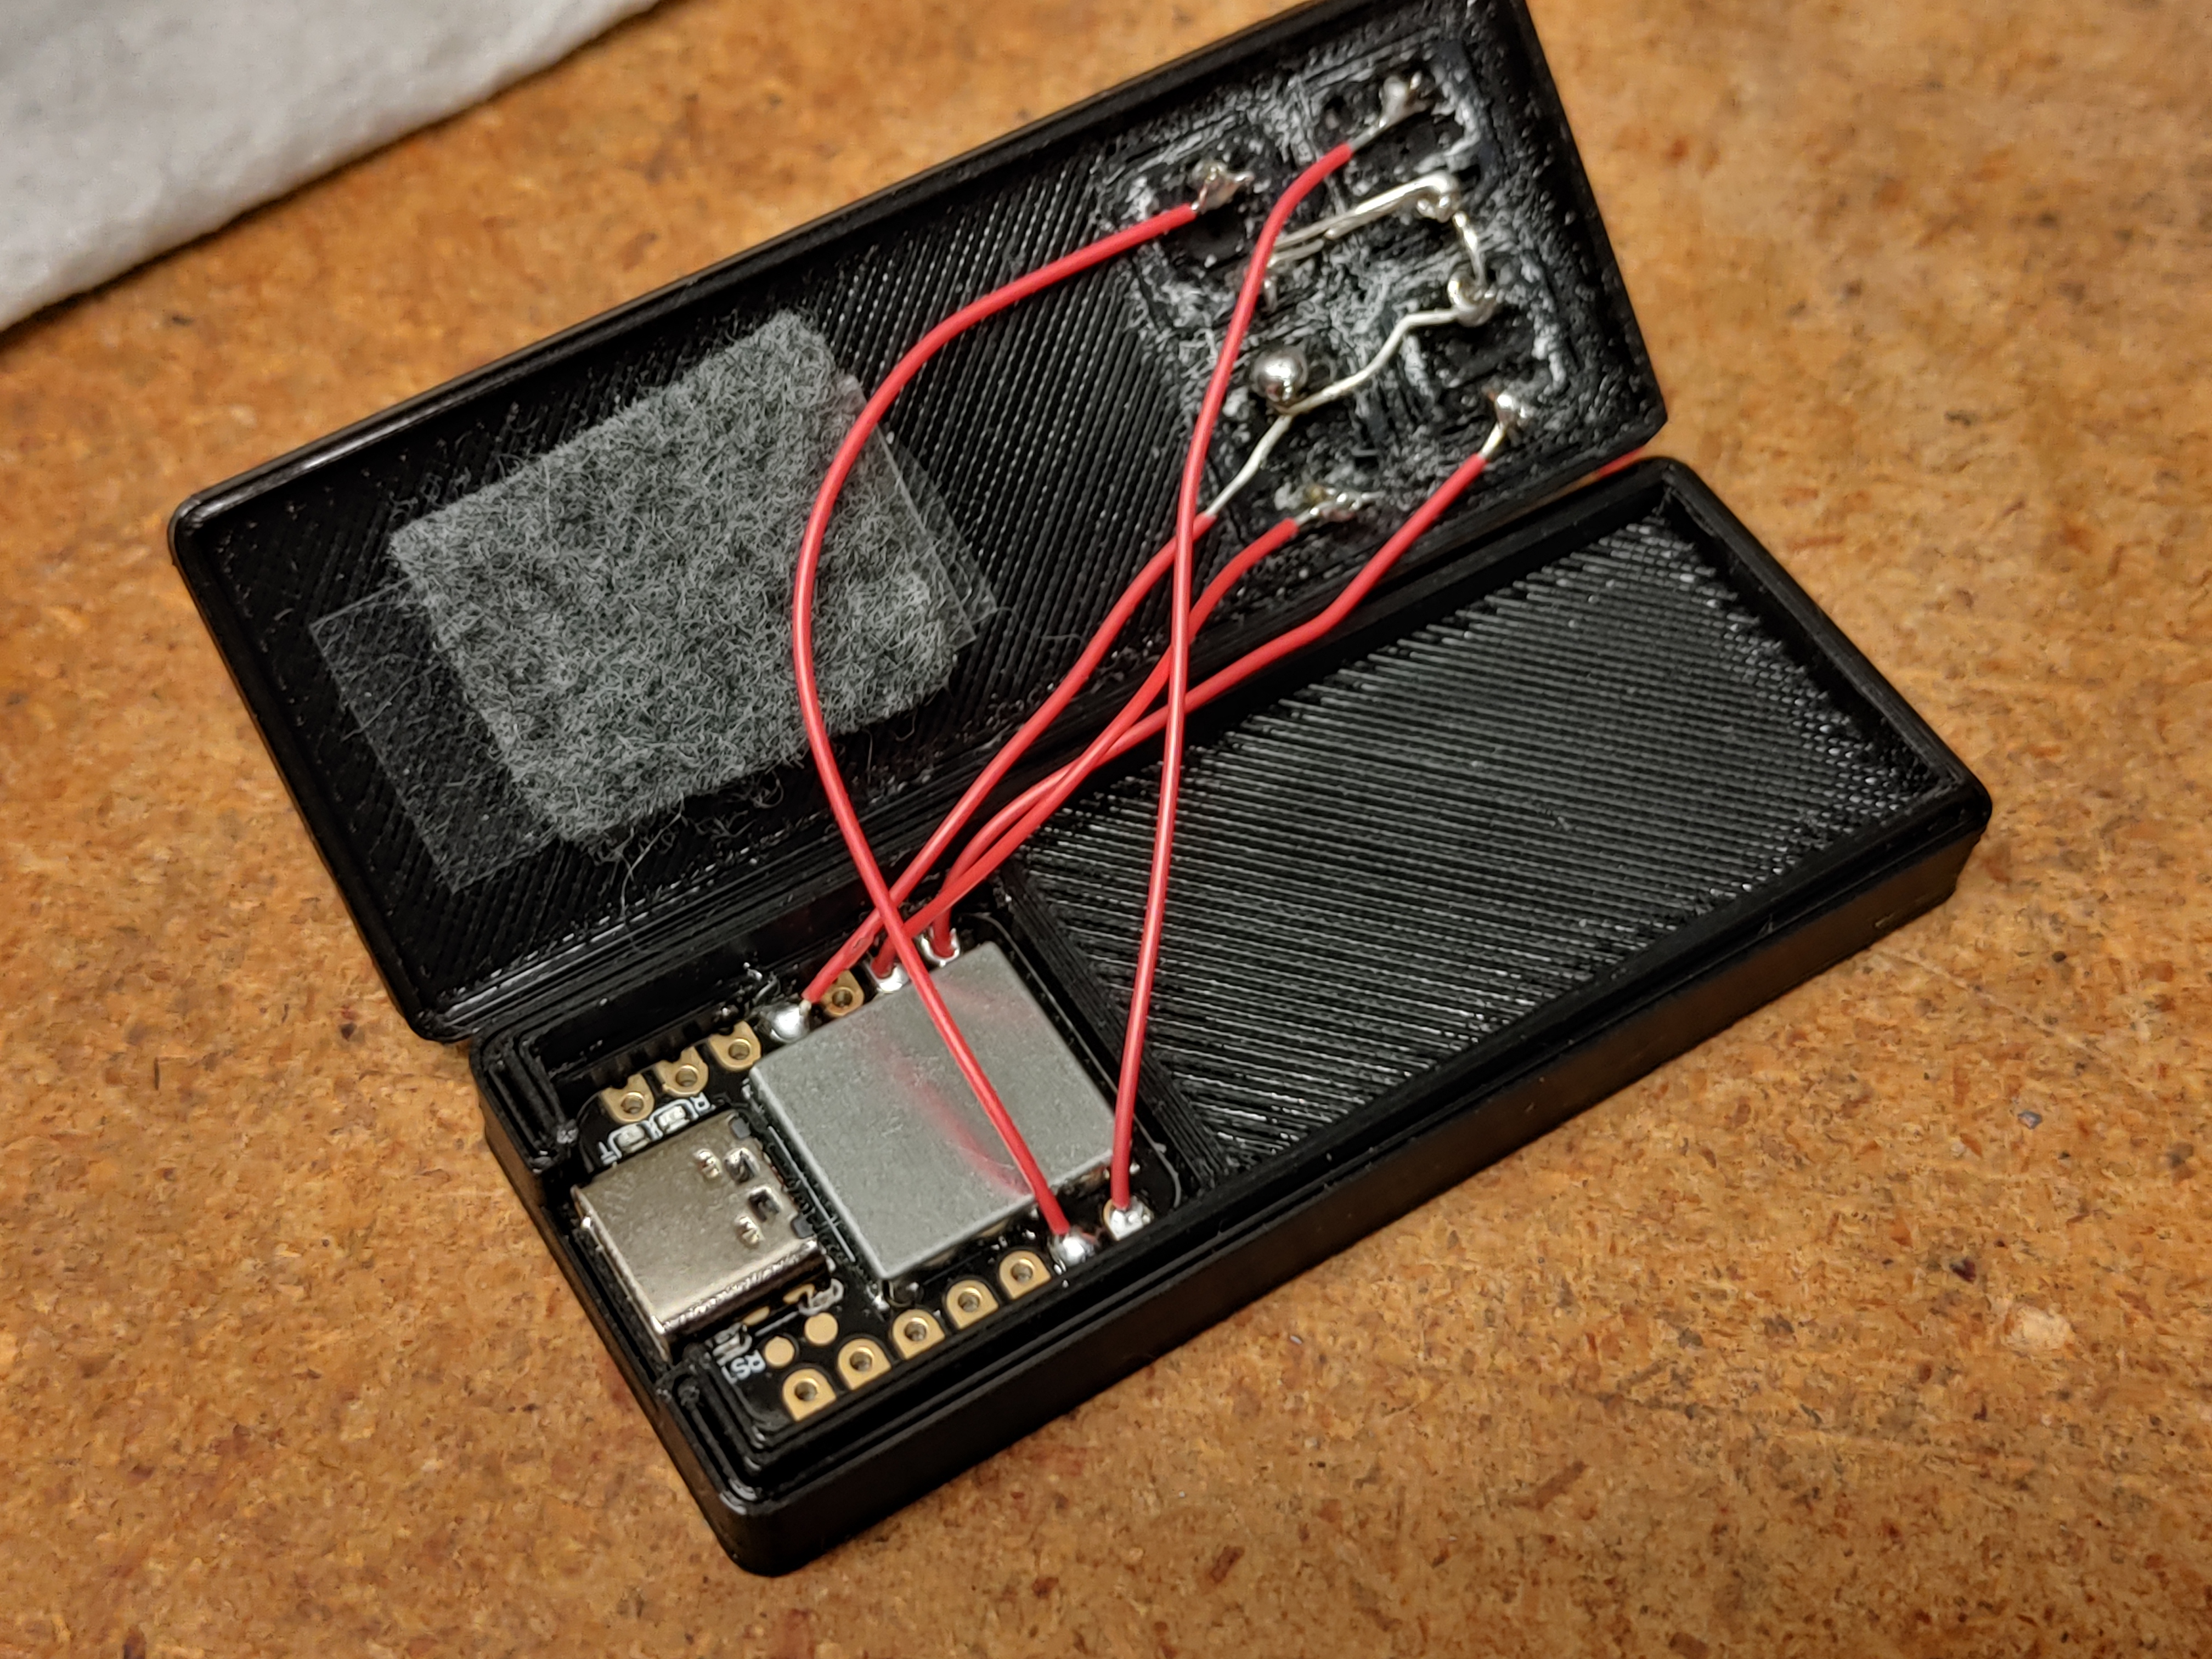
I redesigned the enclosure around the Seeeduino and 6mm pushbuttons.

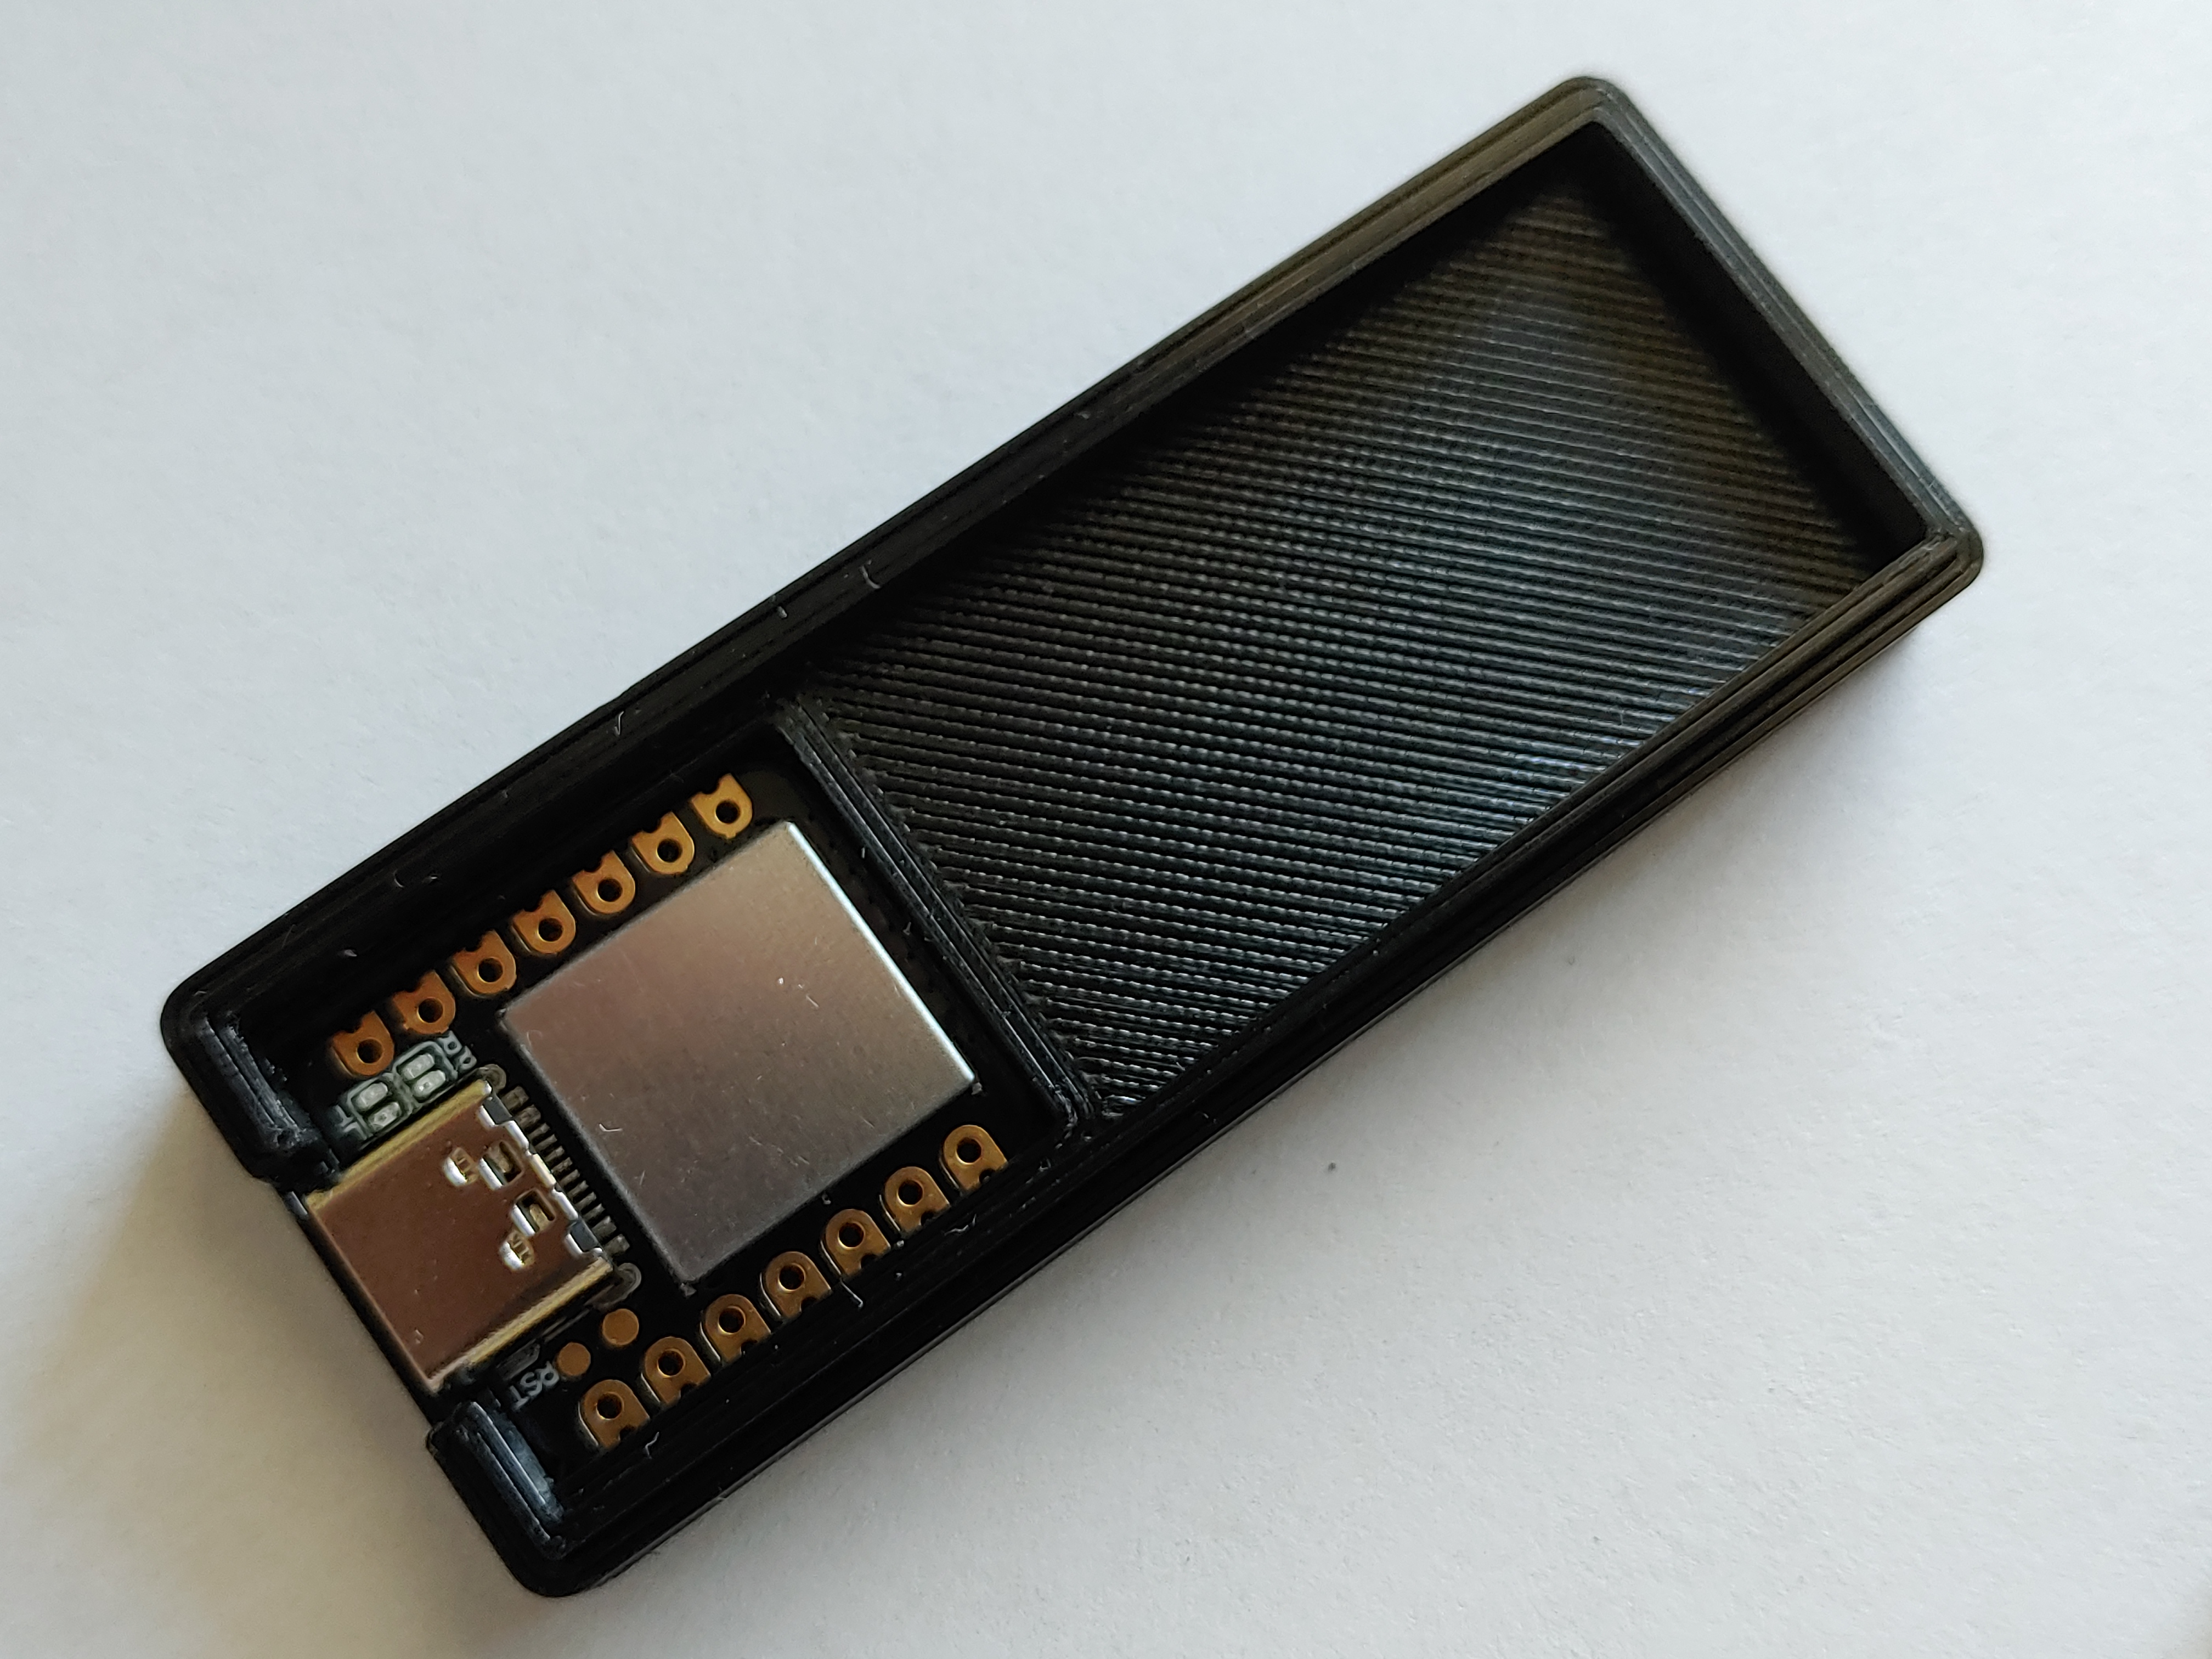


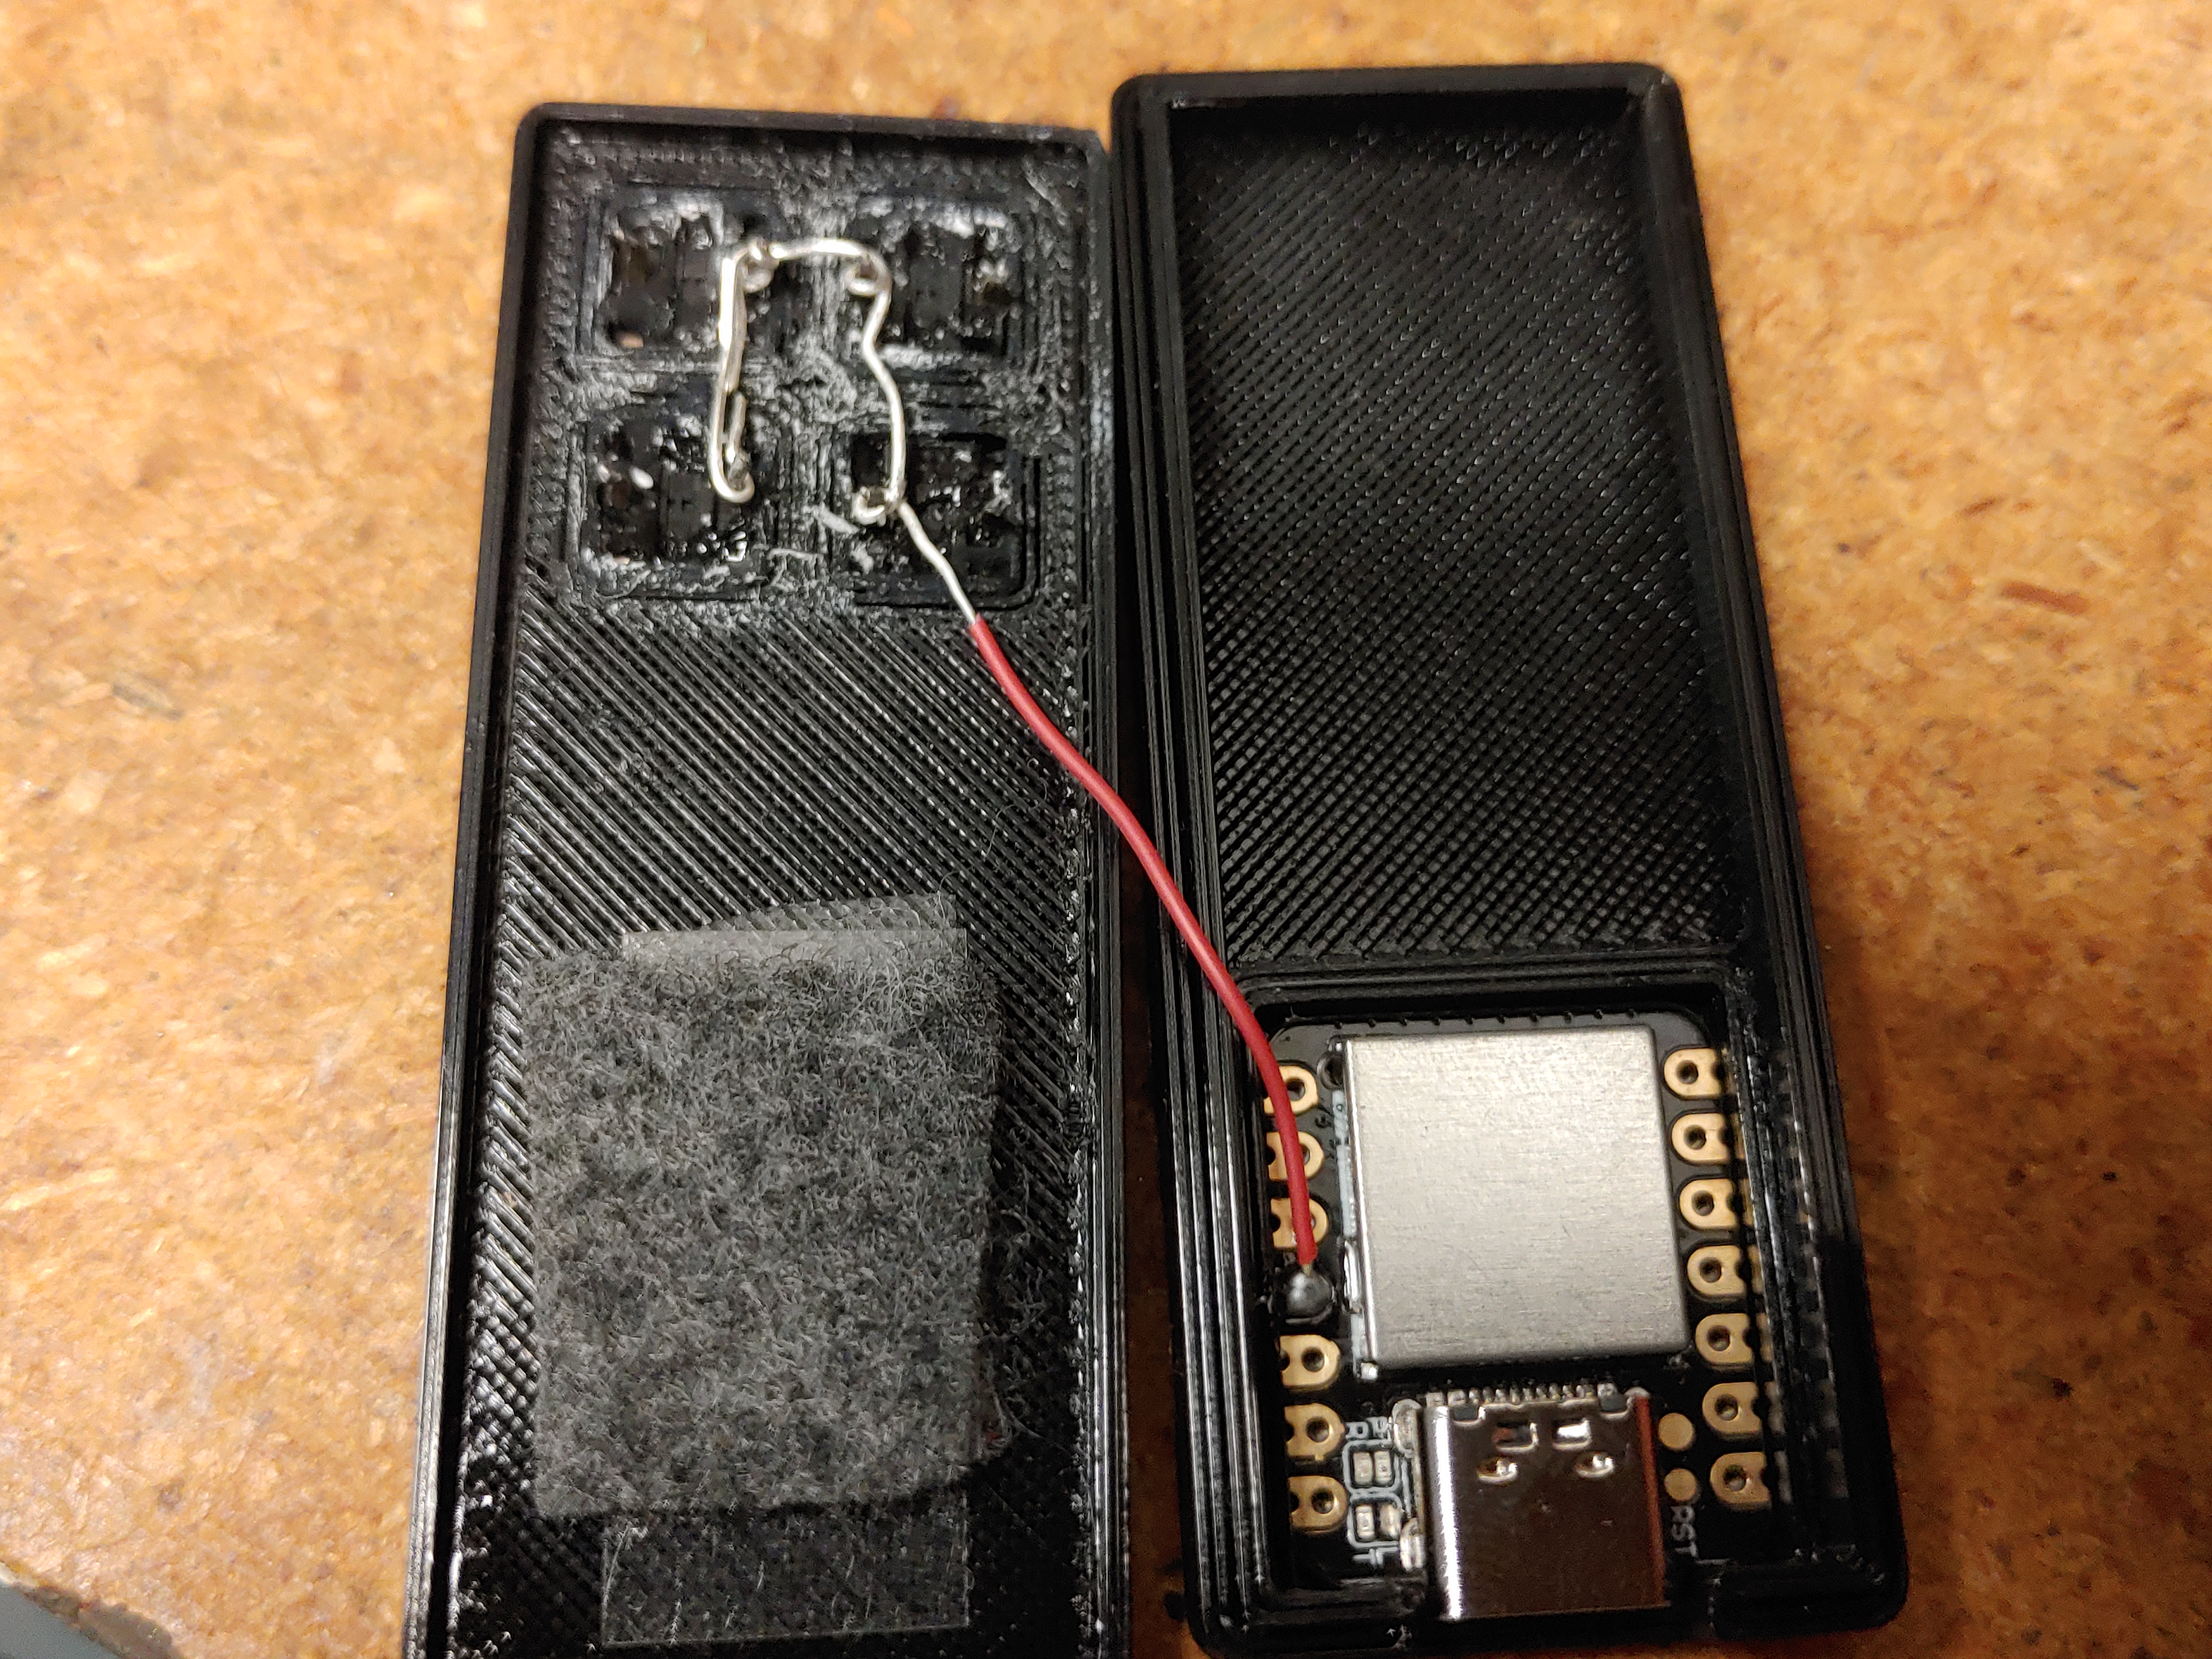
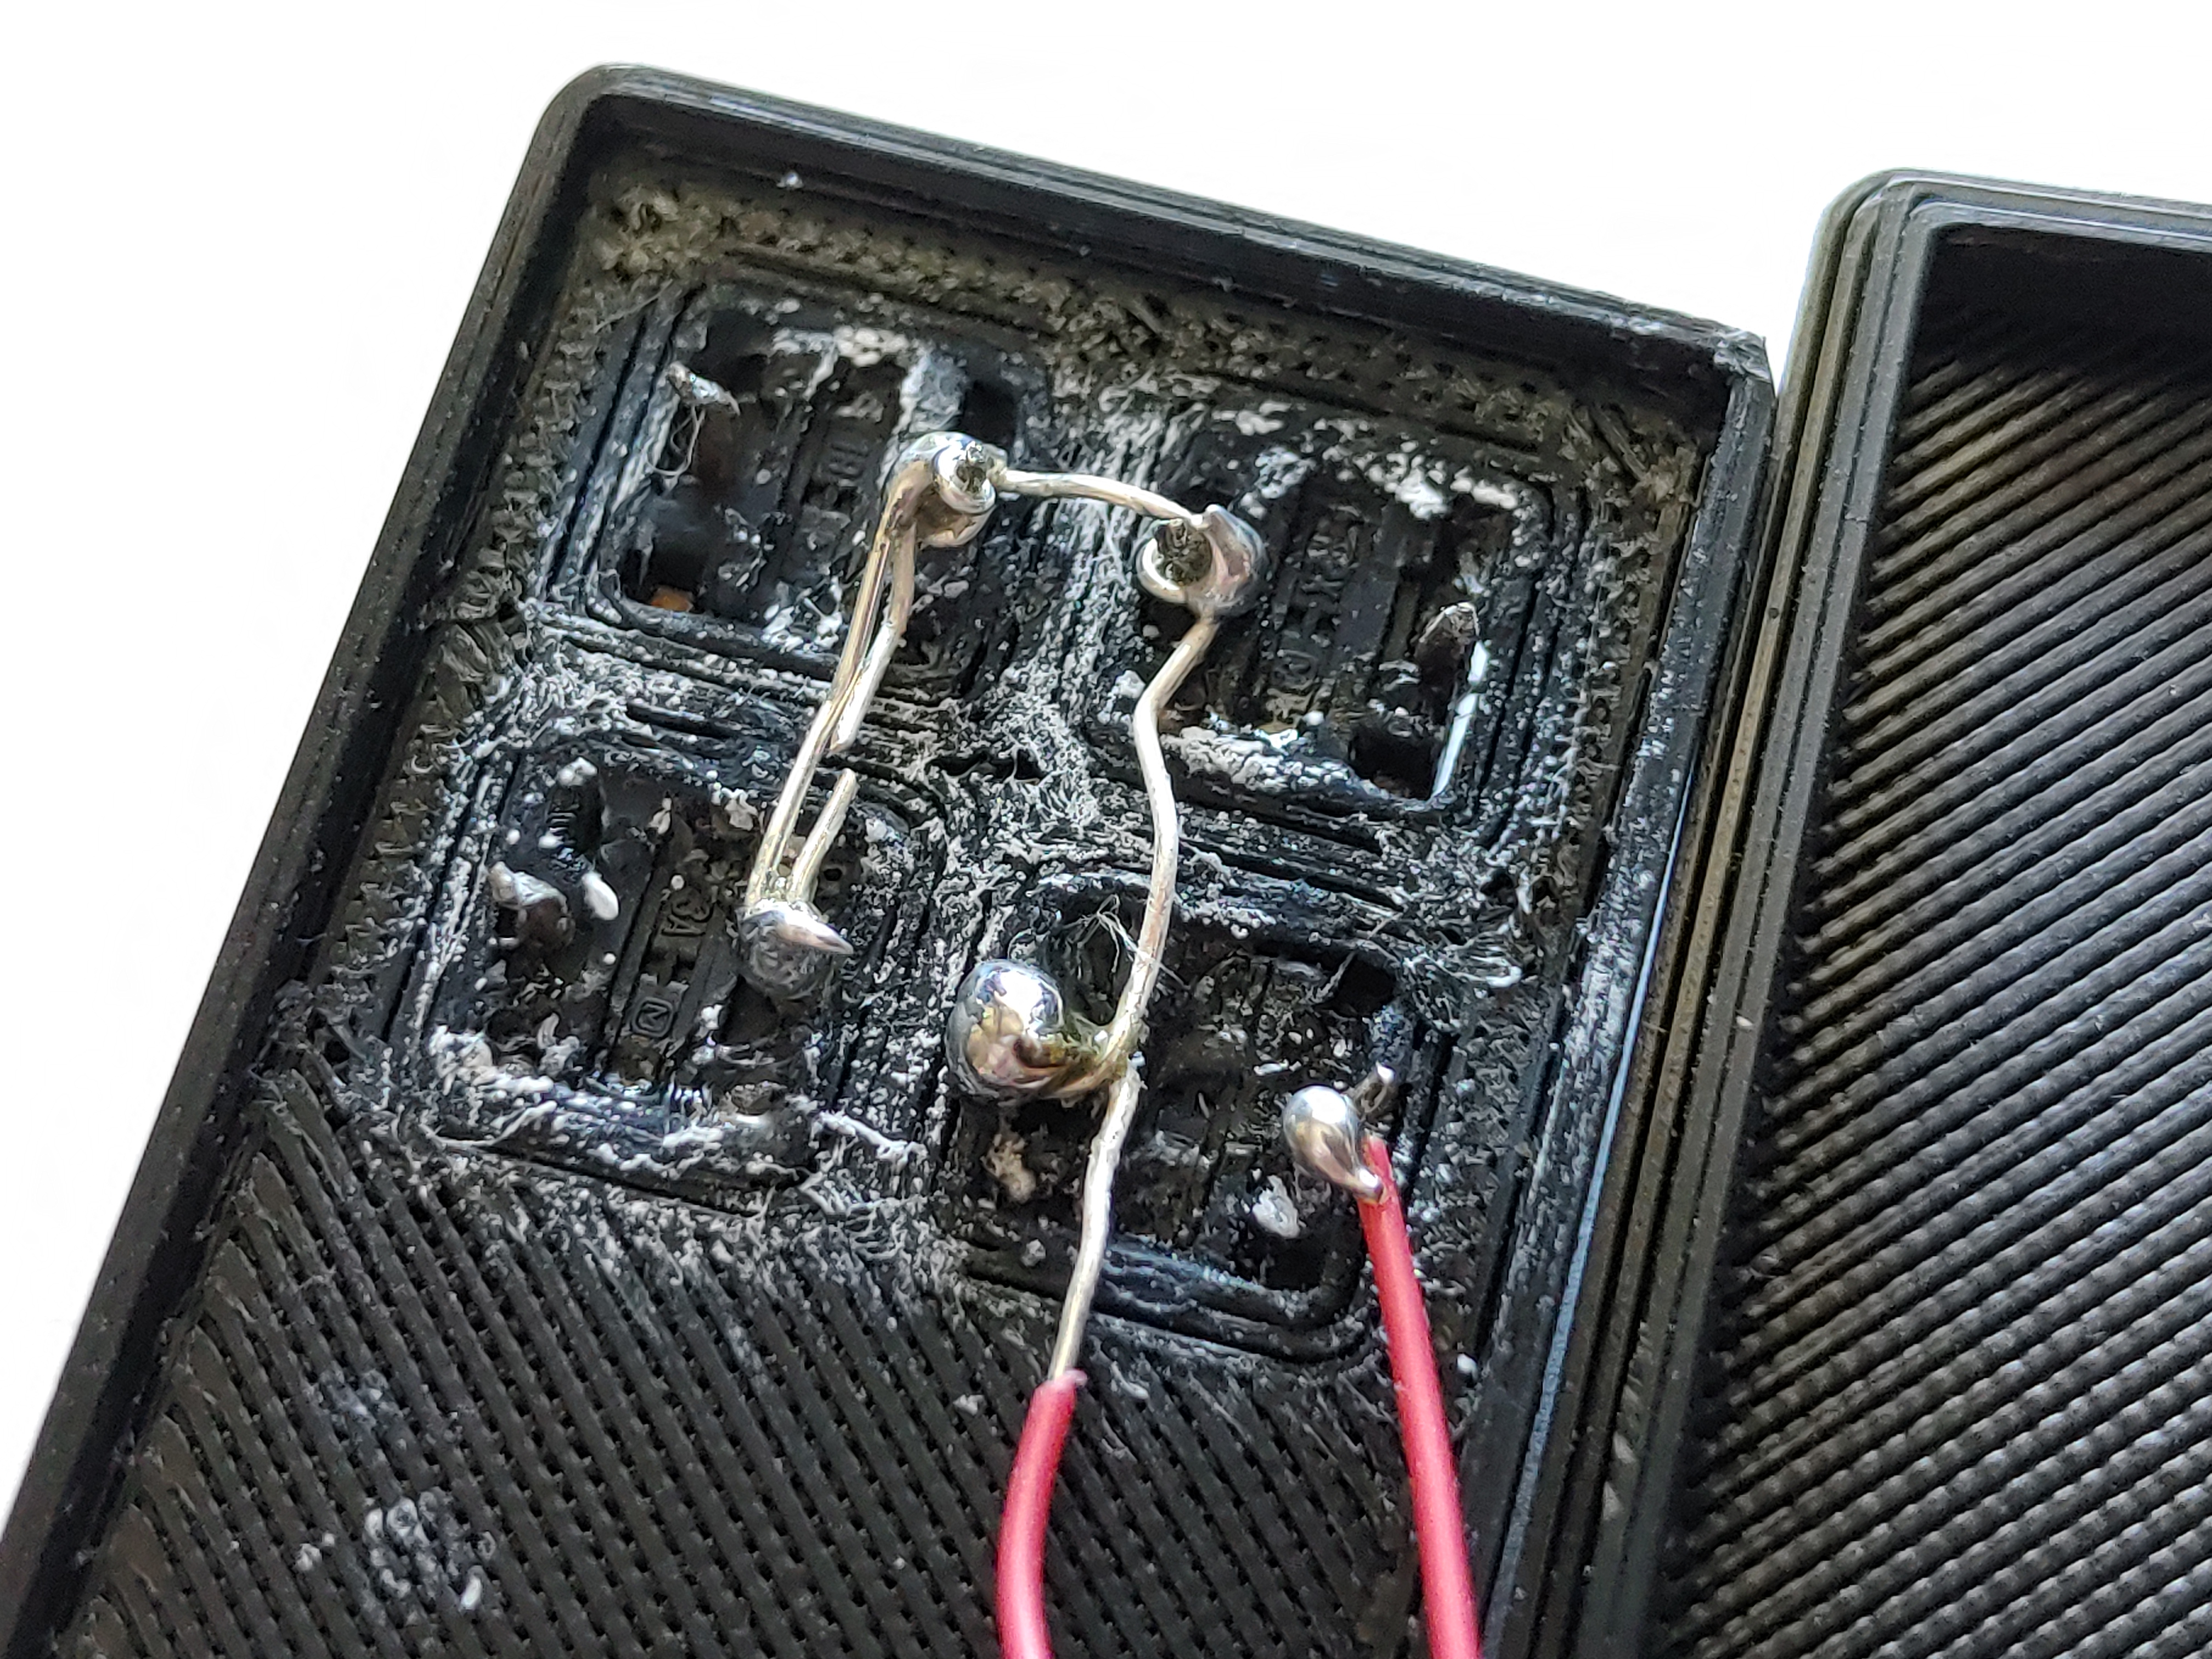
I used superglue to hold the buttons in place, and double-sided tape to fix the controller in its recess. I used doubled-sided tape to attach a piece of felt on the underside of the lid, so that when the lid is firmly shut it provides more support to the controller.
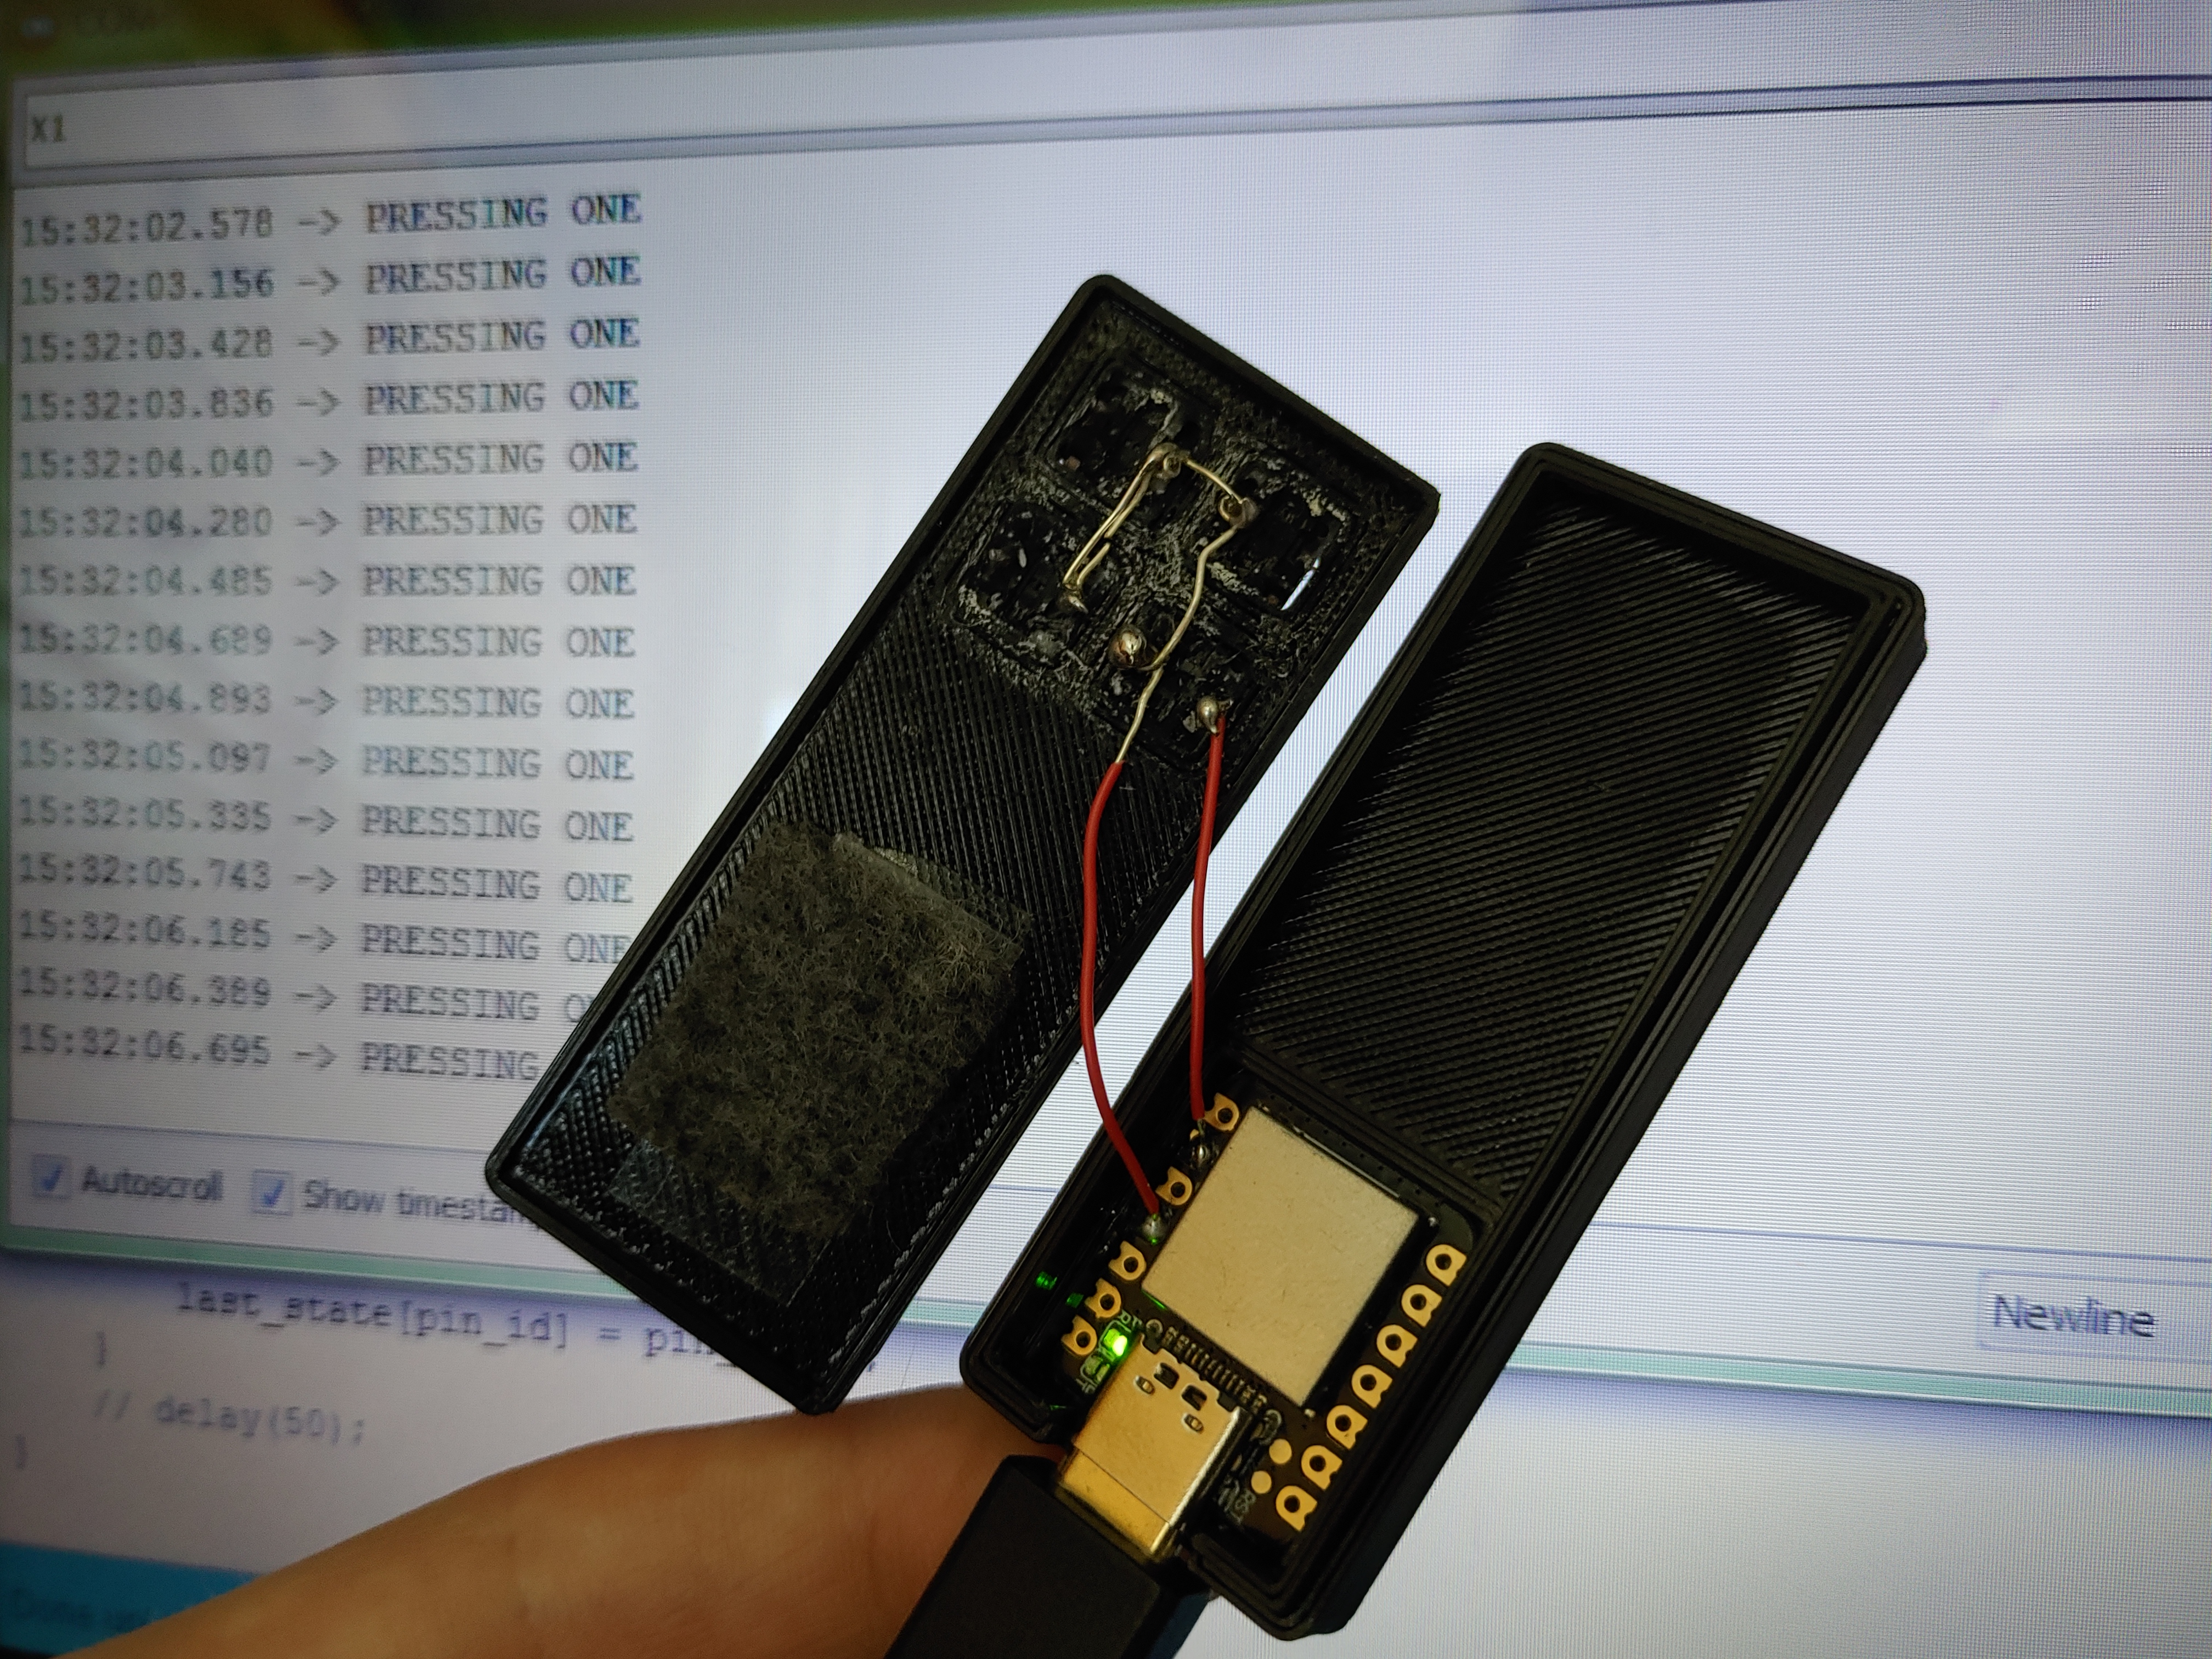
The wiring was straightforward, though I'm still not very good at soldering. The idea is the same as a full-sized keyboard matrix. One wire comes out of the controller and visits all four switches, providing what I am calling the "outbound" signal. Then, the other leg of each switch is wired to a separate pin on the controller so that there are four distinct "inbound" signals. The controller simulates a keypress whenever an inbound signal is received.
I was surprised to find that the Seeeduino does not support QMK firmware like I used on my keyboard. Or at least, I was not able to make QMK Toolbox discover the device even after switching the MCU type to atmega328p. I had to write the firmware myself as Arduino code which took me a while but was overall not too difficult.
Programming for hardware is slower than programming computer software. Normally when I write a program that crashes I can just read the traceback, but in hardware there are no tracebacks. It just stops working. And I have to keep bisecting the code until I find the part that does the least amount of wrongness, each time using a piece of wire to short RESET to GROUND to go back to bootloader mode because regular mode crashes before Arduino can reprogram it.

Even though the first several prints I made were able to snap shut with a bit of friction, for some reason the final one didn't hold itself together very well. But I was tired of printing it so I wrapped it with some blue tape instead of doing it again.

The fourth button (§)
My original plan was for three buttons: Spacebar (right answer), 1 (wrong answer), and Ctrl+Z (go back). After switching to the little buttons it made more sense to have four. It would be nice to map it to Anki's "easy" answer, but that's not straightforward since easy is sometimes 3 and sometimes 4. I am not quite sure what I'll do with it yet.
Conclusion (§)
The finished product functions very well. With a long USB cable I can lean back and review my flashcards comfortably. I added code to debounce the button presses and they seem reliable.
Having said that, I will probably use the ankibutton a few times and then forget about it. The burden of plugging it in, or worse, leaving it plugged in and cluttering my desk space, is simply higher than the value it provides. Mission accomplished!
Download (§)
Appendix: Installing Seeeduino Xiao into the Arduino IDE (§)
- Open File > Preferences, and into the "Additional Boards Manager URLs", paste this:
https://files.seeedstudio.com/arduino/package_seeeduino_boards_index.json. - Open Tools > Board > Boards Manager, and download "Seeed SAMD Boards", which should appear in search results for "xiao".
- Select Tools > Board > Seeed SAMD > Seeeduino Xiao.
When the Seeeduino is in normal operating mode, it will occupy one COM port. If you use a piece of wire to short RESET to GROUND twice in a row, it will enter bootloader mode and occupy a different COM port. During bootloader mode it will also appear in Windows as an external storage device.
When uploading the code from Arduino IDE to the board, it will automatically go from normal mode to bootloader mode and back again. But if you need to reset it manually due to a crash, you need to go back to Tools > Ports and pick the bootloader port before uploading again.
I found that uploading the code would often make my computer reset all of its USB connections, including my external hard drives, which was problematic for me. I did the remainder of the programming on a separate laptop to avoid this.
At first, my laptop was not able to recognize the device at all. I had to download seeed_usb_serial.inf, and then tell Device Manager to install a driver from that file. When Device Manager asks for a driver location it only allows you to select folders, not files, so just select the folder into which you downloaded the inf file.
After these steps I did not encounter any more issues with programming the controller.
Contact me: writing@voussoir.net
If you would like to subscribe for more, add this to your RSS reader: https://voussoir.net/writing/writing.atom