How to run an SSH, SFTP server from Termux
With Syncthing in one hand and Termux in the other, you can do almost all of your pc-phone file transfer wirelessly. Here's how to serve SSH and SFTP from Android.
"Almost all" (§)
I have an LG K10 running Android 7 with an SD card inserted. I find that Termux isn't able to write to the SD card. The GitHub issues say that you can write to one directory, but you can't get general access. You'll have to stick to writing to the internal storage.
Initial setup (§)
Download and install Termux.
Run
termux-setup-storage, grant it permission, then reboot Termux. You can typeexitor pull down the notification and press the Exit button.You will find a new folder
~/storagewhich contains some symlinks to various directories on the phone. Personally, I prefer to remove this withrm -rf ~/storageand thenln -s /storage/emulated/0 ~/internal, but this is not required.Run
pkg install openssh.You will probably also want
pkg install vim.
Password auth (§)
At this point I am following the official Termux Wiki page on Remote Access, but I'll simplify the presentation:
Run
cat /data/data/com.termux/files/usr/etc/ssh/sshd_configto confirm that the contents match the default as seen on the wiki:PrintMotd yes PasswordAuthentication yes Subsystem sftp /data/data/com.termux/files/usr/libexec/sftp-serverRun
passwdto pick a password. I'll be switching to key-based authentication in a minute so I'm just going to pick1as my password. Of course, this password doesn't apply to your whole phone, just the termux emulator.Run
sshdto start the server.You can run
ifconfigwithin Termux to find your phone's local IP address, or, depending on your home router, you might be able to assign the phone a hostname from the admin panel.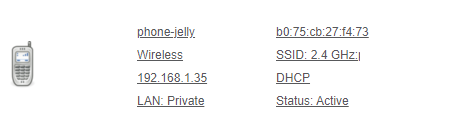
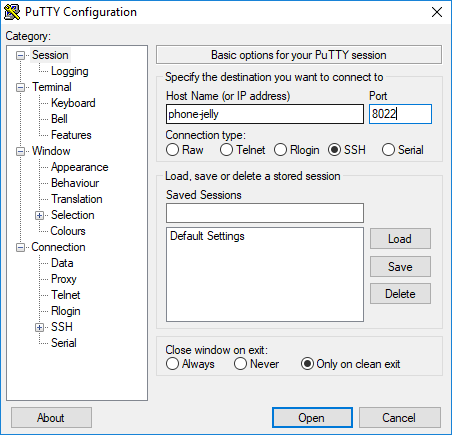
Open an SSH client on your PC. I'll be using Putty.
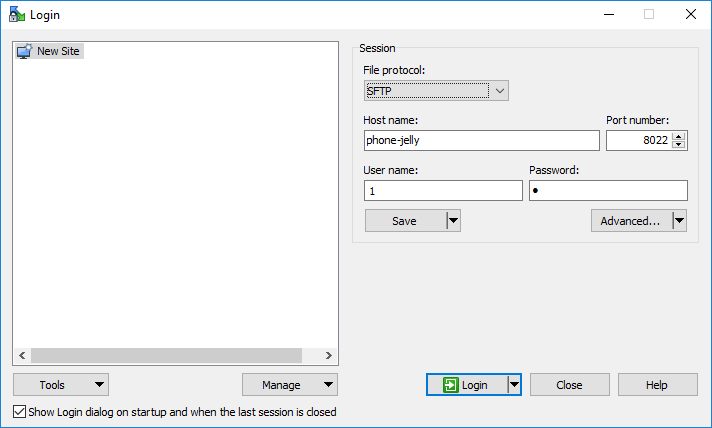
Enter the phone's hostname or IP address, and choose 8022 for the port, and start the session.
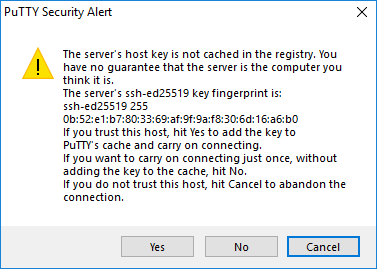
Putty may warn you that it has never seen the server's fingerprint before, which is expected and you can accept it.
In Putty, the server will prompt you for a username. You may type anything your want, or even leave it blank and just hit Enter. Then it will ask you for the password you chose earlier.
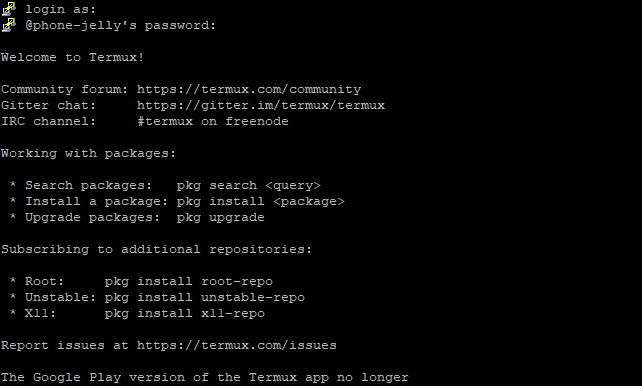
Congratulations! Try running a command like
ls.Open an FTP client on your PC. I'll be using WinSCP.
Enter the phone's hostname/IP and port. When I typed 8022 into the port field, WinSCP automatically changed the protocol selection from SFTP to WebDAV, so change it back to SFTP. You may enter anything you want for the username, but if you leave it blank then WinSCP will prompt you during the login process, so maybe you'd like to make something up. Also enter your password, then log in.
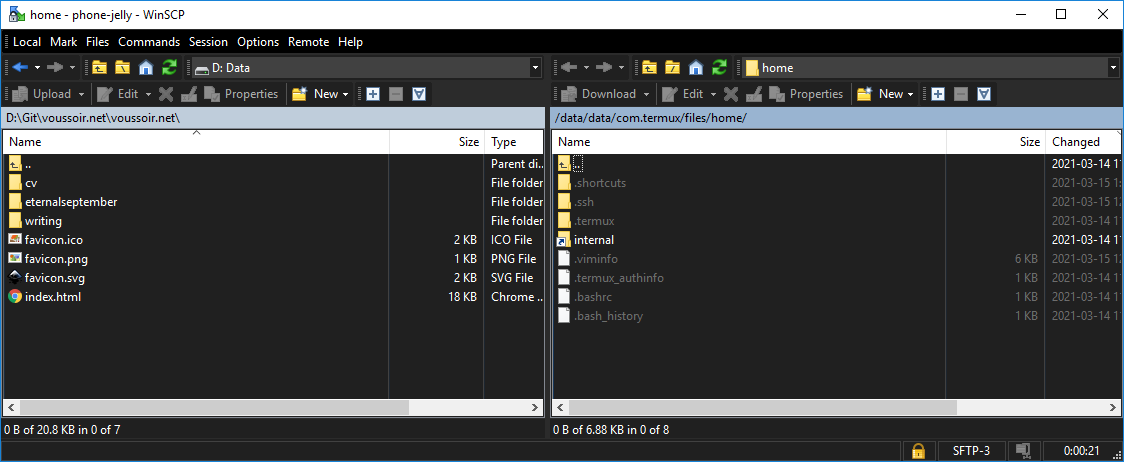
Congratulations! Try uploading some files to the phone.
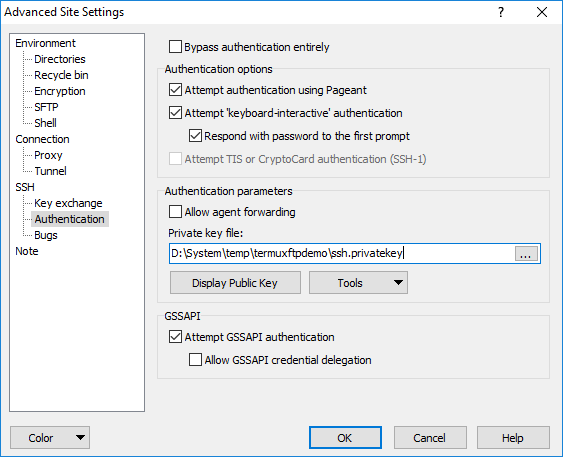
Keyfile auth (§)
I assume you won't be leaving your phone's server on very long, or giving it an internet-facing port, so you can leave it in password auth mode if you want. But this is a great chance to get some practice with SSH keyfiles anyway, so keep reading.
When you downloaded Putty, you should have also gotten
puttygen.exe. Open that program.Leave the key type as RSA and press the Generate button to make a public/private keypair. You can use the comment field to give it a memorable name.
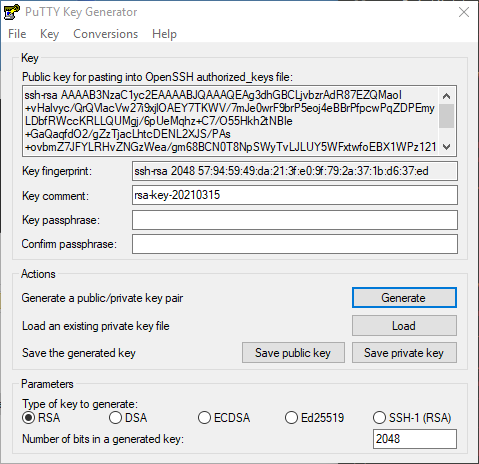
You may give the keypair a password, but you'll have to type this password every time you log in with Putty/WinSCP, which you may not want to do. So you can leave it blank. In a 'real-life' SSH situation, you can use a passworded keyfile to double your security; someone would have to steal your keyfile and know your password to log into your servers.
Use the "Save public key" and "Save private key" buttons to write your keyfiles to disk. You can pick any kind of name and file extension you want. I use a name like
voussoir.ssh.publicandvoussoir.ssh.private. Do not close puttygen yet.We need to teach the server to trust the public key we've created. In Putty, use vim to create a file called
~/.ssh/authorized_keys.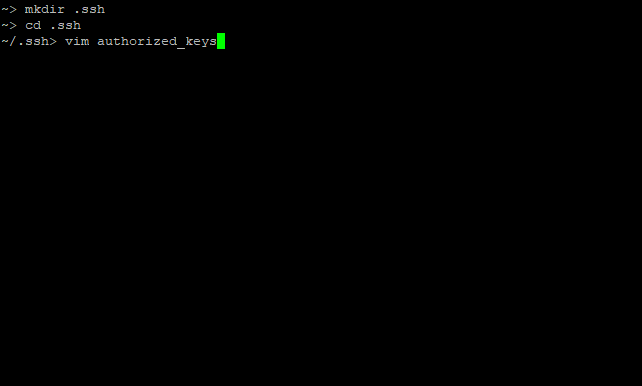
In the puttygen UI, the text box at the top has the text that needs to go into this file. You'll notice that the format of this text is
<key type> <base64> <comment>where the key type isssh-rsa, the base64 is the content of the publickey file you saved, and the comment is what you wrote earlier. To paste into vim over putty you may need to press Shift+Insert.Save and quit with Esc +
:wq.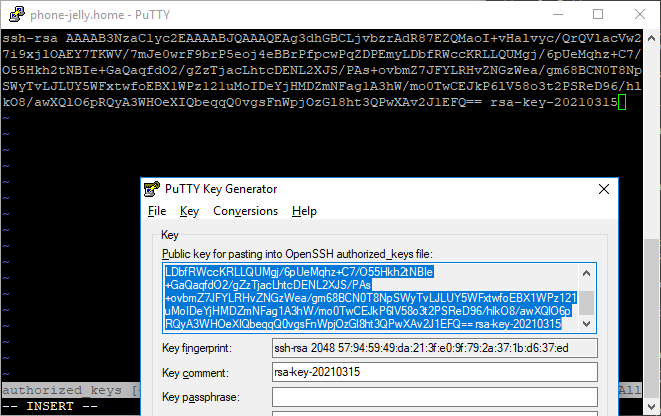
Also modify the
sshd_configfile to disable password authentication.vim /data/data/com.termux/files/usr/etc/ssh/sshd_config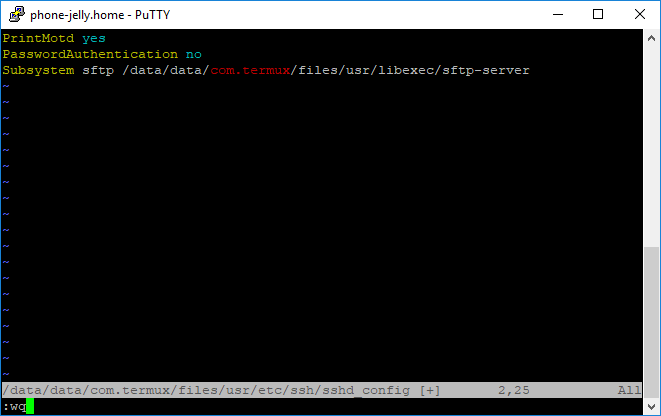
Close Putty and WinSCP. Stop the server with
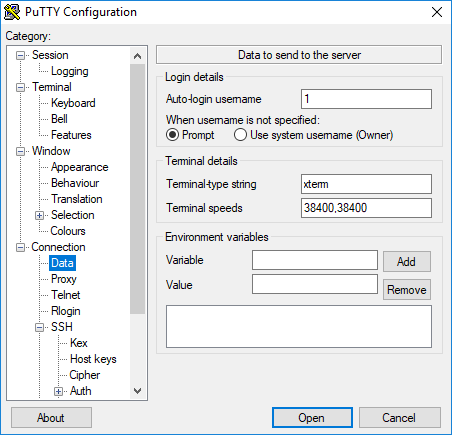
pkill sshdand run it again withsshd.Open Putty again, and enter the hostname and port.
On the left menu, choose Connection > Data and put something in the username box so you won't get prompted during login.
Then choose Connection > SSH > Auth and browse for your private keyfile.
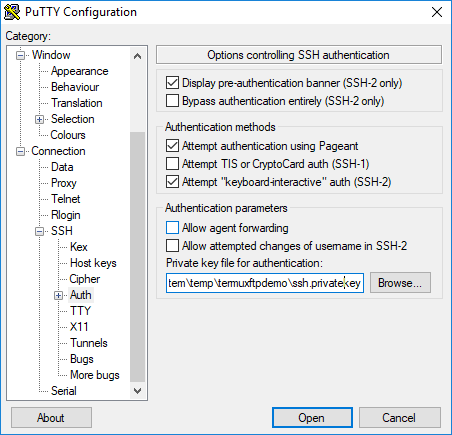
Before pressing the Open button, you may want to go back to the main Session screen and click the Save button to store the configuration. Then click Open.
Congratulations!
Open WinSCP again, and enter the hostname and port and select SFTP. Put something in the username box.
Click the Advanced button and select SSH > Authentication. Browse for your private keyfile.
You may want to save the session configuration. Then click Login.
Congratulations!
Homescreen shortcut (§)
Now we'll put a shortcut on the homescreen to launch the server in a single tap.
Download and install Termux:Widget.
Using the shell or WinSCP, create the folder
~/.shortcutsand create an.shfile inside there. I'll call itsshd_widget.sh.Here is the content of my script file:
sshd
echo SSH server running.
echo press Enter to terminate.
read continue
pkill sshd
On your phone's homescreen, create a new shortcut widget from the Termux:Widget section. It will show you the files inside
~/.shortcuts.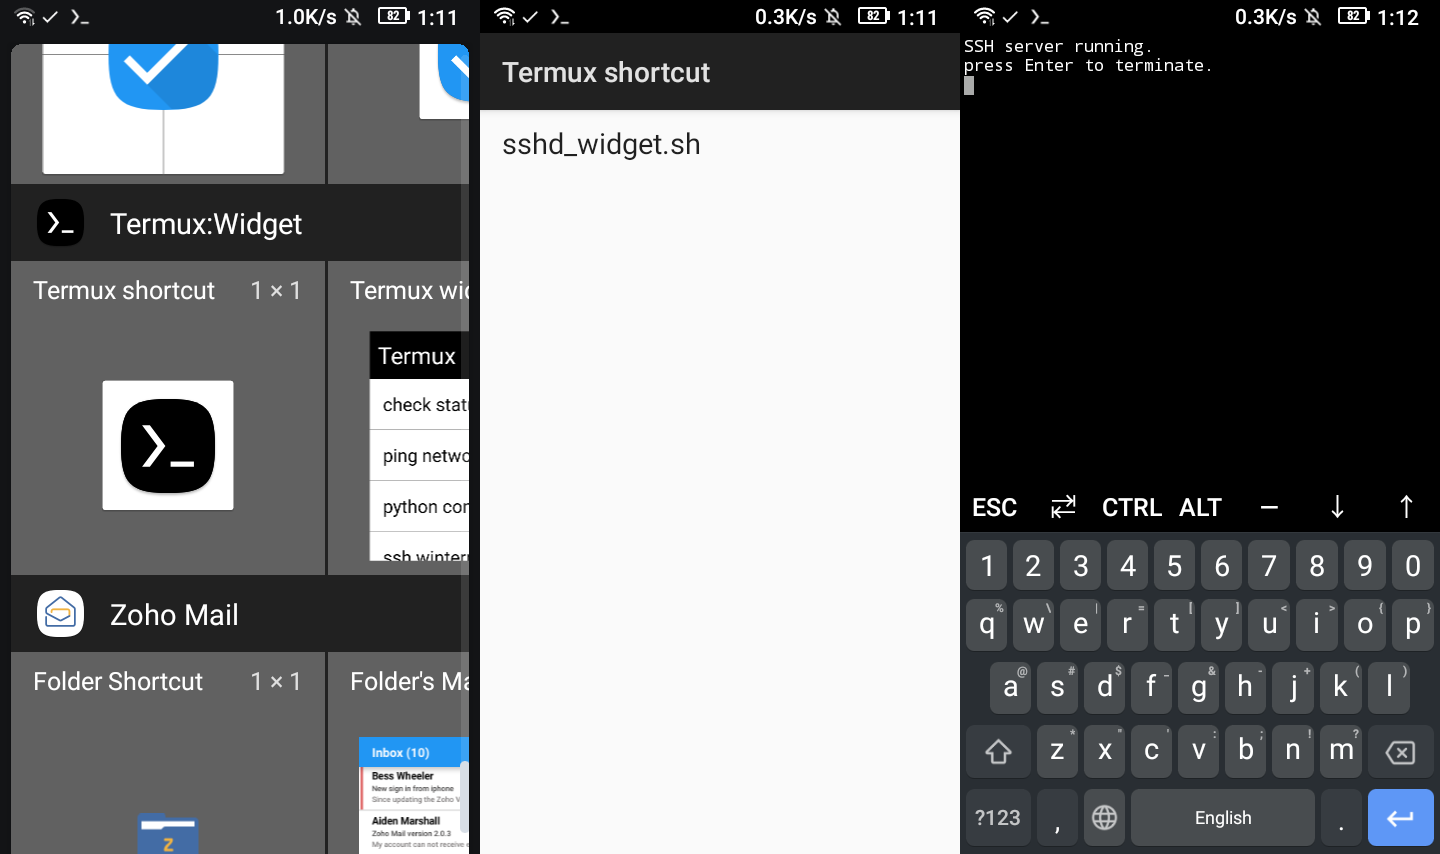
Congratulations!
Contact me: writing@voussoir.net
If you would like to subscribe for more, add this to your RSS reader: https://voussoir.net/writing/writing.atom